Showing posts with label pasta. Show all posts

Wednesday, March 9, 2011

Beer-braised sausage and kale

This is an odd take on gruenkohl und pinkel that I made even odder by making a few poor choices interpreting ambiguities in the recipe. I do think it has promise though, so I'm going to post about it anyway.

To back up a step, what's gruenkohl and pinkel? Well, it's beer-braised sausage and kale--Didn't you read the subject line?--and the name is pretty much the recipe, although I understand you can optionally add a slice of ham. It's a northern Germany thing and sounds appealing enough that I would have made it just like that if I didn't have a blog to fill up.

The unusual version I attempted comes from Dave Copeland, Salon.com's food writer, who has added some possibly ill-advised Italian elements which I've de-emphasized in my version.

Ingredients:
1/2 pound raw sausage, German or Polish would be best, but use your judgment, casing removed
1 medium white onion, chopped
5 cloves garlic, minced
1 pound kale, washed, de-ribbed and torn or cut into largish pieces
12 ounces dark beer
1 pound dried pasta [I used fresh which maybe could have worked if it wasn't my falling-apart spinach pasta], something thick and chewy would probably be best.
1 Tablespoon mustard [I used prepared mustard, but I see now that the recipe just says "mustard". A full Tablespoon of dried mustard is a whole lot, isn't it? I think he means prepared mustard. But not the strong yellow sort I used. Something more mellow would be best.]
salt and pepper
1 cup grated Parmesan [The combination of Parmesan and dark beer does sort of work but I'm not at all convinced it's the best choice for the job. Most beer/cheese recipes that I've found use cheddar, but not many use dark beer. Still probably a better bet than Parmesan. I could see blue cheese and dark beer, too, maybe.]

1. Heat a little oil in a Dutch oven or large pot over medium high heat and brown sausage, breaking it up. Remove to a bowl.

2. Add onions to pot and sauté until softened, about 5 minutes. Add garlic and cook briefly until aromatic, then add kale. Toss kale to get it all somewhat wilted. When there's enough room in the pot, return the sausage and add the beer. Bring to a boil, turn heat to medium low, cover and cook until kale is tender, 15-20 minutes.

3. Meanwhile, cook your pasta to al dente.

4. When kale is cooked, stir in salt, pepper and mustard. Add the cheese. When the cheese has melted into the beer, add the pasta and simmer until finished cooking, 1-2 minutes.

Served garnished with a little more cheese and maybe some more mustard too.


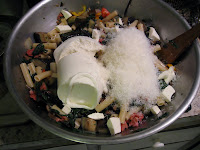
The batch I made ended up a weird mishmash of flavors that didn't really work too well. I think you can pretty much tell that just by looking at it. The Parmesan and the mustard particularly don't mesh and the mushy fresh pasta was a huge mistake. But, like I said, I think there's some promise here. I did like the sauce the beer and cheese formed and it did compliment the kale nicely. The kale itself was cooked well and I could see the textures working with a different sort of pasta. So avoid my mistakes and you'll probably enjoy it. Or just add kale to a standard beer cheese soup instead; That might be nice.

Thursday, December 23, 2010

Radish mizuna pasta

Bit of a change of plans for both the radishes and the mizuna. And a bit of an experiment too as neither ingredient is really known for its use in this sort of thing.

I started by frying up a pile of thinly-sliced radishes in copious butter and olive oil (since I knew the cooking fat would be the basis of the pasta sauce). Ideally, this should be over medium heat as the radishes go from raw to burnt rather quickly, but my stove's large burner only does high and off.

I overcooked at the time so here's a smaller batch I cooked up later at the level of doneness you're looking for: browned around the edges, some red left and just turning golden in the center. A little longer in the pan and they'll crisp up, but these are still soft. The radishes lose their bite early in the cooking process and turn sweet. The browning dims the sweetness and adds a toasty savoriness. At this stage, the flavor is not far from sweet potato chips (if you sprinkle on a bit of salt as they come out of the pan). It was hard to stop snacking on them, to tell the truth.

Sweet potato chips are also not known as a pasta topping so some additional ingredients are necessary. I added a few chopped anchovies for umami, but serano ham or even soy sauce would be good choices too if you wanted to take this in a different direction.

When the anchovies had dissolved and the pasta was done, I added the pasta to the pan, topped with the mizuna (which I had cleaned and removed the stemmier bits from. This required more attention than I expected as there were some rotty gunk mixed in that needed to be washed off. That's why I over-cooked my radishes. That's why you've got to have your mis en place all en place before you start.), removed the pan from the heat and tossed until the mizuna wilted a little.

Finish with a light drizzle of white wine vinegar (or a squeeze of lemon) to cut the fat and that's it. I never said it was a complicated recipe, just an interesting experiment. A successful one too, I'd say.

The radishes are taking the place of a more traditional toasted bread crumbs and the mizuna the place of a more traditional green (I considered the radish tops first, but their good to icky ratio was too low and would have taken too much time to deal with with the radishes already on the fire). Otherwise, a pretty standard Italian preparation and a pretty good one too.

My one reservation is that the radishes lost their crunch pretty quickly. I'd add some pinenuts next time. Or maybe capers. That would be nice too.

Tuesday, December 14, 2010

CSA week three - eggplant and dandelion pasta bake

This isn't anything terribly innovative, complex or exciting, but basic recipes are more popular over time and this is the only thing I've cooked in the last few days so here it is.

On second thought, maybe this is complex. Everything gets tossed together in the end, but many of the ingredients needed to be pre-cooked and that ends up taking some doing. Here, to start, are a can of diced tomato in sauce simmering on the back burner; onions, peppers and mushrooms sweating on the left; and the dandelion greens blanching on the right.

When the onion mix was done I reused the pan to soften and slightly brown the eggplant (in batches as I used four Chinese eggplants) and reused the (now well-flavored) pot of water to cook a half pound of ziti to al dente.

I reused the pan again to brown a half pound of sweet Italian sausage and several cloves of garlic.

All that got mixed together with some fresh basil, cubed mozzarella, a load of ricotta, a good bit of Parmesan and finally the tomato sauce. That all went into a baking pan for 30 minutes at 350 degrees and a few more under the broiler. Despite all the prep, this went pretty quickly and it was in the oven no more than 45 minutes after I started cooking. Even more conveniently, all that prep could easily be done the day before, although I wouldn't mix in the pasta until the last minute.


The end result is unsightly, but certainly tasty enough. The dandelion is the only unusual addition here and I think it works quite well with the eggplant, retaining a good bit of flavor and not dissolving into green flecks the way spinach would have. The emphasis on eggplant over cheese means that it falls apart on the plate, which is bad for presentation but makes it a lot easier to actually eat.

I wonder if I could have added structure by peeling the eggplant and cooking it down into a baba ganoush-ish paste so it would be part of the spackle instead of more chunks to be held together. I do like it's firmness as is, though, since the pasta is maybe a minute overdone, though. In retrospect, I probably should have poured the tomato sauce over top after baking instead of mixing it in. That would have helped both keep the pasta firm and it would have avoided thinning out the cheese.

Anyway, a good use of a lot of eggplant and easy enough for a Monday night.

Tuesday, June 1, 2010

Capellini with crab, jalapeño and mint

If you've been watching Top Chef Masters, you've seen this dish. Chef Jonathan Waxman made it a couple weeks back for one of the challenges. He said it was a big hit at his restaurant and the (amateur) judges seemed to like it quite a bit, but it didn't make sense to me. I've got enough experience at this that usually I can see how ingredients fit together; these, not so much.

I've got all four of those ingredients in the house right now. It's an odd happenstance really as jalapeños are the only one I consider a staple. I only buy those other three when I've got some particular purpose in mind and the leftovers don't last indefinitely.

I'm using canned crab, not the king crab leg Waxman calls for, but otherwise I'm following the recipe I found on the Top Chef Masters website as best I can. Unfortunately, it's missing some important details, like temperatures, cooking times. Adding the crab. I made guesses for the missing bits, but it's a simple enough recipe that I don't think I can go too far wrong.

As an aside here, does it bother the rest of you as much as it bothers me to see broken recipes on profession websites? It's surprisingly common to find recipes with unused ingredients, vague instructions or chunks missing out of the middle. I expect that from recipe sites that are made up of user-submitted content, but mass media companies really ought to do better. It's not that hard. Are there no copy editors or proof readers to look at these things? Don't the chefs with their names attached ever check?

Anyway, here's my version.

Ingredients:
2 Tablespoons butter
1/2 jalapeño, finely diced
zest from 1/4 of a lemon
zest from 1/4 of a lime
1 small clove garlic, minced
2 Tablespoons mint leaves chiffinade
1/2 cup crab meat
1/2 pound angel hair pasta
juice from 1/2 of a lemon

0. Put a large pot of water on high heat. When water reaches a boil move on to step one.

1. Melt butter in a medium pan over medium heat. When it's done sizzling add jalapeño, zest, garlic and mint. Turn heat down to low and sweat the pepper and garlic for several minutes. Add crab and cook for a minute more.

2. Add pasta and a few pinches of salt to the boiling water. Cook to al dente. (capellini takes only a few minutes) When just barely done remove from water with tongs and add to the pan without draining. Mix well. Add lemon juice and a bit more water to loosen the sauce if necessary. Season with salt and pepper to taste.

Serve garnished with a bit more mint.
And here it is. The mint and citrus have blended together mojitoly, but the crab is still distinct and I'm getting different ratios of the two flavors (plus a touch of heat) in each bite. he flavor is best, I think, when crab is in the forefront, but I only get that when I get an actual forkful of crab. Maybe that's because I'm using relatively cheap canned crab that doesn't have the intense flavor of the king crab legs Waxman uses. Also, king crab leg meat would be in chunks not tiny flakes. That probably makes a significant difference.

The flavor combination is interesting and unusual, but not a synergistic knock out like some recipes I've tried. The problem is that it's all right at the front of each bite with no follow-through. There's some element missing to round out the back end. I think chunks of king crab would help here, but lacking that it needs something else. Maybe just a little wine or shrimp stock would do it, but I'm not going to put everything back in the pan to find out.

I don't suppose any of you have been to his restaurant, Barbuto, and tried the proper version?

Monday, December 7, 2009

CSA week two - Italian dandelion greens and penne rigate

That looks pretty tasty, doesn't it? Well, in reality it's barely edible. As the Tropical Locavore (who really ought to change the name on her profile picture if she wants to remain psuedonymous) complained earlier today, these greens are intensely bitter.

I used the traditional cooking method of blanching then sautéing, but it really didn't help much. Maybe a longer boil would draw out more of the bitterness? I found the water afterward to be flavored quite nicely, actually, and used it to cook the pasta.

The recipe in the newsletter that uses the greens raw is definitely contraindicated. Save that for when we get some chard.

I'm not saying to throw the dandelion greens out; just use them judiciously, balancing the bitterness with other strong flavors. I used a handful along with some of the bok choy in a yakisoba last night where a touch of bitterness was a pleasant element. I can't see them staying fresh long enough to use up a whole batch this way, but at least you'll get some good use out of them.

Monday, May 18, 2009

Hey, look what I bought!

I've mentioned a few times the difficulties I had dealing with my broken down manual pasta roller. It's screwed up one too many dishes and I finally tossed it. And I've replaced it with this shiny new Kitchen Aid attachment motorized pasta roller!

Using it is a completely different experience than the frustration of that old machine. The pasta goes in one end and comes out the other end flatter. And that's it; no drama involved. The only problem I encountered was, because I didn't need any flour to keep the dough from sticking to the rollers, I forgot that I needed it to keep the dough from sticking to itself. The net of noodles in the picture is one solid object.

I tore it into reasonably-sized pieces, made do and learned a lesson for next time. For the record, I sautéed up some broccoli raab (not brocollini as I mistakened identified it in the risotto post) and shrimp in butter and olive oil with plenty of garlic, red pepper flakes, fresh oregano and parsley for the pasta sauce. Finished with a squeeze of lemon it wasn't bad despite the uneven cooking of the wads of noodle.

Like all Kitchen Aid attachments, the price is ludicrous, but if you're serious about making pasta and maybe if you've got one of those 20% off Bed Bath and Beyond coupons, it's worth the investment.

Sunday, May 3, 2009

Dim Sum Sunday - Creamy macaroni and cheese

A little while back I was invited to join the Karmic Kitchen's Dim Sum Sunday food blog event:

"Is your Sunday dinner delectable? Daring? Succulent? Shareable? If it's any or all of those things, or even something completely different, we'd like to invite you to participate in "Dim Sum Sunday" - a weekly food meme. Each week, a theme will be given. The participants will use the theme (from the literal to the avant-garde) when creating their Sunday suppers the following week. Then, just take a picture or two of the meal, and tell us all about it. Does it have to be home cooking? Not necessarily - you can go out, eat in, or even go to a friends house...as long as your post reflects the theme in original (you don't have to be a professional photographer) pictures of your dinner, and personal stories (and recipes and how-tos if you choose...)!"

I declined at the time as I was working the Sunday late shift on the reference desk and wasn't having a Sunday dinner. I still am, but I've belated realized that the Sunday dinner doesn't have to be literal; I just need to post it up on Sunday. This dish was actually my Friday dinner. The theme this week: comfort food.

Mentioning the reference desk there is actually relevant as I've decided to misuse my librarianly abilities for personal gain. I have access to databases filled with over a century of newspaper backfiles and while, yes, man walks on moon, man also cooks mac and cheese and writes articles about the recipe.

Actually, it's woman, not man, in this case and the article is just from 2006 so it's probably on-line somewhere. But it's from an article with some interesting things to say about the philosophy of mac and cheese with some recipes that are proper macaroni and cheese not macaroni in a cheese-flavored white sauce. This is an exceptionally interesting one that uses ingredients and techniques I haven't seen before:

Creamy Macaroni and Cheese
Time: 1 hour 15 minutes

2 tablespoons butter
1 cup cottage cheese (not lowfat)
2 cups milk (not skim)
1 teaspoon dry mustard
Pinch cayenne
Pinch freshly grated nutmeg
1/2 teaspoon salt
1/4 teaspoon freshly ground black pepper
1 pound sharp or extra-sharp cheddar cheese, grated [I used half sharp cheddar and half colby]
1/2 pound elbow pasta, uncooked.

1. Heat oven to 375 degrees and position an oven rack in upper third of oven. Use 1 tablespoon butter to butter a 9-inch round or square baking pan.

2. In a blender, purée cottage cheese, milk, mustard, cayenne, nutmeg and salt and pepper together. Reserve 1/4 cup grated cheese for topping. In a large bowl, combine remaining grated cheese, milk mixture and uncooked pasta. Pour into prepared pan, cover tightly with foil and bake 30 minutes.

3. Uncover pan, stir gently,

[and stir in anything that you want mixed into the dish. I wanted to keep things simple so I sautéed some onion, pepper and good quality, but neutrally-flavored ham (for something like this you want the ham to taste like ham, not smoke or maple syrup) in a little butter and a whole lot of truffle oil. The little black specks you can see in the pan are bits of truffle. I've heard of truffled mac and cheese plenty of times, but I've never tried it and now seemed as good a time as ever.]

sprinkle with reserved cheese and dot with remaining tablespoon butter. Bake, uncovered, 30 minutes more, until browned. Let cool at least 15 minutes before serving. Serve with a green salad and white wine.

Yield: 6 to 8 servings."

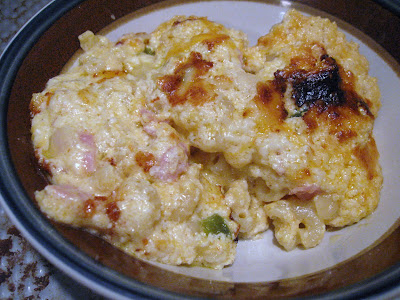
And here it is:


It looks pretty darn good, but that's definitely not what I'd call creamy. The cheese is clotted up pretty solid, really. I went back to the article to see if there was a description of the completed dish to compare with my results:
"One of the most surprising recipes I tried called for uncooked pasta. Full of doubt, I mixed raw elbow noodles with a sludge of cottage cheese, milk and grated cheese. The result was stunning: the noodles obediently absorbed the liquid as they cooked, encasing themselves in fluffy cheese and a crust of deep rich brown."
and on the origin of the dish:
"Daphne Mahoney, the Jamaican-born owner of Daphne's Caribbean Express in Manhattan's East Village, makes a wonderfully dense version of macaroni and cheese that combines American cheese with extra-sharp cheddar. Macaroni pie is hugely popular in the Caribbean, especially on islands like Jamaica and Barbados that once received regular stocks of cheddar from other members of the British commonwealth: Canada, Australia and New Zealand."
and more generally:
"'Starting at about the turn of the 20th century, there was a huge fashion for white sauce in America -- chafing-dish stuff like chicken à la king, or creamed onions,' [cookbook author John Thorne] said last week. 'They were cheap and seemed elegant, and their legacy is that people choose 'creamy' over everything else. But I maintain that macaroni and cheese should be primarily cheesy.'"

"Creamy" as a negative. "Macaroni pie". "Encasing themselves in fluffy cheese". I think this recipe turned out exactly as it was supposed to; it was just mislabeled. And once past that cognitive dissonance I could enjoy the dish for what it was. Putting the macaroni in uncooked resulted in them coming out firm and chewy, but not al dente. And far from the limp and soft overcooked macaroni you often get when using pre-cooked pasta in a baked mac and cheese. The cheese is solid, but soft and light. Almost like a soufle, really. That's from the cottage cheese. Plenty of good cheese flavor, but deeper and richer than straight chedar and/or colby. And that's the truffles doing. The ham, onion and pepper are just fiddly bits adding a little interest.

I don't make mac and cheese very often so I don't have a standard recipe, but I can see coming back to this one to try variations.

Sunday, April 12, 2009

Vacation wrap-up, Week 19 start-up

I'm back and, thanks to la Diva, I've got this week's share.

As I predicted, I was kicked out of the kitchen while my mother, sister and brother-in-law cooked for Passover. I didn't even get to make any dessert. I don't really know how this traditional came about. They must have settled into a routine while I was living in San Diego and couldn't afford to fly back cross-country every year. Just as well, probably, as I've never actually roasted a turkey, braised a brisket, made chopped liver or matzo balls so I'd probably screw them up on my first try. Or more likely, do something different with them. Briskets should be smoked and there are plenty of interesting things to do with chicken livers.

Not that my mother's chopped liver recipe isn't interesting; she's got a few tweaks to the standard methodology that are worth recording. I'll took some notes and some pictures and I'll give it it's own sometime soon.

I did get to cobble together a meal from the picked-over leftovers: just some roasted broccoli and turkey scraps. I sauteed some onion and mushrooms, added the leftovers to reheat, then chicken soup and cream, salt, pepper and plenty of nutmeg which I cooked down for a sauce to go over fresh pasta. I didn't have a pasta maker so the noodles ended up quite thick and chewy, but since I didn't have to struggle with a pasta maker they were really easy to make. That's something everyone makes a few days after Thanksgiving, right?

I also spent some time looking through the cookbooks my sister brought and found a really interesting recipe for the beets. It's rather involved and I have the more perishable items from week 19 to worry about first so it may be a little while before I get around to it, though. How did you guys deal with the giant beets? Or are they still taunting you from the backs of your refrigerators?


As for those week 19 items, let's start with the leeks. When I thought they were more spring onions I decided on doing an onion bread and not 100% on abandoning that idea. But I've always liked leeks in a cream sauce too. I'll have to see what they look like cleaned up; I may have enough there for two recipes, particularly with last week's spring onions added to the pile.

For the eggplant, I have a Javanese eggplant in sweet soy sauce recipe I want to make and I'm thinking of adding onions, peppers and squash to make a weird version of ratatouille out of it.

La Diva got me an extra bag of green beans and I intend to freeze one of them. The other I want to use in a cold salad. I've gone back over the 11 different ways I've cooked green beans since starting this blog and and concluded that I prefer them cold. I'll figure out the exact details later. Bacon will probably be involved.

The cabbage will keep so I won't worry about that. The strawberries I need to add to last week's to make up enough for the strawberry/black olive ice cream I'm planning. Not enough kale or cucumber for much. I'll probably just make chips with the kale and pair the cucumber with dill and tuna or salmon for something simple. That leaves the Chinese celery which I need for my mysterious beet recipe from earlier in the post.

Saturday, March 28, 2009

CSA week 16 wrap-up, week 17 start-up

With Thursday taken up by the Food and Wine festival, I didn't get a chance to finish up week 16's box so I chopped up and froze the two remaining zucchini for later. I froze the pieces on a cookie sheet before bagging them up which is supposed to a) freeze them quick to keep ice crystals small which maintains their texture better and b) freeze them individually so they don't stick to each other in the bag. I can vouch for the second, but haven't tested the first yet.

On Friday I used my turnip tops and the leftover thinly sliced zucchini on top of my second attempt at homemade pasta. I still had some trouble rolling it out; I'm pretty sure the problem is that each roller setting will only work well with a narrow range of incoming dough thickness and getting that right is something you need to get a feel for over time. Once I got it rolled out, I made strozzapreti by cutting the dough into noodles, folding a couple over and rolling them together between my palms until they stuck into an irregular lump. I used a lot of flour so they didn't always stick right, but they tasted good either way. Next time I think I'll try making orecchiette or some other thick pasta shape.

On to this week. I walked down to the pick up spot again and this time tried out my shoulder strap, but discovered the limits of the boxes structural integrity might not be up to the job. If I can find a better way of attaching the strap it might still work, though. I'll have to give it some consideration.


And on to the share. In the upper left corner are dandelion greens. Not something I've used very often. I found lots of good ideas here mainly centering on blanching, sautéing and then lightly dressing the greens. Bitter greens are bitter greens so fair enough.

Under that is a romaine heart. I haven't used my previous lettuces much, but this is about as good as lettuce gets so I figured I ought to give it a try. So, fine, salad.

I don't think I need a particular plan for the spring onion, potatoes or oranges. They'll find themselves a use.

Next up, the bok choy. I could do a stir fry or a soup or maybe that Chinese green vegetable recipe I posted about a while back. It's not a vegetable that cries out for innovative uses. I'll look around, but I wouldn't be surprised not to find anything that piques my interest.

And, speaking of innovative uses that piqued my interest, if you read my last post through you'll know that a strawberry/black olive ice cream is on my to do list. I've got another flavor in the works right now and there's still plenty of last week's flavor left so I'll probably freeze these strawberries and get to making that later.

That leaves the daikon. And leaving the daikon is what most people did if the full extras box at my drop off point is any indication. I'm determined to find at least one more worthwhile thing to do with them beyond radish cakes and kim chee. These are a staple ingredient in Japanese cooking, but not really central very often so using up three fair sized daikon takes some doing. Maybe I'll make a Japanese curry or there's a Korean daikon and pork soup I found that looks good. I dunno, maybe I'll just braise the dang things.

Thursday, February 12, 2009

CSA week 10 - Homemade pasta with fresh tomato sauce

Earlier this week La Diva ventured into the realm of homemade pasta with trepidation, difficulty and mixed results. This may have been at my instigation so I feel honor-bound to follow her example and make some pasta myself. This is not only my first time making pasta, I think it'll actually be my first time cooking or eating fresh pasta too.

I started with a cup and a third of flour--half semolina and half white bread flour--a third of a teaspoon of kosher salt and, into the well, cracked two large eggs. I beat the eggs with a fork and gradually mixed in the flour.


Here's where I decided using the fork was getting tricky and switched to bare hands. The dough was still wet, but there was a good bit of flour left so every time it stuck to my hands I'd just roll it in flour and go on kneading it. It only took around five minutes before there was enough gluten formation for it to form a tight ball at which point I let it rest for a half hour.


Meanwhile, I set a big pot of water on the heat and started the sauce. I browned a Tablespoon of butter, added fresh sage and oregano and some chopped pancetta, dipped one of the CSA tomatoes into the boiling water to loosen the peel, peeled and chopped it and added it to the pan along with a spoonful of water to give it a chance to cook down and form a sauce.


Once the dough had rested came the hard part. I cut it in two and attempted to start rolling one half out using my pasta maker. It jammed up just like my earlier attempt at making gyoza wrappers a while back and the result was ragged and uneven. I rolled it back up into a ball, cursed the machine and took out my perfectly good rolling pin to roll out the dough.


I was able to make a good start, but the gluten was too tight to let it roll out to the thinness I was looking for. I did notice that the dough was incidentally getting much better coated in flour than my earlier attempts managed so I figured that may well have been my problem. The dough had gotten too wide so I sliced it in two again and fed half into machine.

I had the rollers set at the widest setting but the dough was too thin for it to get a good grip on it so I had to go down a couple notches. That did it, but it took a few tries before I managed to get it through. This is a process that really requires three hands: one to feed in the dough, one to feed it out and a third to crank the machine. I managed as best I could.

I had better luck with one half than the other. I think just a little bit less flour is causing problems. Also, a bit of metal on the machine is bent out of shape on one side catching the pasta as it comes out the bottom of the rollers so I have to be careful not to get too close to that side.

Long story short, I eventually figured out to keep the dough strip narrow and well-coated in flour and how to feed it in straight. That latter is very important as hitting the sides immediately wads everything up. Next time I'm going to start by cutting the dough into a rectangle to keep everything nice and even.


I managed to get the dough down to roller setting four which was about the thickness of the paperadelli I get dried so I figured that was what I was aiming at. I put on the cutting attachment and made noodles without any further drama.


I brought the water back up to a boil, salted it and added the noodles. I let them cook for just two minutes before taking them out and adding them to the pan of sauce (which had cooked dry and had to be rehydrated a couple times as I struggled with the pasta). I let the noodles cook another couple of minutes in the pan to finish up and absorb the flavors, drizzled some balsamic vinegar, grated on some Parmesan and it was ready to eat.


The cooked pasta is pretty chewy, but I don't think it's undercooked just overthick. They swelled a bit and I forgot to account for that. Next time, at least one notch thinner. As for flavor: they taste like egg noodles. Less distinctly so than dried as they absorbed the flavor of the sauce just as advertised.

That wasn't so hard, considering. And I got enough of a feel for it that next time should go more smoothly. Once I'm comfortable rolling out noodles I'll move on to stuffed pasta but I think that may take a while.

Sunday, July 20, 2008

Pappardelle with caramelized onions, skirt steak and fresh tomatoes

Despite my talk about avoiding the kitchen as soon as I restocked my supplies I found myself leaping straight from "I'm hungry" to throwing together something worth writing about. (There are no prep pictures this time as I didn't know it would be post-worthy until after I tasted it.)

Specifically this came about because had purchased more skirt steak than I needed for a fajita recipe you'll see later this week. I don't eat a lot of beef so I haven't tried a lot of different cuts. This is the first time I've tried skirt steak and I'm pretty impressed with it. It's nicely flavorful, has an unusual loose texture that grabs on to rubs and marinades, and it gives tender results when cooked up quickly. It's not a traditional steak but it seems like a good choice for dishes that call for small pieces of beef which are far more common in my repertoire. So, anyway, I was cutting a large skirt steak up into serving-sized pieces for freezing and decided to give it a try. Here's what I came up with:

Pappardelle with caramelized onions, skirt steak and fresh tomatoes

3 nests pappardelle or two generous servings of another pasta
1/4 lb skirt steak, sliced into thin strips against the grain
1 medium onion, sliced thin
3 cloves of garlic, sliced thin
4 large cherry tomatoes, roughly chopped (or 1 medium full-sized tomato)
1 teaspoon red wine vinegar
2 teaspoons butter
2 teaspoons vegetable oil
2 teaspoons steak spice rub (I used Spice House's Milwaukee Avenue polish-style steak seasoning, but anything smokey and peppery will do)
2 Tablespoons parsley, roughly chopped

1. Heat cast iron pan over high heat. Add oil and butter. When butter stops foaming add onion and garlic, stirring so they're well coated in oil, and immediately turn heat down to medium-low. The vegetables will get a head start on browning from the residual heat. This works best with cast iron on an electric stove. Stir onions frequently. Lower the heat if they look like they're starting to get crisp.

2. Put water for pasta on heat.

3. Coat steak in spice rub. Set aside.

4.When water is at a rolling boil add pasta (with generous amounts of salt). Cook to al dente, for pappardelle six minutes.

5. When pasta is almost ready, remove onions to serving bowl draining the oil back into the pan. Add tomatoes and vinegar to bowl along with salt and pepper to taste. Stir briefly. Turn pan up to high heat.

6. When pasta is ready, drain but don't rinse and add to serving bowl. Toss with onions and tomatoes. (You'll be tossing again later, but don't neglect this one or your pasta will stick to itself instead of to the sauce.)

7.Add steak to pan, making sure the slices are well scattered over the surface. Let sit for 20 to 30 seconds to get a good browning on one side and then stir fry until finished. This should only take around another 20 seconds. Remove to serving bowl, add parsley and toss again.


If you used a non-stick pan, you might want to deglaze it, but that generally doesn't work so well on cast iron unless it's enamelled or very well seasoned.

8. Serve immediately.