Showing posts with label baking. Show all posts

Monday, March 14, 2011

Canistel coffee coconut custard pie

This is a variation on a Minimalist sweet potato pie recipe. I particularly liked the addition of coconut milk which I thought would blend nicely with the canistel.

The original recipe used a cracker crust but I wanted to try a vodka crust instead. Vodka pie crust, if you're not familiar with it, is a recipe that came out of Cook's Illustrated a few years back. The vodka adds moisture that doesn't promote gluten formation so you end up with a wet dough that you can hand press into the pie pan without worrying about overworking it. Then the vodka evaporates away and you end up with a flaky tender crust without all the hassle. I was fairly happy with the results with the caveats that a) it's so wet it slumps if you try to blind bake it and I wish someone had made a note of that in the recipe and b) either my pie pan is a weird size (and now that I've measured it, I think it is) or the recipe makes rather too much dough for the two crusts it says it makes. I didn't care for the thick crust but other folks liked it. Maybe it's just me.

One other thing. I've made variations on this pie twice. The first time I used 14 ounces of lúcuma pulp and the second time pulp from three canistels which was more like 10 ounces. Either works, but adjust the number of eggs: four for 14 ounces, three for 10. The original recipe calls for 2 medium sweet potatoes which isn't really helpful in pinning down the amount. Oh, and lúcuma is a close cousin of canistel that's popular in Peru and Chile.

Enough ado, here's the recipe.

Ingredients:
2 Tablespoons ground coffee
1/2 cup water
3 or 4 large eggs
1/2 - 3/4 cups sugar, adjusted for the sweetness of your fruit [light brown if you'd like, but it makes the results taste more like pumpkin pie than canistel]
1 cup coconut milk
spices to taste [I used 1 teaspoon cinnamon and 1 teaspoon allspice but I could have used more.]
1 large pinch salt
pulp from 3 or 4 canistels
1 pie crust

0. Preheat oven to 350 degrees.

1. Add the coffee to the water in a small pot. Bring to a boil, turn off heat and let steep for 10 minutes.

2. To a food processor or blender add the eggs, sugar, coconut milk, spices and salt. Strain in the coffee. Blend until well combined. Add the canistel. Blend until smooth.

3. Pour mixture into pie crust and bake for 40 to 50 minutes until it is mostly set but the center couple inches are still a little jiggly.

Right [minus the coffee]:


Slightly overcooked:


Again, right [minus coffee]:


and slightly overcooked:


The textures of both are very smooth and the crust came out nicely tender. The second is overcooked, so it's not meltingly creamy. The first pie had a much lower fruit to egg ratio and came out a little starchy. I've made the ajustments to the recipe so yours should come out just right.

The second pie came out a lot more mild after baking than the mixture was raw, which I should have expected given my experiments with baking canistels. Still, the flavors are all still there. It starts with the canistel up front, maybe a hint of coconut and finishes with a bitter hit of coffee. It could use an extra quarter cup or so of sugar, but that's hard to tell going in. It tasted just fine raw so make it a bit sweeter than you think it should be. The combination of coffee and canistel works really well and is, I'd like to point out, my innovation, although I'd think it an obvious one for any pastry chef with any experience using canistels. It's really easy too, so well worth a try.

Monday, January 31, 2011

Black sapote oat bars, variation two

My original black sapote oat bar recipe, two years ago, was a pretty big hit, both for the folks who tried the batch I made and for others looking to use their excess sapotes. As I said in my last post, I've got some new ideas for flavor combinations. I figured it would be a good idea to keep the rest of the dish constant so I could isolate that variable to see how it changes the results.

Before, the filling in the bars was made up of black sapote pulp mixed with walnut butter, a bit of cinnamon and a bit of coffee. No cooking involved. The result was a sort of mocha/fig flavor with toasty, nutty overtones. I'm going a rather different direction this time.


Filling ingredients:
1 1/2 cups black sapote pulp
1/2 cup not-too-fruity, not-too-dry red wine [I used a pinot noir]
2 Tablespoons dutch process cocoa
1/2 cup sugar
1 pinch salt
1/2 Tablespoon vanilla

1. Bloom the cocoa in the wine for a minute or two.

2. Add the choco-wine, sugar and salt to the black sapote pulp. Mix well, mushing up the sapote. Cook down over medium-low heat until it thickens and reduces to 1 1/2 cups, stirring frequently.

The mixture will be thick and splattery so be careful.

3. Cool until it stops steaming and add vanilla to taste.

No change to the bar itself:
3/4 cup butter, softened,
1 cup packed light brown sugar
blended,
and then mixed with
1 1/2 cups rolled oats,
1 1/2 cups all-purpose flour
and another pinch of salt.

I packed 2/3 on the bottom this time instead of just half, letting it rise up a bit on the sides and in the corners which should help keep things from sticking.

Then I spread the sapote mixture out and topped with the rest of the dough, sprinkled and spread around evenly, but not pressed down.

I baked at 400 degrees for 20-some minutes minutes until it's browned and it was clear the sugar had melted and the bars were fairly solid. It came out sizzling. I don't remember it sizzling before.

And here it is after cooling:


This turned out quite well indeed. The flavor was familiar, but hard to pin down. The fig element was there again, but it was filled out with rich chocolate and tanin notes. It was kind of like a port, maybe. A really great contrast with the light sweet crisp flavor of the crust, particularly with the generous amount of filling I used.

If you didn't want to make oat bars, the filling could work well as a swirl in a quick bread. Or you could cook it down a little more and use it as a layer in a chocolate cake. Or it could work as a pudding or ice cream base with the addition of some egg yolks and some cream. Lots of options worth a try.

Oh, hey, one last thing before I go. Did you know that, if cut a just-ripe black sapote around its equator, you can unscrew it open like an avocado? It leaves the seeds sitting there exposed and easily removed. It takes a little finesse to get the pulp out of the half-skins, but it's a much less messy process than what I had been doing before.

Monday, May 24, 2010

Bagels, a third variation

After a year away and two not-entirely-satisfactory batches, (scroll down on this page to see them) I'm returning to making bagels. The recipe I'm using this time is from Peter Reinhart's Artisan Breads Every Day. There doesn't seem to be anything distinctively Reinhartian about it, though, so far as I can see. His schtick is soaking whole grains overnight to soften the hull-shards and this recipe doesn't contain any whole grains. I thought that, with this cookbook, he had joined no-knead and/or keep-dough-in-the-refrigerator-indefinitely crowds, but I don't see any sign of that here.

This recipe isn't particularly different from the last version I made. The only major distinction is a night in the refrigerator, but that's nearly always a good idea when baking bread. I do like that it measures the ingredients by weight for more precision. I want to do more of that in my baking. To add a little more distinctiveness, I thought I'd try the looped rope method of shaping the bagels instead of the poke-a-hole-through method I used last time.

Also, I doubled the recipe since bagels freeze well and are handy to have around.

Ingredients:
2 Tablespoons barley malt syrup
2 teaspoons instant yeast
1 Tablespoon fine kosher salt
510 grams (a bit over 2 cups) lukewarm water
908 grams (around 7 cups) bread flour

poaching liquid:
2-3 quarts water
1 1/2 Tablespoons barley malt syrup
1 Tablespoon baking soda
1 teaspoon fine kosher salt

toppings:
poppy seeds
sesame seeds
dehydrated onion or garlic, rehydrated
coarse sea salt

1. Mix the malt syrup, yeast and salt in the water. Let sit while you measure out the flour. Mix into the flour until the dough forms a stiff, slightly shaggy ball. There should be just barely enough moisture for the flour. Let rest 5 minutes then knead for 3 minutes until gluten forms and the dough smoothes out. Add a little more flour if the dough is sticky. Place dough in a clean oiled bowl, cover with plastic wrap and let rise 1 hour.

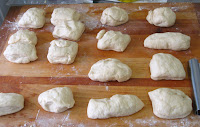
2. Dump dough out onto an unfloured surface and cut into pieces. I decided I wanted modestly-sized, but not mini-, bagels so I partitioned out 16 3 ounce pieces of dough.

3. Cover two baking sheets with sheets of parchment paper. Lightly oil the paper. Clear space in your refrigerator for the sheets to fit.

4. Roll each piece of dough out into a rope about 10 inches long with a little taper at each end. Hold the rope by one end, whip it around over your fist and catch the other end so the dough loop snugly encloses your hand. Roll the overlapping ends against your work surface with your palm until they're well fused (I didn't do the best job of this). Place each formed bagel on a baking sheet not worrying about leaving too much space around them as they're not going to be rising yet. When you've laid out all your bagels, lightly oil their tops, cover with plastic wrap, put in the refrigerator and wait a day.

5. Remove the bagels from the refrigerator 60 to 90 minutes before you want to start baking. After 60 minutes check if the bagels are ready by gently dropping one into a bowl of water. If it floats, they're ready. If your poaching liquid isn't ready yet, put the bagels in the refrigerator until it is. Preheat the oven to 500 degrees. Bring the poaching water to a boil in a large pot or dutch oven, lower heat to bring down to a simmer and add the malt syrup, baking soda and salt.

6. Gently add the bagels to the poaching liquid in batches. Don't overcrowd as they'll be expanding. Poach for 1 minute, flip them over and poach for 1 more. Remove from the liquid, dunk in your prefered the toppings (domed side down), and return to the parchment sheets with a little more space this time.

7. Put the bagels in the oven and turn the heat down to 450 degrees. Bake for 8 minutes, rotate and revolve the baking sheets, and bake for 8 to 12 minutes more until golden brown and a bit crisp.

Cool for at least a half hour before serving.

During cooling I noticed that these bagels have the appropriate distinctive malty smell. Funny how it's instantly recognizable as malty now but I never pegged it before even when I used malt previously. There's a touch of malt in the flavor and I think there's a little depth from the overnight in the fridge too. These taste just about right.

But really, the texture of a bagel is the important thing. The crust has a slight snap to it, like a good hot dog. That's perfect, but it never lasts. You only get that when the bagels are fresh from the oven.

The insides are chewy but not overly dense. There are uneven holes inside which means I didn't get out all the air bubbles I should have. That's not too bad, but the uneven holes through their centers are less appealing; the rope method is harder than it looks.

Aesthetically, not fabulous, but the flavor and texture is dead on. I'm quite happy with the results and will need some good reason to stray from this recipe from now on.
---
Report from tomorrow: the bagels went stale remarkably quickly. Luckily I put most into the freezer immediately so they should be OK. I might add a bit of whole wheat and/or rye next time to improve their shelf life.

Thursday, December 31, 2009

Greek zucchini pie

I had a few different ideas of what to do with the zucchini this time around. My first choice was a couscous dish, but I decided to put it off until I can get hold of some merguez sausage (which means probably no time soon). This, instead, is a cross between these zucchini galettes, originally from Bon Appétit magazine, and a more traditional Greek kolokithopita. Or maybe it's just a quiche; I dunno.

Ingredients:
crust:
1 cup flour
1/4 teaspoon salt
6 Tablespoons cold unsalted butter, cut in chunks
2-4 Tablespoons cold water

filling:
1 large zucchini and 1 small summer squash, grated
1 small onion, sliced
2 cloves garlic
3 1/2 ounces well-flavored feta, crumbled
1/3 cup Greek yogurt [I substituted the sour cream I had on hand, but yogurt would be better.]
3 eggs
1 small handful flat leaf parsley, chopped
a little bit of fresh mint leaves, chopped
a little bit of fresh dill, chopped [I was out, but it's a traditional compliment to the other flavors in this dish.]
salt
pepper
pecorino romano or kefalotiri cheese if you can get it

0. Preheat your oven to 425 degrees.

1. For the crust, mix the flour and salt in a food processor. Add the butter and pulse several times until the butter is incorporated and the mixture looks a little coarse. Add the water Tablespoon by Tablespoon, pulsing in between, until the dough just barely comes together. Remove the dough to a work surface, work it into a ball, split in half, flatten each piece into a disc, wrap in plastic and chill in the refrigerator for a half hour.

2. Meanwhile, grate the zucchini and squash (or whatever you've got), mix with 1/4 teaspoon salt, put in a colander and let sit for a half hour. Afterward, squeeze out most of the moisture.

3. Heat olive oil and/or butter over medium-high heat in a medium pan. Add the onion and cook for a few minutes, stirring occasionally, until softened and slightly browned. Add the garlic and cook until fragrant. Add the zucchini and cook five minutes more until the zucchini is softened and slightly browned. Remove from heat.

4. Mix feta, yogurt and eggs in a large bowl. Add the zucchini mixture and the herbs. Add salt and pepper to taste.

5. Remove one of the dough discs from the refrigerator and roll out to about 10-inches in diameter. Place it into a 9-inch pie pan and adjust it so it's lining the pan properly. Pour in the filling and grate the romano cheese over top. I folded the excess dough over the top for a bit of the galette feel. You could top the pie with the other half of the dough instead if you'd like. I ended up saving it for another recipe.

6. Bake the pie at 425 degrees for 15 minutes. Reduce the heat to 375 degrees and bake for 25 minutes more until the filling is set and browned and the crust is golden. Cool at least five minutes before serving.


The pie filling is fluffy and the crust light and crisp so no faulting it on texture, but I'm disappointed in the lack of a strong zucchini flavor. I would have thought the purging and pan frying would have intensified it, but no. The pie's flavor is mostly just savory eggs, feta tang and fresh herbs. Maybe the zucchini flavors blended with the herbal notes? I think it's in there somewhere. Well, I'm not being judged on my use of the ingredient so it doesn't really matter. What's important is that the results are pretty tasty any which way.

Wednesday, December 23, 2009

CSA week three - Black sapote toffee cake

This is an adaption of a date cake recipe created by Chicago pastry chef Kate Neumann that I found on Food and Wine's website. I've got the idea that black sapote can be successfully substituted any time you find dried fruit that's been simmered and softened as Neumann calls for here.

Ingredients:
CAKE
1 cup black sapote gunk (two black sapotes peeled and seeded)
1 Tablespoon molasses
1 cup all-purpose flour
1 teaspoon baking powder
1/4 teaspoon baking soda
1/4 teaspoon cinnamon
1/4 teaspoon ground ginger
salt
1 stick unsalted butter, softened
1/2 cup plus 2 Tablespoons dark brown sugar
1 large egg
1/2 teaspoon pure vanilla extract
1/2 cup pecans
1 handful finely shredded coconut
2 Tablespoons corn syrup

TOFFEE SAUCE
1/2 stick unsalted butter
1/2 cup dark brown sugar
1/2 cup heavy cream
1/8 teaspoon salt
[The original recipe called for double the amount of sauce, but that's quite excessive. As you'll see, even this amount is generous.]


0. Prepare a 8 to 10-inch cake pan by buttering the sides, placing parchment paper in the bottom and buttering the paper. Preheat oven to 350 degrees.

1. [The original recipe called for 7 ounces of dates simmered in 3/4 cup of water until it boiled down and then blended smooth with the molasses. No need to do any of that with sapote.] Just whisk the sapote gunk with the molasses until it's fairly smooth.

3. Mix flour, baking powder, baking soda, cinnamon, ginger and 1/4 teaspoon salt.

4. Use your mixer to beat butter with 1/2 cup brown sugar until fluffy. Beat in the egg, then the vanilla. Mix in the dry ingredients. Mix in the sapote mixture. Beat until fluffy again. Pour into prepared cake pan and smooth out. Bake for 25-35 minutes depending on the size of your cake pan. [I had a 10-inch pan instead of the 9-inch pan the original recipe called for so I reduced the baking time from 30 to 25 minutes.]

5. Meanwhile, break up the pecans to your preferred size. Spread them and the coconut into a pie plate or baking dish. Add then to the oven for 8-10 minutes until fragrant and golden.

6. Also meanwhile, mix the corn syrup with the remaining 2 Tablespoons brown sugar and another 1/4 teaspoon salt in a small bowl. Heat briefly in the microwave to get the sugar good and dissolved.

7. Remove the cake from the oven, cool slightly and then dump it out onto a cooling rank. Peel off the parchment and return it to the cake pan. Sprinkle the pecans and coconut onto the parchment then drizzle with the corn syrup mixture. Return the cake to the pan, preferably the same side up. [This is much easier said than done. If you've got a method that works for this sort of thing, do please share.] Retrieve the broken pieces of cake from the counter and pack them back into the cake pan as best you can.

Return to oven and cook another 12-17 minutes depending on the size of of your cake pan. When the cake is springy and dry, remove from oven, cool slightly and then invert onto a cooling rack. Peel off the parchment trying to retain as much of the nuts and coconut as you can. Return to cake pan or place on serving platter.

8. For the toffee sauce, place the butter and brown sugar into a small pot. Melt the butter over medium heat, stirring to dissolve the sugar. Bring to a boil. Remove from heat and add cream. Stir until blended and then return to heat.

Return to a boil and simmer 5 minutes. Stir in salt, let cool slightly and then pour over the cake. Let sit overnight to soak in.

Well that was a bit of a project, but the results are pretty impressive:

This was a big hit in the office. It's pretty rich, but not nearly as over-the-top as you'd think from looking at it. Despite everything else, you can taste the black sapote in there with its not-quite-chocolately flavor undergirding the bright toffee and nuts. Combined with the brown sugar, it's hard to identify, but it's an important component giving the cake depth and keeping it from becoming cloying.

The texture is deeply moist, but still caky, not like those brownies people try to pass off as extra-rich because they're only half-baked. The toffee did successfully epoxy the broken cake back together which is a bonus.

While I'm not going to say the toppings are a bad thing, the cake is pretty good on its own. You can probably save some of that trouble and just dust it with powdered sugar and you'd still be pretty happy with the results.

Tuesday, October 27, 2009

Orange-lemon poppy seed muffins

I wasn't planning on making a post about this but I ended up making so many changes to the recipe I started with just fixing it up that I ended up with something entirely different. Even though it didn't turn out the best muffins I've ever had, it still seemed worth talking about.

I don't know about you, but I like to keep my muffins fairly austere. Not to the self-flagellant extremity of bran muffins, but I don't want a recipe packed with sour cream, yogurt or cream cheese either. If I wanted cupcakes, I'd make cupcakes. On the other hand, I'm not making health food here either, just something I don't feel entirely ridiculous eating for breakfast.

Ingredients for 12 muffins:
1 1/2 cups all purpose flour
1/2 cup whole wheat pastry flour
2 teaspoons baking powder (down from the original full Tablespoon. But given the under-risen results, maybe I'd use all of it next time despite the math saying it's too much.)
1 teaspoon salt
1 Tablespoon poppy seeds
zest of 1 lemon
--
1/2 cup butter, melted and slightly cooled
1/3 cup lemon juice
1/6 cup orange juice (all lemon juice in the original, but I thought a little orange would round out the flavor.)
1 teaspoon vanilla
1/2 cup sugar
2 eggs
--
three handfuls streusel topping (I keep a bag pre-mixed in the pantry. It's flour, rolled oats, brown sugar, cinnamon and nutmeg, some chopped walnuts.)
1 Tablespoon softened butter

0. Preheat oven to 400 degrees.

1. Mix the dry ingredients in the first ingredients section in a large bowl. I included the zest and seeds with the dry so they'd get coated in flour and stay evenly distributed in the batter.

2. Mix the wet ingredients in the second section in a smaller bowl. The sugar is with the wet because you want it dissolved.

3. Mix the streusel topping with the butter using your fingers until it gets knobbly.

4. Form a well in the dry mix and pour the wet mix in. Stir just enough to moisten. Lumps are fine, whole layers of dry flour probably not.

5. Butter a muffin tin or use non-stick. Evenly distribute the batter using an ice-cream or coffee scoop. Top each with a sprinkle of the streusel. Pat it down a little so it sticks.

6. Open the oven door and leave it open for a moment for the heating cycle to click on. You want the muffins to start with a burst of heat to help them rise. Put in the muffin tin and bake for 15 to 20 minutes, turning halfway through.

7. You want them golden brown on top, dry in the middle, but not crusty crisp around the bottom. At 18 minutes, mine are a little over-baked.
When they look done, turn them out onto a dish towel. Alton Brown says to leave them upside down for better volume. I flipped them right side up for the picture and my volume wasn't a good as I had hoped so maybe he's right.

But they still look pretty good. Let's look inside...


Not too bad. Looks cakey and crumbly. And let's have a taste...

Huh, tastes kind of like cornbread. I wonder how that happened. The lemon is aromatic, but not tart. The crumb is soft and buttery--just a bit dry and with a little crunch from the poppy seeds. Just a little sweet. I think I hit the target I was aiming at in terms of richness, but the flavor is--let's put it charitably--subtle. There is a lot going on with the citrus, the whole wheat, the butter, the poppy seed and all the flavors in the streusel, but they're understated. A little dull on its own, but a spoonful of apricot jam sets things aright. Overall I'm happy, but next time I'm adding some flavor extracts or spices to boost the flavors.

Tuesday, August 25, 2009

Blueberry buttermilk ice cream

My original plan was to make an olive oil ice cream, and I bought the blueberries to go with that, but I've got to get rid of this buttermilk and buttermilk and blueberries are a classic combination. Maybe too classic, really. This certainly isn't the most innovative ice cream I've ever made in concept, although, since I'm adapting Jeni Britton's basic recipe instead of adding a bunch of egg yolks again, there is some originality in practice.

Ice cream base ingredients:
1 1/4 cup buttermilk
1 cup milk
1 cup heavy cream
1 1/2 ounces cream cheese
3/4 Tablespoon corn starch
1 teaspoon vanilla
1/8 teaspoon kosher salt

1. Mix corn starch with two Tablespoons on milk in a small bowl.

2. Heat buttermilk, milk and heavy cream in a medium pot to boiling. Turn heat down to low and simmer for five minutes.

3. Meanwhile, whip cream cheese until fluffy.

4. Remove milk mixture from heat, whisk in corn starch mixture and return to heat for a minute or two until it thickens slightly.

5. Strain milk mixture into the container you're going to store it in. Whisk in cream cheese, vanilla and salt. Let cool on counter for a half hour then in refrigerator for at least two hours until it reaches 40 degrees before churning.


The blueberry swirl is adapted from a blueberry sauce in David Lebovitz's The Perfect Scoop. I'm really not sure if leaving in the cornstarch from the original was a good idea. It'll thicken plenty just from the freezing temperatures. On the other hand, I think the cornstarch improves the texture as it melts on the tongue. I'd have to try it without to be sure, though.

Blueberry swirl ingredients:
1 cup cultivated blueberries (wild don't have enough juice in them)
1 ounce (by volume) sugar
3/4 teaspoon cornstarch
1 1/2 teaspoons cold water
1 1/2 teaspoons lemon juice
3 Tablespoons vodka (berry flavored or kirsch if you've got it. Lebovitz suggests crème de cassis as a variation.)
0-2 Tablespoons light honey or agave nectar to taste

1. In a small nonreactive saucepan, heat blueberries and sugar over medium heat until blueberries begin to release their juices. Smush them up a bit to help the process along if you're getting impatient.

2. Mix the cornstarch with the water and lemon juice until smooth. When the pan is full of more juice than berries, add the cornstarch slurry, stir well, bring to a boil, reduce heat to a simmer and cook for 1 minute more.

3. Remove from heat and mix in the vodka. Let cool slightly and check the flavor. Don't worry about any alcohol bite; that goes away in the freezer. Make sure it's good and sweet as the cold dampens that down.

4. Pour into a storage container and store in the freezer until you're ready to start churning the ice cream. At that point, remove to the kitchen counter to thaw. Once the ice cream is ready, give the swirl a good stir to make sure it's at least vaguely liquid. You can either pour it into the churn to let it swirl for you for 10 seconds or so, or do it manually.


I chose to do it manually since I was doing another mix in too. I figured this wasn't interesting enough as is and added chunks of a blueberry buttermilk oat quick bread I baked a few days previous. I made the recipe just as I found it at The Kitchn so I'll send you over there instead of making this post any longer.

Mine didn't turn out nearly as fluffy as theirs. I think they meant to say 2 teaspoons of baking soda, not baking powder, as the baking soda would react with the acid buttermilk to make bubbles to raise the loaf.
Fortuitously, the dense chewy bread worked rather well as an ice-cream mix in when a light cakey bread would have fallen apart into crumbs. All's well that ends in ice cream, I always say.

Here's everything piled up before I swirled it together. Actually, I did more of a fold. It worked out better than my swirling usually does so I'm going to stick with that technique in the future.

And here's the final result:


Pretty isn't it?

I was hoping all that alcohol would keep the swirl liquid, but it doesn't quite. It does melt rapidly on the tongue, though, releasing a burst of tart blueberry flavor over the creamy tangy buttermilk base. Most folks misidentified the tanginess as from cream cheese as there's a distinct cheesecake flavor here (and I've let the cream cheese age to create a cheesecake flavored ice cream before).

There's the occasional intact berry in there which has a little bit of icy crunch, but not so much that it's unpleasantly crunchy. The quick bread is a nicely sweet contrast to the other components, both of which aren't actively un-sweet, but do have more prominent flavors hiding their sugar content. I was afraid the bread would freeze hard, but it's waterlogged so it's soft and a bit crumbly. Not really necessary, but if you used flavored liquor in the berries, it might be nice to soak the bread in a little of that too. There's a lot of good stuff going on here with all those different flavors and textures working well together.

I still want to do an olive oil ice cream but I'm thinking of pairing it with a dark chocolate stracciatella and fleur de sel.

Thursday, August 13, 2009

Speaking of hearty brown bread...

as I did in passing near the end of my last post, I baked a loaf recently. It's just the second half of the batch of batter bread dough I made last month, but I baked it with a substantially different technique and got substantially better results, although, to be honest, I'm not sure why.

If you just re-read that first post or if you've got an exceptionally good memory, you'll recall that the batter bread was made without kneading which naturally resulted in a soft, crumbly texture from the lack of gluten. Since then I've given some thought to the matter and I wondered if I could adapt techniques used for other low-gluten breads made from batters like cornbread.

I've only recently started freezing dough so I'm not sure of the most appropriate way to get it ready for baking. What I've been doing is defrosting in the refrigerator overnight, putting the dough into a loaf pan in the morning and letting it sit, lightly covered, on the counter until I get home from work to give it enough time to come up to room temperature and then rise.

This time, instead of a loaf pan, I used an 8x8 inch baking pan. This dough, I figured, would be loose enough to spread out. I neglected to take a 'before' picture, so you'll just have to imagine a sizable lump of what looks rather like clay in the center of the pan. Here's the 'after' picture. The dough spread out nicely and rose to just about exactly fill the pan. There was a bit of a rise above in the middle, but the dough stuck to the parchment paper I used to cover it so it deflated a little when I removed it.

I was hoping for one of our usual summer afternoon thunderstorms to keep the room humid and blot out the sun, but it was a bright dry day and the dough crusted over in the oven-like heat of my kitchen. That, no doubt, hampered the rise, but this dough didn't have the structure to hold itself up very far anyway. I spritzed the top with water and olive oil to soften it up before baking.

Instead of the wacky baking method in the original recipe, I used a more standard cornbread/cake method of baking it at 350 degrees until a knife inserted in the center came out clean. It took about 40 minutes. There wasn't any extra rise in the oven; In fact it looks like it shrunk a little and the top crusted over hard.


On the other hand, take a look at the texture inside--dense and bubbly with a bit of chew. Even the crunchy barley bits softened pleasantly. Miles better than the texture I got from this same dough last time. Maybe I accidentally used the no-knead method and got gluten to form just by leaving a loose dough to sit?

I'd experiment more, but all this rigmarole hardly seems worth the effort if the point is to simulate a loaf properly made in the first place. Might be a good way to salvage a poorly kneaded loaf, but then so is kneading. Maybe I'll just write this off as a one time thing unless you guys see some practical upshot of all this.