Showing posts with label parsley. Show all posts

Wednesday, February 23, 2011

Fergus Henderson's roast bone marrow and parsley salad redux

It's been three years since I made this recipe to disappointing results and it's taken me this long to try it again. It's highly acclaimed, so I knew it was my fault it turned out poorly, but it took seeing a demo showing exactly what I did wrong to push me to actually getting more marrow bones and giving it another shot. Having a big bunch of CSA parsley on hand didn't hurt. I'm still on week ten's share if anyone's keeping track. Also, that original post is, somehow, still getting hits despite being one of a dozen blog posts about this recipe. I feel kind of obliged to update for those readers.

Here's the recipe again with a few notes on my preparation:
Roast Bone Marrow and Parsley Salad
from The Whole Beast: Nose to Tail Eating, by Fergus Henderson

- serves four

twelve 3-inch pieces of veal marrowbone [I used two 6-inch beef bones. I had the option to have them cut in half, but I didn't check the recipe first.]
a healthy bunch of flat-leaf parsley, leaves picked from the stems
2 shallots, peeled and very thinly sliced
1 modest handful of capers (extra-fine if possible)

Dressing:
juice of 1 lemon
extra-virgin olive oil
a pinch of sea salt and freshly ground pepper
a good supply of toast
coarse salt

Put the marrowbone pieces in an ovenproof frying pan and place in a hot 450 degree (F) oven. The roasting process should take about 20 minutes depending on the thickness of the bone. You are looking for the marrow to be loose and giving, but not melted away, which it will do if left too long (traditionally the ends would be covered to prevent any seepage, but I like the coloring and crispness at the ends). [I went a few minutes too long as the crustiness that developed at the uncovered ends disguised the looseness I was looking for. Probably best for beginners like me to cover.]

Lightly chop your parsley, just enough to discipline it, mix it with the shallots and capers, and at the last moment, dress the salad.

Here is a dish that should not be completely seasoned before leaving the kitchen, rendering a last-minute seasoning unnecessary by the actual eater; this, especially in the case of coarse sea salt, gives texture and uplift at the moment of eating. My approach is to scrape the marrow from the bone onto the toast and season with coarse sea 
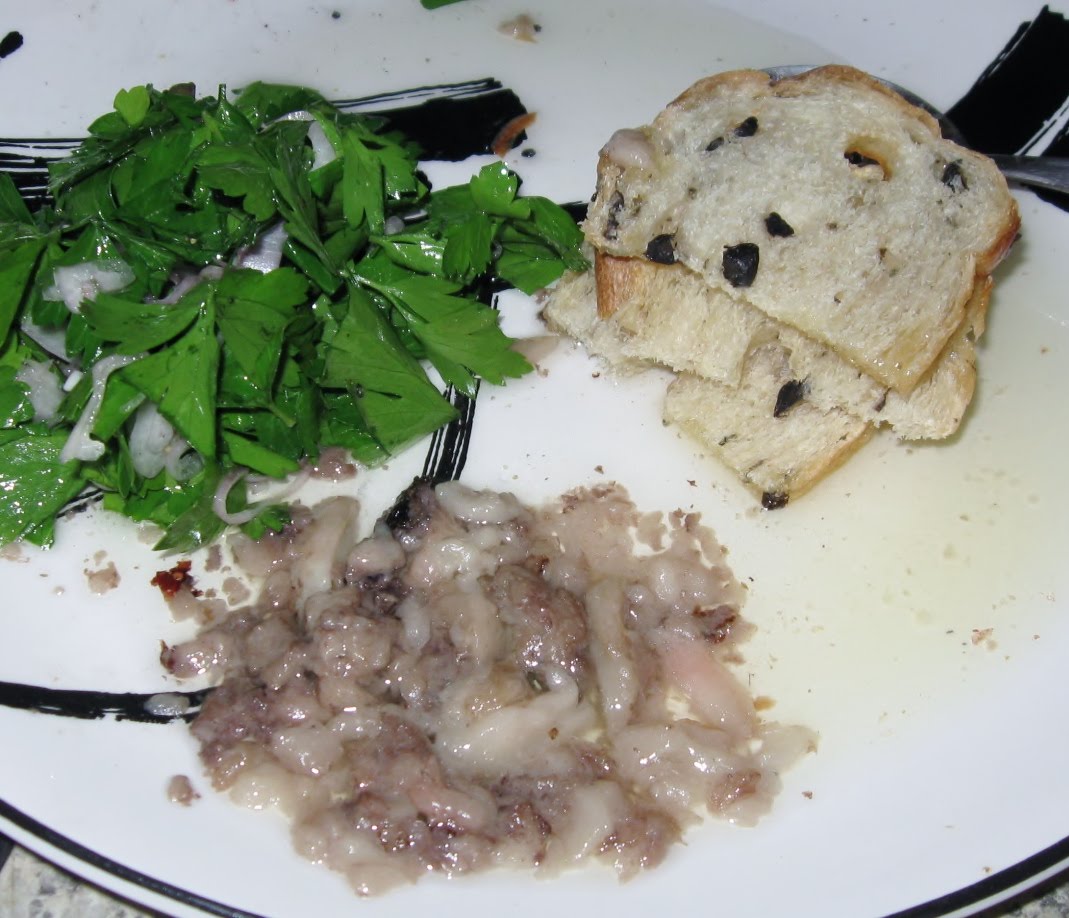
salt. [Lacking a marrow spoon, I found a pair of chopsticks worked well to dig the marrow out. I found it easiest to scrape a bone out fully and then spoon a measure of marrow onto each piece of toast. Also, that allowed the toast to soak in a pool of rendered marrow for a little extra unctuousness.] Then a pinch of parsley salad on top of this and eat. Of course once you have your pile of bones, salad, toast, and salt it is diner’s choice. [I used Hawaiian black sea salt because it was what I had at the level of coarseness I was looking for. It does look nice too, though, don't you think?


As I said up top, I had a much improved experience this time around. Along with the sheer fattiness, the marrow delivered a good bit of meaty flavor. Think of biting into a well-cooked steak and getting that great burst of just-melting fat full of savory flavor. It's kind of like that without the meat part. So, yeah, worth making once in a while.

Sunday, January 23, 2011

CSA week five - grapefruit anchovy salad

Grapefruit and anchovies sound like an odd combination, I'll admit, but it's not as far a reach as you might think. I'm just substituting the grapefruit into a traditional Sicilian orange and anchovy salad. I was prepared to add some sugar to adjust, but I was lucky enough to have a couple unusually sweet grapefruit. I let them sit for an extra week after they looked ripe; Maybe that made a difference.

Ingredients:
1 medium and 1 small grapefruit, cut into supremes and then into bite-sized pieces
two stems flat leaf parsley, roughly chopped
1 scallion, green part only, chopped
4 anchovy fillets, chopped
1 Tablespoon extra virgin olive oil
salt and pepper to taste (careful with the salt as you've got the anchovies)

1. Cut grapefruit into a bowl and drain the excess juice.

2. Add everything else, mix, taste and adjust seasoning.


This salad comes together a lot better than you'd expect. The balance is only slightly off a salad dressed in lemon vinaigrette. The salt cuts the bitterness of the grapefruit and the juiciness of the fruit buffers the saltiness of the anchovies. With everything balanced, the most prominent flavors to emerge are herbal with citrus tartness and olive oil unctuousness backing it up. Possibly that's because I started with two quite mild grapefruit. You'll have to bump up the other elements if yours are intensely sour and/or bitter.

Now that I know grapefruit goes with the salt and umami of anchovies, I want to try it with Worcestershire sauce. I'll let you know how that goes.

Thursday, June 3, 2010

Azerbaijani herb omelet

No doubt there's an Azerbaijani name for such a thing, but that's the title on the recipe I found on World Hearth. The cookbook it came from, Please to the Table, has got translations, but that page isn't in the Amazon preview so I can't tell you what that translation might be (or even what language it was translated into. It's a Russian cookbook, but not a Russian recipe.) The cooking method is more Spanish tortilla than omelet, but, hey, close enough.

Ingredients:
2 cups spinach, finely chopped
5 large scallions, finely chopped (I've only got three regular-sized ones)
1 cup parsley, finely chopped
1/2 cup dill, finely chopped
3 Tablespoons cilantro, finely chopped
1/4 cup walnuts, finely chopped
1/4 teaspoon turmeric
salt and pepper to taste
6 large eggs, well beaten
3 Tablespoons olive oil

When herbs are getting finely chopped I use the stems too, but that's just me.

Of more general concern is the question of when a recipe says "2 cups spinach, finely chopped" does it mean to finely chop two cups of spinach leaves or to finely chop enough spinach to make two cups? Finely chopping cuts the volume in half, more or less. See?
before:


after:
Whoops, I should have scraped down the bowl; you can't really see. Just trust me on this one.

When I write recipes, I usually mean the latter and it bugs me that what I write literally means the former but the latter seems more precise as to the amount that ends up in the dish.

Since I wasn't sure what the creator of this recipe (presumably Anya von Bremzen and John Welchman, the authors of the cookbook) meant, and since I had started with the amounts listed and ended up with half that, I decided to mix three eggs into the herb mixture to see what that got me.

What it got me was a bowl of barely moistened herbs. I doubted that was right so I added the other three eggs and got something more reasonable. That means the authors meant what they wrote: "2 cups spinach, finely chopped". OK, good to know.

Once everything (bar the olive oil) is mixed the instructions are to heat the oil over medium heat in a 10-inch pan, pour in the egg mixture, cook for 5 minutes to let the eggs start to set, cover and turn heat to low and cook for 15 minutes more.

That's where my second problem presented itself. The large burner on my stove doesn't really do medium. Not very well anyway. When you turn it on it only does high and barely-warm with nothing in between. If I leave it on high for a while, temperatures in between slowly become available, I think, or possibly that's just heat stored in the pan. Anyway, getting a pan over medium heat is tough, particularly when the only suitable 10-inch pan I've got is cast iron. I gave it my best shot, but the eggs set right away so I skipped the first 5 minutes, covered the pan and checked progress at 5 minute intervals.

In fact it did take the full 15 minutes for the omelet to set, after which it was time for the next step: slicing it into 8 pieces while still in the pan over the heat and then flipping each piece. That sounds like it would be problem number three for this recipe, but it actually was pretty easy. The trick was to pull one slice out of the pan and set it aside. That leaves room to flip another slice and slide it over to make space to flip the next one. Once everything was flipped, it was 5 more minutes over the heat (which seemed pretty well medium at this point) and then out to a serving dish.

Now let's see how it tastes...
It's mostly savory egg, with some very nice flavor from the browned edges, with aromatic parsley and dill. I'm not getting a lot of spinach, cilantro or walnut. The egg is a bit, but not badly overdone, chewy but not rubbery. There's a bit of crunch from the nuts (and the stems). Nothing spectacular, but nice enough, if you like parsley and dill anyway. It could use some contrast; at least a bit of acid, but I think I'd like it in a sandwich with a mayonnaise with some vinegar in. Maybe I'll try that tomorrow as I've already had three slices and I want to save the rest. I wonder how it's served traditionally.

Tuesday, February 23, 2010

CSA week 12 - Gumbo z'herbes

I'm not entirely certain about this. There are lots of recipes out there but they all agree on simmering the greens two hours or longer. Collards, OK maybe they can handle that. But chard and turnip greens? And what about the dandelion greens? Most of the recipes put them on the list of greens to include but nobody prepares them to deal with the bitterness.

I'm going to try it, but I dunno.

First step, clean and prep 2-3 pounds of greens--whatever you've got, the more variety the better. For those who haven't read the previous post, I had 1 bunch collards, 1 bunch chard, 1 bunch dandelion greens, 1 bunch turnip greens and 1 bunch radish greens. I did this prep the night before to avoid having dinner too very late.

Next step, get a gallon of water and/or stock (I used two cups of shrimp stock and the rest water) to a boil in a large pot and add the greens. Simmer for at least an hour.

Meanwhile,make a roux. I used the in-oven method. Mix equal parts fat and flour (I used 2 Tablespoons bacon drippings, 3 Tablespoons canola oil and 5 Tablespoons flour) in a big cast iron pot and put it in a 350 degree oven for at least an hour. No stirring necessary. The recipes that specify call for a peanut-butter colored roux, but they all also call for filé powder added at the end too. I don't have any filé so I'm not going to get that thickening. And, as you probably know, the darker the roux, the more flavor, but the less thickening power. So I pulled it out of the oven at around 1 hour 20 minutes. It looks peanut butter colored, but it started a little dark from the bacon drippings so I think I'm in good shape.

After that time, the greens have wilted considerably. Here they are along with half a cabbage, 1 bunch scallions and 1 bunch parsley that are going back into the pot with them later.

But before that, the pot with the roux goes up on the stove and in goes 1 large white onion, 1 green bell pepper and 3 stalks celery, chopped. I cooked that for 10 minutes over medium-high heat before adding the reserved stock and greens which I've roughly chopped, the cabbage, scallion and parsley (although what good scallion and parsley added this early will do I dunno), a ham hock, 2 bay leaves, 4 stalks thyme, 1 stalk rosemary, 4 allspice berries and a generous amount pre-mixed Cajun spice blend because I'm lazy.

It's at this point that I finally understand exactly how huge this batch of gumbo is. I'm going to be eating this for a month; it better be good.

Normally, that's the dish. Just simmer an hour more and serve, but I wanted it a little heartier so I added a couple links of andouille sausage and, 5 minutes before the end, a quarter pound of shrimp.

And here it is served over rice:


Hmmm...no real thickening at all. Or roux flavor, either, disappointingly. This is basically a huge mess of greens in a bucket of pot liquor. Lacking the filé powder, maybe I'll make up a slurry and bring it back up to a boil to thicken it up. It'll probably add a little raw flour flavor, but I'll trade that off for making this sauce into gravy. The greens still have a tiny bit of texture to them--the cabbage a little more--but mainly it's just soft. It's not falling apart like I expected though, so it's still in a pleasant neighborhood.

The flavors of the greens have all melded together to just a generic tasty green. No notable bitterness, or skunkiness from the boiled cabbage either. The herbs and spices round out the flavor a little and there's a hint of smokiness there. The sausage and shrimp weren't in long enough to swap flavors with the greens so they've retained all their flavor. The shrimp are a nice match, the sausage a bit less so. That'll probably change as everything melds in the refrigerator over night, though. I'll have some for lunch tomorrow and report back in a comment.

Monday, December 28, 2009

CSA week four - A couple of compicated salads

I don't think it struck me until just now, after the fact, that this week's CSA share (the half-share at least) is better suited to salads than cooking. I thought it was just my slow recovery from various ills that making me not feel like cooking, but with grapefruit, curly parsley, avocado, green pepper and tomato, this is just a raw foods sort of week.

As these are salads, there isn't much to say or illustrate preparation-wise. Chop everything up, mix it together, make the dressing and toss. Not much too it. The aforementioned complication comes from the sheer number of ingredients in each of these dishes. I only made minor tweaks in each so with no further ado, here are the recipes:

Italian Parsley Salad

Adapted from “Roast Chicken and Other Stories” by Simon Hopkinson (Hyperion, 2007)

Ingredients:
1/3 cup soft, fleshy black olives, pitted and coarsely chopped
1 bunch parsley, coarsely chopped
1 large shallot, chopped
1 ounce capers, rinsed of salt or brine
1 large garlic clove, finely chopped
7 large anchovy fillets, chopped

Dressing:
Freshly grated zest of 1 lemon
1/4 cup olive oil
freshly ground black pepper
juice of 1 lemon
salt, to taste [probably not a lot]

thin slivers of Parmesan cheese
crackers or biscuits or toast or bruschetta or suchlike

Mix the salad ingredients. Mix the dressing ingredients. Mix them together. Top with the Parmesan and serve with the crackers.

This has a pleasing combination of flavors that blend together in a pretty classic way and compliment the parsley while still letting it be the center of the salad. Both the texture and the somewhat less strident bitterness of flat-leaf parsley would work better; That's probably why the original recipe called for it. Still, it's still not bad with the curly parsley. The crackers are important in toning down the intensity of flavors, but it's still a bit much to eat on its own. It's better as a side dish to a straightforward piece of roasted meat, I think.


Avocado shrimp Thai salad

This is an unsigned recipe from Recipe4Living which is a community recipe website so there's no way to know where the recipe actually came from. No other versions of it online are immediately obvious so I can't track it down that way. They don't claim association with any old media source of recipes or have any chefs on staff either so far as I can see. I guess it'll have to remain a mystery unless one of their editors notices this post and wants to clear things up in the comments.

Ingredients:
1 hass or lula avocado, peeled, pitted and cubed
1 fluid ounce lime juice
1/2 pound shrimp, peeled and deveined, poached and chopped if they're larger than 'large'
1 large meaty tomato, [whatever sort our CSA tomatoes are is perfect for this sort of thing] coarsely chopped
1 1/2 green onions, sliced lengthwise and separated into four pieces then chopped into 2-inch lengths
1/2 small green bell pepper, diced
1/2 small red bell pepper, diced
1/4 cup bean sprouts [I left these out as the grocery that usually has them didn't this week. They would have been a nice addition even in that small amount.]
1/8 cup mint leaves, coarsely chopped

Dressing:
1/4 cup lime juice [You can get this out of one lime if you rough it up a bit, microwave it for 20 seconds or so and then ream it out with a fork.]
1 teaspoon Dijon mustard
1/2 cup vegetable oil [That's clearly way too much so I used only 1/3 cup which seemed to emulsify well with the amount of water-based ingredients.]
1/2 Tablespoon sesame oil
2 cloves garlic, finely chopped
1 inch knob ginger, grated
1/2 teaspoon brown sugar
zest from 1/2 lime
1 pinch crushed red pepper flakes
salt to taste

Mix the salad ingredients. Mix the dressing ingredients. Mix them together. Serve.


Now this is pretty darn good. There are so many different flavors and textures going on in here that every forkful is a different combination. Each starts with the bite of the dressing, sesame and lime foremost, blending as the crunch, creaminess or chew of the ingredients releases their individual flavors. The tartness gets to be a bit much after a full serving, though. I think that's because there is way too much dressing here. I think halving the amount would probably balance things a little better.

Monday, April 27, 2009

CSA week 20 - Khoresh karafs

Khoresh is a type of Iranian stew and karafs is Persian for celery. Wait, hold on, I've just did a bit more research and I'm going to say that khoresh just means stew. The term is used across the Middle East and there's so much variation in recipes that I can't really pin down what would make one stew a khoresh and another not. That said, if you look up Iranian khoresh, this recipe is what you'll turn up.

The particular version I used is from here as it's a little more complicated than the other versions I found. I probably should have made this a bit sooner as the week in the refrigerator has made the CSA celery a little rubbery, but the flavors are so close to the beet soup I made last week that I wanted to put a little space in between.

Ingredients:
1 teaspoon saffron
1 teaspoon sugar
1/4 cup olive oil
6 garlic cloves, finely chopped
2 large onions, roughly chopped [I'm low on onions so I used one and one shallot]
1 1/2 teaspoon turmeric
1 teaspoon sweet paprika
1 pound stew beef cut in 1-inch pieces
salt and pepper to taste
1 large celery bunch with leaves [Our CSA celery went beyond 'large' to 'huge' so I only used three quarters of it.]
3 cups chopped herbs--a mix of parsley, cilantro and mint [I'm well off mint, at least combined with saffron, so I went half and half with parsley and cilantro.]
Juice of 1 lime [or Iranian dried or preserved limes which I haven't got]
1 Tablespoon tomato paste

1. Using a mortar and pestle, grind saffron and sugar. In a small bowl, combine ground saffron-and-sugar mixture with 1/4 cup hot water; set aside for 10 to 15 minutes.

2. In a large shallow saucepan, heat 2 tablespoons olive oil over medium heat. Add garlic and onions. Cook until golden brown, about 10 minutes. Stir in 1 teaspoon turmeric and paprika. Add beef, salt, and pepper. Cook until meat is browned, about 10 minutes. Add 1 1/2 cups hot water, and stir to combine. Cover, and cook for 20 minutes. [This recipe calls for two very large saucepans, but I've only got one. Instead of adding the water to the pan, I heated it up in my dutch oven on a back burner and added the beef mixture to it.]

3. Cut celery on the diagonal into 1 1/2-inch pieces. In a large skillet, heat remaining 2 tablespoons olive oil over medium heat. Add celery, and cook for 20 minutes, stirring occasionally. Add parsley and mint to cooked celery. Stir in additional salt and pepper, and remaining 1/2 teaspoon turmeric. Cook for 2 minutes.

4. Add celery mixture, lime juice, tomato paste, 1 tablespoon saffron-and-water mixture (saving the remainder for another use [for instance, adding to the rice you're going to serve this with]), and 2 cups hot water to beef; stir to combine. Cover, and cook over low heat for 1 hour [or into the oven at 350 degrees for 2 hours for a more foolproof method]. Serve with Persian rice [or just plain rice if you don't feel up to making fancy rice].


Not a bad preparation for someone not entirely fond of celery as their flavor is rather washed out. The dish is fragrant with herbs and saffron. The celery flavor actually blends in with the parsley and cilantro as another herb. It isn't spicy, but the turmeric and paprika are prominent keeping the stew well localized to Iran and the broth flavorful enough to keep a mouthful of celery palatable. Beyond just that, the flavors do meld well into a tasty and unusual (to me. Your standards of unusual will, of course, vary) whole. Rather better than they melded with beets, at any rate.

If you find yourself stuck with a big head of celery, this is a fine way to use it. But if you're the sort of person who goes out and buys a big head of celery, you might want to find a recipe that plays it up a little more.

Monday, February 2, 2009

CSA week nine - Chicken tagine with olives and preserved lemons

and also large bunches of parsley and cilantro.

This is a recipe from North African Cooking by Hilaire Walden. It's not the one I mentioned on Saturday, but this one uses more parsley and cilantro than that one plus some other interesting flavors so I thought I'd give it a try. I've modified it a bit and probably screwed it up since I couldn't get the right sorts of olives or preserved lemons. Well, that's the way of things; I'll just have to hope for the best.

Ingredients:
2-3 Tablespoons olive oil
1 red onion, finely chopped
3 garlic cloves
3/4 teaspoons ground ginger
1 1/2 teaspoons ground cinnamon
1 large pinch saffron threads, crushed
salt and pepper

1 chicken weighing about 3 1/2 pounds (Mine was a bit bigger so I was generous on all the spices and used a large onion.)
3 cups chicken broth or water

1/2 cup greeny-brown Moroccan olives, rinsed or kalamata olives, roughly chopped
1 large bunch of cilantro, finely chopped (I used about half my share. There's large and then there's large.)
1 large bunch of parsley, finely chopped
1 preserved lemon in salt (The lemons I found were pickled, but so are the olives so I figure I'm probably OK. They were also kind of small so I used two.), chopped

0. Preheat oven to 400 degrees.

1. Heat the olive oil over medium heat in a dutch oven just big enough to fit the chicken. Add onions and fry until golden brown.

2. Meanwhile, crush garlic in a mortar with a pinch of salt. Work in the ginger, cinnamon, saffron and a bit of pepper. Add to onions and cook until fragrant. Remove to a bowl.

3. Let the spice mix cool a bit and then mash it up into a smoother paste.
Or just run it through the food processor. Spread it all over the chicken including in the body cavity.

4. Put chicken in the dutch oven (which you're glad you used because you didn't lose all the flavor from the spice mix you couldn't entirely scrape out) and add broth. Bring to a simmer and cover.

The original recipe goes on to simmer on the stovetop for 1 1/4 hours, but instead I put it into the oven for omni-directional heat. 350 works for stews but wanted to keep the sauce simmering here so I want a little higher temperature. Technically that means this is a braise not a tagine, I think. The recipe called for flipping the chicken a few times which still seemed like a good idea so I went ahead and did that.

I'm not sure about the timing since I started at 350, changed my mind, tried 375 and then 400. I just cooked until my probe thermometer got a reading of 165 degrees. I've been having trouble getting reliable readings so the chicken ended up a bit overcooked, but the sauce kept it from drying out so it wasn't a disaster.

5. When the thermometer reaches 160 degrees add the chopped olives, lemon, cilantro and parsley, turn the oven down to 350 degrees and cook for 15 minutes more.

6. When the chicken is done, remove it to a cutting board to cool and put the sauce on the stove to cook down if it looks like it needs it. Taste the sauce and adjust the seasoning now. When the chicken is cool enough to work with, portion it out and serve with the sauce. If you can figure how to skim the chicken fat from the sauce, you probably should.


I also had a side dish: Fried peppers with capers and garlic

Ingredients:
2 Tablespoons olive oil
3/4 pound red peppers, cut into strips
2 garlic cloves, sliced
1/2 Tablespoon salt-packed capers (don't substitute the pickled capers; the flavors are quite different)
1 Tablespoon white wine vinegar (go ahead and substitute plain white vinegar)
salt and pepper

1. Heat the oil on high heat in a cast iron pan until nearly smoking. Add the peppers. Fry, stirring frequently but not constantly, until they've charred around the edges.

2. Add the capers and garlic. Cook until they sizzle and the garlic starts to brown.

3. Stir in the vinegar which will evaporate too fast to do any real damage to the seasoning on your cast iron pan. Still, you'll want to clean the pan promptly after dinner.

4. Serve hot as a side dish or cold as a salad.


And I made couscous too.

I'm fairly happy with how the tagine turned out. There's a lot of good flavor in the sauce, but you can tell the right olives and lemon would match with the herbs and spices a bit better. As usual when I neglect to brine the chicken is flavorful on the outside but the actual meat is kind of bland. Even this free-range, organic blah-blah-blah chicken doesn't have a whole lot of flavor. Not compared to olives and preserved lemons, anyway. I suppose the overcooking was no help here either. But still, not bad and the sauce is quite nice with the couscous.

The peppers are sweet, salty and tangy. Very different from the chicken and a nice accompaniment. The recipe doesn't actually specify sweet bell peppers so I wonder how it would be using a pepper with a little heat.

Now I could really go for some baclava for dessert.

Monday, December 29, 2008

CSA week four - Filleto tartufato with parsley salad

I mentioned in the most recent CSA week-opening post that I had rich and classy beef dish planned to be accompanied by a parsley salad. This is that. I've been accumulating small amounts of high-tone ingredients that I've bought on impulse and this is a good chance to put them all together to strut their stuff. I've got here a six ounce filet mignon (cut from the three pound piece of grass-fed tenderloin I got a good deal on last month), a summer black truffle (second best to winter black truffle but only half the cost at around $12 per truffle), a small bottle of foie gras (mushy from the preservation, but the flavor is comparable to fresh. And at $13 for 1.7 ounces rather more affordable.), and some condensed veal demi-glace (only five bucks and enough for several recipes).

I'm using a recipe from the Gilded Fork at Culinary Media Network. I've poked around a bit on their website and I'm still not clear just who these people are or what their deal is. Kind of a web-only alternative to Gourmet magazine I think.

Anyway, the recipe isn't too complicated. I seasoned the filet with just salt and pepper and sautéed it in olive oil and butter in a small cast iron pan for four minutes on one side and three on the other. (The recipe says: "Cooking time will depend on how well-done you desire the steaks." Great guidance there. Thanks a lot.) My cooking time was a pure guess but by chance, I managed to get the filet done to just about medium; a little further along than I generally prefer but quite palatable.

In another pan I sweated the truffle, shaved thin, in butter. (The recipe actually calls for a full ounce of truffle for each steak. That's eight whole average truffles and assuming they're calling for black winter truffle, about $100 worth. There's certainly not that much piled up in the picture with the recipe so I'm going to assume some screw up here and that using just one truffle is sufficient. After a few minutes I added a good splash of red wine (They call for Madiera but Fresh Market didn't have any so I just used a Cab that goes well with red meat. Probably nothing like what was intended, but I like how it turned out.) and the reconstituted demi-glace and turned down the heat to just keep it warm.

When the steak was done I removed it to a warm oven and added slices of foie gras, seasoned and floured, to the pan and turned up the heat to quickly brown it on both sides.

And that's it. The steak gets topped by the foie gras and the sauce (mounted with a pat of cold butter) is poured on top. Easy-peasy.

The salad is just as easy. A big handful of parsley leaves (stems kept for making soup) roughly chopped, tossed with a sliced shallot and maybe a half Tablespoon of capers. Seasoned with salt and pepper and dressed with olive oil and lemon juice.

I shouldn't have used the black plate; I don't think you can get a really good look at the assembled dish. Sorry.

So is it everything it's cracked up to be? Could anything possibly be? It's certainly got Arby's roast beef sandwich beat; I'll give it that much. I want to say it's one-note, but that's not quite right. Each component is evident and compliments the others with its own individual take on that note: buttery, earthy, fatty, meaty, rich (with some tanginess from the wine). It's a chorus, but monotonic; like Gregorian plainchant. OK, I just had a bit with the right amounts of everything at the right temperature and the layers of flavors and textures really are very good indeed. I'm now I'm willing to put it on par with a well-made cheesesteak. I don't know if I made the sauce quite properly and I certainly didn't use the heap of truffles the recipe calls for so it wouldn't be fair for me to write it off on the basis of my own efforts. And maybe it's unfair to expect it to be transcendent just because of its pricey ingredients. If I see it on a menu and I've got the cash to burn I'll consider it, but I'll probably order the lobster.

The parsley salad is the steak's diametric opposite: light, crisp and tart. A lovely accompaniment. Going back and forth between the two is a bit much, but the bread acts as a mediator as it did with the marrow bones the salad was invented to accompany. I think it would go nicely with carpaccio or as a garnish to a bowl of beef bourguignon.

I've still got lots of parsley left; I'll have to look into other parsley salads as I don't think I'll be eating any more beef for a little while now.

Sunday, July 20, 2008

Pappardelle with caramelized onions, skirt steak and fresh tomatoes

Despite my talk about avoiding the kitchen as soon as I restocked my supplies I found myself leaping straight from "I'm hungry" to throwing together something worth writing about. (There are no prep pictures this time as I didn't know it would be post-worthy until after I tasted it.)

Specifically this came about because had purchased more skirt steak than I needed for a fajita recipe you'll see later this week. I don't eat a lot of beef so I haven't tried a lot of different cuts. This is the first time I've tried skirt steak and I'm pretty impressed with it. It's nicely flavorful, has an unusual loose texture that grabs on to rubs and marinades, and it gives tender results when cooked up quickly. It's not a traditional steak but it seems like a good choice for dishes that call for small pieces of beef which are far more common in my repertoire. So, anyway, I was cutting a large skirt steak up into serving-sized pieces for freezing and decided to give it a try. Here's what I came up with:

Pappardelle with caramelized onions, skirt steak and fresh tomatoes

3 nests pappardelle or two generous servings of another pasta
1/4 lb skirt steak, sliced into thin strips against the grain
1 medium onion, sliced thin
3 cloves of garlic, sliced thin
4 large cherry tomatoes, roughly chopped (or 1 medium full-sized tomato)
1 teaspoon red wine vinegar
2 teaspoons butter
2 teaspoons vegetable oil
2 teaspoons steak spice rub (I used Spice House's Milwaukee Avenue polish-style steak seasoning, but anything smokey and peppery will do)
2 Tablespoons parsley, roughly chopped

1. Heat cast iron pan over high heat. Add oil and butter. When butter stops foaming add onion and garlic, stirring so they're well coated in oil, and immediately turn heat down to medium-low. The vegetables will get a head start on browning from the residual heat. This works best with cast iron on an electric stove. Stir onions frequently. Lower the heat if they look like they're starting to get crisp.

2. Put water for pasta on heat.

3. Coat steak in spice rub. Set aside.

4.When water is at a rolling boil add pasta (with generous amounts of salt). Cook to al dente, for pappardelle six minutes.

5. When pasta is almost ready, remove onions to serving bowl draining the oil back into the pan. Add tomatoes and vinegar to bowl along with salt and pepper to taste. Stir briefly. Turn pan up to high heat.

6. When pasta is ready, drain but don't rinse and add to serving bowl. Toss with onions and tomatoes. (You'll be tossing again later, but don't neglect this one or your pasta will stick to itself instead of to the sauce.)

7.Add steak to pan, making sure the slices are well scattered over the surface. Let sit for 20 to 30 seconds to get a good browning on one side and then stir fry until finished. This should only take around another 20 seconds. Remove to serving bowl, add parsley and toss again.


If you used a non-stick pan, you might want to deglaze it, but that generally doesn't work so well on cast iron unless it's enamelled or very well seasoned.

8. Serve immediately.

Sunday, May 4, 2008

Fergus Henderson's Roast Bone Marrow and Parsley Salad

[Yes I saw this dish properly prepared on No Reservations too and learned that I overcooked it, rendering the marrow. That's probably why my marrow didn't have a lot of flavor to it. I've finally gotten my hands on some more marrow bones and made it again with rather better results. I bought a new camera in the meantime so I have much better pictures too. I'm going to put them in a new post so click here to take a look.]

If you watch any foodie-centric television (as opposed to the ever more downmarket Food Network) that name should seem familiar to you. Any time a foodie show travels to London they stop by Henderson's restaurant St. John and talk to him about his single-handed revival of country English cooking using all the other bits of the animal than what you normally eat. And if you've been watching reruns of Anthony Bourdain's old series Cooks Tour then just a few weeks ago you saw him calling this particular recipe his choice for his death-row meal.

Henderson popping up all over the place inspired my recent declaration that I want to cook and eat more organ meat (and my resulting disappointment at how little I've found available). Well, that and most of a bottle of wine. The latter is a general requirement for most of my declarations. Anyway, I'm pleased to have found that Whole Foods carries marrow bones and to have found Henderson's recipe on-line. So here's my chance to see what all the fuss is about. I'll let Fergus give you the details:

Roast Bone Marrow and Parsley Salad
from The Whole Beast: Nose to Tail Eating, by Fergus Henderson

- serves four

twelve 3-inch pieces of veal marrowbone [the packaging my marrowbones came in doesn't actually say what animal it came from. It's about veal-sized though]
a healthy bunch of flat-leaf parsley, leaves picked from the stems
2 shallots, peeled and very thinly sliced
1 modest handful of capers (extra-fine if possible)

Dressing:
juice of 1 lemon
extra-virgin olive oil
a pinch of sea salt and freshly ground pepper
a good supply of toast
coarse salt

Put the marrowbone pieces in an ovenproof frying pan and place in a hot 450 degree (F) oven. The roasting process should take about 20 minutes depending on the thickness of the bone. You are looking for the marrow to be loose and giving, but not melted away, which it will do if left too long (traditionally the ends would be covered to prevent any seepage, but I like the coloring and crispness at the ends).

Lightly chop your parsley, just enough to discipline it, mix it with the shallots and capers, and at the last moment, dress the salad.

Here is a dish that should not be completely seasoned before leaving the kitchen, rendering a last-minute seasoning unnecessary by the actual eater; this, especially in the case of coarse sea salt, gives texture and uplift at the moment of eating. My approach is to scrape the marrow from the bone onto the toast and season with coarse sea salt. Then a pinch of parsley salad on top of this and eat. Of course once you have your pile of bones, salad, toast, and salt it is diner’s choice.
____

That's the way I like my recipes: conversational and explanatory. But enough of that, you want to know if it really was the exquisite experience I was promised. And the answer is: not really. The marrow didn't have much character and was usually overshadowed by the parsley salad. And by itself it paled beside a good butter. It wasn't bad, mind you, but a death row meal choice it was not. I suppose I might have got sub-standard marrowbones. They were previously frozen; maybe that affects the taste. If I'm going to stuff myself with toast and fat, I'd rather have the buttered breakfast turnips that I made last month. I don't think that's quite a death row meal either, but if I had a week left I think I could find a spot for it.

Monday, March 10, 2008

CSA week 15 - shrimp and turnips in bagna couda-ish sauce

I wanted to revisit the radish and whitefish recipe I made last month and try a variation. Replacing the radishes with turnips was, I think, a step down. The radishes had a sweet complexity of flavor that the turnips couldn't match. I added some cherry tomatoes to compensate and I think that helped.

I also used shrimp instead of the basa I used last time. The fish did fine on its own before, but the shrimp works best dredged in the sauce. If I had been sure how long everything was going to take to cook I would have mixed them in. I played it safe by laying them down on top; that let me take them out after 8 minutes and put the turnips back in for another ten. I'll fix that in the recipe.


3 small to medium turnips, in 1/2 inch slices
the top of one spring onion, sliced into thin rounds
1 handful parsley chopped fine
3 cloves garlic, chopped fine
1 handful cherry tomatoes, halved
2 teaspoons butter
1 Tablespoon olive oil
1 teaspoon capers
2 anchovies, minced
8 large shrimp, cleaned in shell
1/2 cup dry white wine (I used a Louis Latour 2004 Pouilly Fuisse which, while lovely, is sweeter than I would have preferred for this dish)

1. Brine shrimp in salt and sugar solution for at least a half hour
2. Preheat oven to 375 degrees F
3. Mix turnips with parsley, garlic, capers, anchovies, butter, olive oil and salt and pepper to taste
4. Roast (or bake? What's the difference exactly? Or am I frying because of all the fat?) for 20 minutes.
5. Stir in shrimp, tomatoes and wine
6. Roast for 8 minutes more.

For a nice presentation (I've been watching Top Chef recently and have decided that I need to work on my presentation. That doesn't change my earlier decision that I need to eat more offal. You'll be seeing some nicely presented offal over the coming weeks on this blog.) lay out the turnips in a layer on a plate, arrange shrimp on top, pile the rest of the solid bits in the center and pour the sauce over top. Preferably more neatly than I did here, but by this point I had polished off a fair bit of that bottle of Pouilly Fuisse.

As for the taste, you can't go wrong with shrimp in a butter, olive oil and white wine and the anchovies and capers give it a nice extra dimension. However, I can't say it marries all that well with the turnips. I suspect a hearty whitefish or scallops would do well. Or radishes with the shrimp. Next time either turnips or radishes show up in the share, I'll find out.

Sunday, March 9, 2008

CSA week 15 - leblebi-esque escarole and chikpea soup

I was looking at the escarole and cannellini bean recipe in this week's newsletter and thinking that the chickpeas I had handy would substitute well for the beans I didn't. A quick search turned up this recipe for an escarole and chickpea stew that seemed promising. The author said it was based on leblebi, a traditional Moroccan breakfast soup. Well, it turns out there are a few different dishes that go by that name but when I came across this recipe I was hooked.

It hasn't really come out in the dishes I've talked about on the blog but I'm a huge fan of garnishes. My favorite presentation is a simple dish surrounded by a dozen bowls so everyone can personalize their serving. So this list of leblebi garnishes:
Lemon wedges
Coarse sea salt
Harissa
Chopped fresh tomatoes
Chopped green and red bell peppers
2 hardboiled eggs, chopped
Rinsed capers
Sliced pickled turnips
Flaked canned tuna fish (oil- or water-packed)
Freshly ground cumin
Finely chopped fresh parsley
Finely chopped cilantro
Sliced preserved lemons
Croutons or sliced stale bread
Thinly sliced scallions, both white and green parts
Olive oil

called out to me.

There's nothing to the soup itself: four cups of chicken soup (I used half my stock and half from a can), one can of chickpeas, one head of escarole. Simmer until tender (around five minutes I found). It's everything else that makes the dish.

The most important garnishes are the stale bread underneath and the loosely poached egg and harissa on top. Harissa, if you didn't read my previous post on it, is a North African chili oil. The particular bottle I've got has the other ubiquitous North African condiment, preserved lemons, mixed in. I also added tomatoes, green pepper, capers, scallion, cilantro and parsley, black olives (which weren't on this particular list but they're also typical for North Africa), sea salt and olive oil. I probably wasn't suppose to use all of that at once, but I liked having a different combination of flavors and textures in every spoonful. Five minutes cooking didn't give time for the soup's flavors to blend. The escarole and chickpeas retain their character in the crowd. This is simple (sort of) hearty comfort food. You can tell that even if the flavors are unfamiliar. My only advice is to go easy on the harissa and preserved lemons or they'll walk all over the other flavors.

One final thing just so Googlers with different terminology can still find this recipe: garbanzo, garbanzo, garbanzo, garbanzo. There, that should do it.

CSA week 14 & 15 - chicken stock

I was looking at the leftover roasted chicken and vegetables and I decided to make a chicken shepherd's pie. But for that I'll need some chicken stock and, as this is a nice cool day for a long simmer, I decided to pull my accumulated chicken scraps out of the freezer and make my own.

Here in the pot you can see:

~ 2 lbs. chicken bones with a bit of meat attached, some raw some cooked
1 large turnip, eighthed
1/2 large onion, quartered
2 carrots, broken into large chunks
1 potato, quartered (normally I don't bother with potatoes as they don't add much flavor, but if any potato is going to it's an organic, locally grown one so I thought I'd let it strut it's stuff)
3 cloves garlic, lightly crushed
all the accumulated greens stems from the last few weeks substituting for the traditional celery
1 handful parsley
2 pinches peppercorns
1/2 teaspoon kosher salt

I added water to cover, ten cups as it turned out, gave it a stir, laid a steamer over top to hold it down and cranked the heat. After ten minutes I got this:

The scum comes from the bones so it's a good sign that things are moving along. Then all there is to do is turn the heat down to medium low (I'm looking for just one or two bubbles at a time popping on the surface; about as low a simmer as possible. My stove isn't capable of maintaining this so I set it a bit higher. Higher is better than lower here as you need to keep the temperature out of the microbial comfort zone.), skim the scum every ten minutes or so to start and then less frequently after the first hour, add water when the vegetables stop floating and after six to eight hours simmering all the flavor and gelatin is out of the chicken and it's ready to go. I've also got my secret weapon of the concentrated chicken goodness from the roasting that I saved. I'm going to add that in near the end. And here's the result:

hey it looks like soup. The final thing to remember is to cool the stock down quickly in an ice bath until nearly room temperature and then get it in the fridge to race through that aforementioned microbial comfort zone.

And that's it. I'm not sure how much I ended up with. Theoretically it should be near the 10 cups I started with, but I think I'm down to 8 or so. The sign that it turned out right is that after a night in the refrigerator it's a solid block of jelly. I'll have to warm it up to liquid stage again, but the next step is to measure out 2-cup portions, bag each separately and freeze them for later.