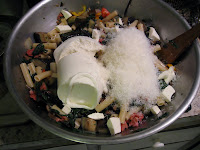
With the CSA on hold, I have time to make something more meat-centric that's been on my to-do list for quite a while: chicken adobo. This is classic Filipino recipe related to, but distinct from, the pork adobo I made and posted about last year.
Like that recipe, every Filipino mother has her own version but they don't vary a whole lot. Most just simmer the chicken in the sauce and call it done, flabby skin and all, but I really liked the ones that removed the meat and cooked it up crisp. A grill would likely be ideal, but I'm going to use my broiler (I'm writing as the chicken marinates, another unusual step). The most unusual aspect of this recipe is the inclusion of coconut milk. Almost nobody does that, but it seems like a good idea. I think that's what the "sa gata" means in the recipe name, but Babelfish finds the term confusing so I'm not sure.
I did a little research and found that the recipes on the web that include coconut milk can all be traced back to Memories of Philippine Kitchens, a cookbook by Amy Besa and Romy Dorotan. Coconut milk is, according to the book (according to a blogger who read the book, anyway) traditional in the Bicol region of the Philippines. I'm going to assume this is a regional variation.
I made a few changes away from the version in Memories based on some other recipes I found interesting.
Ingredients:
1 3 1/2 pound chicken, cut into serving pieces, liver and heart included and fat trimmed
1/4 cup light soy sauce
1/4 cup dark soy sauce
1/2 cup white vinegar [If you've got proper Filipino soy sauce and vinegar, definitely use that instead as this is just an approximation]
3/4 cup coconut milk
4 cloves garlic, crushed
1 sizable shallot, minced
2 bay leaves
generous ground black pepper [or double that whole peppercorns if you want to avoid black specks in your sauce]
1. Mix up everything but the chicken in a large bowl. Add the chicken and marinate in the refrigerator for 3 hours to overnight.
2. Move everything to a large pot (I marinated in my slow cooker pot and cooked it in there instead of the stovetop) and simmer the chicken over medium heat until mostly done, probably around 20 minutes. [Some recipes let the pot cool and refrigerate overnight before finishing the dish. It couldn't hurt if you've got the time.]
3. Remove and drain the chicken. Broil 4 inches away from the heat, skin-side up, turning the pieces with skin on both sides, until crisp and a bit charred. Mine went for 6 minutes but I left them in the pot a little long so take the chicken out sooner and go for 10.
4. Strain the sauce into a pot and reduce a bit. Add more coconut milk to taste.
Serve with white rice, sauce on the side.
Hmm...not bad at all. The chicken weathered the broiler without drying out. It's juicy and has picked up a bit of flavor from the sauce but not enough to overwhelm the mild flavor of the meat. The skin has some crisp bits, but could have stood a little more broiling. Still good through.
The sauce has pleasant levels of salty and tart, moderated by the slightly sweet richness of the coconut milk. A bit of herb comes through from the bay too, but not enough to really assert itself. It's a bit of an odd combination and I wonder if I was supposed to use Indian bay, which goes a bit better with soy sauce to my mind. I should check on that.
I reduced the sauce a bit more to intensify the flavors after I had dinner and then added a little more of the thick bit of the coconut milk--condensed coconut oil mainly--which mounted the sauce nicely like adding butter to French sauce. I think next time, I might not cook with the coconut milk, just add it at the end. I'm curious what sort of difference it might make.
One last thing, one recipe I saw called for a small chicken plus four chicken livers. I wasn't sure what that was about until I tried the liver I cooked and discovered that it was really great. The flavor is a great match for the sauce, better than just plain chicken by a bit. If you could crisp it up in the oven I'd make this with just livers.
A blog about the art and science of cooking with a particular focus on tinkering with recipes to create a more perfect dish. Also a fair bit about eating local, slow food and that sort of thing. Less about the ice cream these days.
Thursday, December 30, 2010
Thursday, December 23, 2010
Radish mizuna pasta
Bit of a change of plans for both the radishes and the mizuna. And a bit of an experiment too as neither ingredient is really known for its use in this sort of thing.
I started by frying up a pile of thinly-sliced radishes in copious butter and olive oil (since I knew the cooking fat would be the basis of the pasta sauce). Ideally, this should be over medium heat as the radishes go from raw to burnt rather quickly, but my stove's large burner only does high and off.
I overcooked at the time so here's a smaller batch I cooked up later at the level of doneness you're looking for: browned around the edges, some red left and just turning golden in the center. A little longer in the pan and they'll crisp up, but these are still soft. The radishes lose their bite early in the cooking process and turn sweet. The browning dims the sweetness and adds a toasty savoriness. At this stage, the flavor is not far from sweet potato chips (if you sprinkle on a bit of salt as they come out of the pan). It was hard to stop snacking on them, to tell the truth.
Sweet potato chips are also not known as a pasta topping so some additional ingredients are necessary. I added a few chopped anchovies for umami, but serano ham or even soy sauce would be good choices too if you wanted to take this in a different direction.
When the anchovies had dissolved and the pasta was done, I added the pasta to the pan, topped with the mizuna (which I had cleaned and removed the stemmier bits from. This required more attention than I expected as there were some rotty gunk mixed in that needed to be washed off. That's why I over-cooked my radishes. That's why you've got to have your mis en place all en place before you start.), removed the pan from the heat and tossed until the mizuna wilted a little.
Finish with a light drizzle of white wine vinegar (or a squeeze of lemon) to cut the fat and that's it. I never said it was a complicated recipe, just an interesting experiment. A successful one too, I'd say.
The radishes are taking the place of a more traditional toasted bread crumbs and the mizuna the place of a more traditional green (I considered the radish tops first, but their good to icky ratio was too low and would have taken too much time to deal with with the radishes already on the fire). Otherwise, a pretty standard Italian preparation and a pretty good one too.
My one reservation is that the radishes lost their crunch pretty quickly. I'd add some pinenuts next time. Or maybe capers. That would be nice too.
Sunday, December 19, 2010
CSA week three wrap-up, week four start-up
I hope nobody was too disappointed not to find this post up yesterday; I wanted to give my sorbet post another day on the top of the blog before it got buried and never looked at again.
That sorbet and the pasta thing I made used up the bulk of last week's share. I did pickle the cucumbers with the dill as I said I might. The cukes turned out to be rather firmer than I expected and well suited to pickling. It's early days yet, but I think they'll turn out well in a few weeks.
On to week four...
Starting on the left, we've got turnips with some very nice greens attached. I'm going to save the turnips since we've got a couple weeks off and they'll keep for a while. I wasn't happy with the texture of the mashed turnip I made with the last turnips we got, so I'll probably slice these up for a gratin or the like. The tops I've already cooked in a Thai-inflected stir fry that also used up the last of the eggplant and some poorly conceived Thai-spiced sausage.
I snacked on the radishes all day yesterday, but there's so many that I've still got a half pound or so left. I'm thinking of making chips out of them as they're quite nice when browned. The tops aren't in nearly as good shape as the turnip tops so I'll probably end up tossing them, but they may end up in the gratin or in a pasta sauce.
The oranges here add to the two I haven't used yet from last week. There's enough now that I could get a reasonable amount of juice out of them or I might just eat them out of hand. The clementines I'd like to use for a stir fry. When I did that last year it turned out really bitter, but I think I know what I did wrong so I'd like to give it another shot.
I'm not sure what to do with the mizuna. I haven't had much luck with it in it's previous appearances. It wilts down to nothing very quickly when cooked and, while it's good in salads it's better complementing other greens than by itself. The mizuna pesto I made last year turned out OK, but I'm not a huge pesto fan and this sizable bunch will make quite a bit of it. This requires more thought.
The sprouts, I've been enjoying in sandwiches as they have a watercress-y flavor to them. It's not using them up very rapidly, though, so I may have to go buy some lettuce to add them and the mizuna to for a salad.
And that leaves the mushrooms. I usually cook them with beef and/or eggs, but they're good raw too. Maybe they'll go into the hypothetical salad I've been constructing.
You know, hypothetical salad would be a pretty good name for a band.
Friday, December 17, 2010
CSA week three - grapefruit-passionfruit sorbet
No story here, just an idea I had.
Ingredients:
1 1/4 cups grapefruit, fruit extracted from various membranes
1/4 cup passionfruit pulp and seeds
1/2 cup water
1/2 cup sugar
1 Tablespoon honey
1 sizable squeeze lime
1 Tablespoon vodka
2 pinches salt
1/4 teaspoon tandori spice (coriander, ginger and cardamom mostly. Some garlic, cumin and paprika in there too)
1. Extract the grapefruit meat, removing the membranes and seeds.
2. Heat the water and sugar until the sugar dissolves. Add to the grapefruit and blend.
3. Add the passionfruit and everything else. Mix well, chill, churn and freeze.
You'll have noticed one unusual item in the ingredient list. I knew I wanted something to cut the grapefruit's bitterness beyond just more sugar and, while I was looking through the spice cabinet, the tandori spice mix presented itself.
In the final flavor mix it comes off less tandori and more spice cake and acts as a rich undertone to the sweet, sour and bitter notes of the fruit. It's distinctly separate so it doesn't temper the bitterness quite as I had hoped (the flavors blended better when the mixture was warm). The passionfruit does tone the grapefruit down a bit, though, rounding out the fruit flavors. It adds some really interesting mottling in color, texture and even flavor as the two fruits never quite fully broke up or blended together.
It's an unusual mixture of flavors that, I think, works. It isn't synergistic into some crowd-pleasing form, though; nobody's going to eat a big bowlful and come back for seconds, but I think folks will finish that first bowl. I'll add an addendum once I've found someone else to try it.
Tuesday, December 14, 2010
CSA week three - eggplant and dandelion pasta bake
This isn't anything terribly innovative, complex or exciting, but basic recipes are more popular over time and this is the only thing I've cooked in the last few days so here it is.
On second thought, maybe this is complex. Everything gets tossed together in the end, but many of the ingredients needed to be pre-cooked and that ends up taking some doing. Here, to start, are a can of diced tomato in sauce simmering on the back burner; onions, peppers and mushrooms sweating on the left; and the dandelion greens blanching on the right.
When the onion mix was done I reused the pan to soften and slightly brown the eggplant (in batches as I used four Chinese eggplants) and reused the (now well-flavored) pot of water to cook a half pound of ziti to al dente.
I reused the pan again to brown a half pound of sweet Italian sausage and several cloves of garlic.
All that got mixed together with some fresh basil, cubed mozzarella, a load of ricotta, a good bit of Parmesan and finally the tomato sauce. That all went into a baking pan for 30 minutes at 350 degrees and a few more under the broiler. Despite all the prep, this went pretty quickly and it was in the oven no more than 45 minutes after I started cooking. Even more conveniently, all that prep could easily be done the day before, although I wouldn't mix in the pasta until the last minute.
The end result is unsightly, but certainly tasty enough. The dandelion is the only unusual addition here and I think it works quite well with the eggplant, retaining a good bit of flavor and not dissolving into green flecks the way spinach would have. The emphasis on eggplant over cheese means that it falls apart on the plate, which is bad for presentation but makes it a lot easier to actually eat.
I wonder if I could have added structure by peeling the eggplant and cooking it down into a baba ganoush-ish paste so it would be part of the spackle instead of more chunks to be held together. I do like it's firmness as is, though, since the pasta is maybe a minute overdone, though. In retrospect, I probably should have poured the tomato sauce over top after baking instead of mixing it in. That would have helped both keep the pasta firm and it would have avoided thinning out the cheese.
Anyway, a good use of a lot of eggplant and easy enough for a Monday night.
Saturday, December 11, 2010
CSA week two wrap-up, week three start-up
So, what's left unaccounted for from last week? I haven't dealt with the roselle yet, but the plan remains the same--making a tea, reducing it down to a syrup and adding it to iced tea. I did pick up some dried cranberries that I'm going to throw that in too, though.
The yuca I ruined by treated it like potatoes. My standard potato plan is boil them tender and then put them in a low oven for an hour to brown and crisp them up. The yuca came out of the pot tasty but unevenly done. I was hoping the oven would finish off the pieces that were still hard, but everything just shriveled up unpleasantly.
Finally, I did make the scallion bread I mentioned, a north Chinese variety instead of the European sort I originally had in mind. It didn't turn out so well, but the method is pretty interesting so I think I'll save it for its own post. The CSA will be skipping a week soon so I'll need the content.
That brings us to this week:
Three more eggplant to add to the one and a half I have leftover from last week. The best way to use eggplant in bulk is in a lasagna or baked ziti sort of casserole. I should be able to use the dandelion leaves in there as well.
I've also got a leftover cucumber which I think I got for one of the Indonesian callaloo recipes I didn't make. These aren't really the right cucumbers for pickling, but I think most experts agree that the best sort of cucumbers for pickling is too many cucumbers which this certainly is. That should use the dill, but I bought some salmon recently so I might use some with that too.
The turnip is small enough, that it should serve well as a starch with a slab of meat. The turnip tops, as usual, I've already had over pasta for a quick lunch.
That only leaves the citrus. I've got some passion fruit I picked up at the market and I was hoping to pair it with carambolas for a sorbet, but the grapefruit should make an interesting alternative. I'll probably need to use the orange and tangello too to make a reasonably-sized batch.
Oh, and I should mention progress on the CSA Facebook fan page. After Marian and I concluded that that would be the best plan, we discovered that neither of had Facebook accounts, any interest in having one nor the time or expertise to run such a thing. Unless someone else wants to pick up the idea, I think that's where it's going to lie. Ah well.
Wednesday, December 8, 2010
CSA week two - Sayur manis bayam dan jagung muda
Roughly translated from Indonesian, that's stewed spinach and sweet corn. Less roughly, bayam--usually translated as "Indonesian spinach"--is amaranth, or, around here, callaloo.
Technique-wise, this recipe is very simple and pretty similar to a standard Islands preparation, but the inclusion of a lot of typical Indonesian flavors makes it distinctive. I found it at bigoven.com, but it's on most of the big recipe websites so there's no knowing where it came from originally.
Ingredients:
a little cooking oil
1 thumb-sized knob of ginger, julienned (my ginger was too dried out to slice so I just threw it in whole and fished it out later)
3 cloves garlic, finely chopped
hot peppers to taste (I chopped one and left another whole)
1 small shallot, sliced (the original recipe says onion, but shallot goes nicely with the other aromatics)
1 stalk lemongrass, cored and crushed
1 thumb-sized knob of galangal, sliced (I only have dried so I put in a big chunk)
1 salam leaf
1 cup chicken stock (the original recipe calls for vegetable stock, which might be fine if you wanted to go vegan, but I'd be concerned that the particular mix of vegetables wouldn't go well with Indonesian flavors.)
7 ounces (by weight) sweet young corn (the original recipe calls for "baby corn" but those little cobs would be pretty odd to use here so I'm pretty sure that's not what they mean)
2 bunchs callaloo, thick stems removed (around 10 ounces total)
1 cup coconut milk
salt and pepper to taste
1. Heat the oil in a large pot over medium high heat. Add the fresh aromatics (garlic, peppers and shallot in my case). Cook briefly until aromatic. Add the dried or otherwise inedible aromatics (ginger, lemongrass, galangal and salam for me). Cook a little longer until even more aromatic.
2. Add the stock and corn. Season with a little salt and pepper. Return to a boil. Add half the callaloo. Stir to wilt until there's room for the rest. Add the rest and stir a little more. Cover, turn heat down to a simmer and cook seven minutes. Stir in coconut milk, recover and cook five minutes more.
3. Remove inedibles, adjust seasonings and serve over rice.
Callaloo and coconut milk are, of course, a classic combination. Corn less so, but cornbread is a common accompaniment so corn isn't a big leap. So that's all pretty accessible. The overlay of the floral citrusy Indonesian flavors is something else entirely, at least if you've got some expectation of Caribbean flavors. But, if you set aside your preconceptions, I think they do counterpoint against the callaloo's distinctive flavor. I know you guys don't have the galangal or salam leaf, but try using the lemongrass when you cook up your callaloo. It's not bad at all.
Monday, December 6, 2010
CSA week two - Stuffed eggplant in black bean sauce
I started this dish with a recipe by Richard Ng, the owner/chef of Bo Lings in Kansas City. The original recipe calls for slicing the eggplant into thick rounds, slicing a pocket into each, stuffing them with shrimp, deep frying them, making a sauce from scratch, dipping them in the sauce and then steaming them.
I changed it a bit to emphasize the eggplant over the shrimp and simplified it so it was suitable not just as a weekday dinner, but as a weekday after going shopping and discovering that Whole Foods doesn't carry dried shrimp any more so you can't do the callaloo recipe you wanted to and they also don't have creamed corn so you can't do the back-up recipe either, not as written anyway, dinner.
Instead of cutting the eggplant rounds, I just cut it lengthwise (and then across so so it would fit in the steamer), sliced off a little bit of the skin side so it would sit flat and then scooped out a shallow trench to put the shrimp in.
The shrimp, instead of cutting into pea-sized pieces and stirring for four minutes until it gets sticky, I just blended (with the scooped out eggplant) in a food processor into a coarse paste. Shamefully, I didn't even bother to devein them. I did season them with generous salt and white pepper, I should mention.
Instead of deep frying, I browned the eggplant on both sides in just a Tablespoon or two of oil. Since I made boats instead of sandwiches, I did this before stuffing the shrimp in.
As the eggplant cooled, I made the sauce. I started with Lee Kum Kee prepared black bean garlic sauce and doctored it up with a little of soy sauce, sugar, rice wine and sesame oil--all the ingredients in the recipe that weren't in the ingredient list on the bottle-- until I got the flavor in the right neighborhood. Then I added a little corn starch so the sauce would thicken up during steaming and stick to the eggplant better.
I flipped the eggplant boats over, spooned a little sauce over the bottoms, flipped them back, stuffed them with the shrimp mixture, put them into the steamer (in the same pot I fried them in earlier), spooned some more sauce over top, covered and steamed for 13 minutes. That's it.
I think I missed the mark on the sauce, but not too badly. It thickened up a little too much, but the flavor's pretty close to what I've had at dim sum places. The salty deeply savory richness pairs well with the sweet eggplant and shrimp, but it's maybe a little bitter. I should have added a little more sugar and it could have used some ginger too. Visually, it could be a lot more appealing, I'll grant you.
The thicker pieces of eggplant is falling apart, but the thin end holds together well. The deep frying in the original recipe must drive out enough moisture that it firms up and can survive the steaming better. The texture of the shrimp is pretty good, though--a nice meaty chew.
Overall, not bad at all for a quick dinner. The biggest problem was that it was best hot out of the steamer, but cooled down quick while I took pictures and stopped to write up my impressions. I'm not used to that happening in Miami. Weird.
Saturday, December 4, 2010
CSA week one round-up, week two start-up
I think it took me eight days to use up my first week of vegetables; that's not too bad. The key, I think, is to insist on using at least one vegetable each day, make a big batch to use it all up and then pretend the leftovers in the freezer don't count.
Of what I made, there were a couple items not worth a full blog post, but worth mentioning. The dandelions went into this cross between the hindbeh bil zayt and the Azerbaijani herb omelet that I've made before. Right after I took this photo I remembered to toss some walnuts to bring back some of the texture lost when the fried onion and garlic got soggy soaking in the eggs. Darn tasty stuff.
Most of the parsley and garlic chives went into this blue cheese bread pudding. You'll note some structural issues there. I was short on eggs and the bread I was using was a dense fifty-percent whole grain loaf that didn't fall apart as well as well as one might like. Still, yummy, though and it should freeze well.
On to week two:
I left behind my lettuce and replaced it with a second bunch of callaloo which you can see on the left. You might remember that last year I was doing a world tour of callaloo recipes and I think I've got one left over; it's Korean if I remember correctly. No, I just checked my notes and it's Javanese. Unfortunately, it calls for fresh fingerroot which I don't think I can get hold of. Maybe I can substitute in galangal which is similar.
Next over is Chinese eggplant. This happens to be one of the ingredients that I had and didn't use during my recent blogging lapse so I've got a recipe already picked out, dim-sum-style shrimp-stuffed eggplant. It's surprisingly easy to make, at least on paper.
The scallion is a challenge as it's rare to come across a recipe that uses more than a half cup of it and there's quite a lot in this bunch (plus a few more I've got in the refrigerator). I've got a craving for scallion bread, but I recall the recipes I've found for it were rather light on the scallions. I'll have to take another look.
Next over is the yuca. I've never cooked yuca before; I don't think I've ever seen it in it's raw state before this morning. I've seen it boiled into mash and fried up as fries and haven't been impressed with either. A quick search doesn't turn up a lot of other options. Maybe I'll try roasting them; that might help.
The lemongrass is particularly fresh which means that it's tender enough that I won't have to pick it out of a stir-fry or soup. Lots of options there, but none of the other ingredients, except maybe the scallions pair well so it's not an efficient choice if I'm trying to get everything used in a week. I suppose I could use it as part of a dipping sauce for fried yuca, but it seems a waste of both ingredients.
The hibiscus I wasn't thrilled with when I simmered it up African-style as a side dish last year and the sorbet the year before wasn't a winner either, so I'm going to go back to making a drink from it. I'll probably boil it down to a syrup and add it to iced instead of having it straight, though.
And finally, the avocado. We had a few good Florida avocados last year, but most were watery and bland so I don't think much of Monroe avocadoes. But a)part of that was my fault as I didn't always use them at the peak of ripeness, and b)this could be a Choquette for all I know. If it's any good, I'll probably just make some guacamole. If it isn't, maybe I'll try roasting it to see if that helps.
And finally finally, as Marian and I discussed the group blog logistics, we came round to the idea that a Facebook page might work better as more people could find it and it would allow a better forum for general discussion than blog comments do. What do you guys think?
Wednesday, December 1, 2010
Persimmon honey ice cream
This is the first time I've cooked with persimmon and I knew very little about them. I did know (from a comment on a blog post last year) that they are close cousins of black sapotes so, after I got them at the fruit stand at the UM market I knew to let them get very soft and ripe before using them. I looked around for recipes and found a lot for baked persimmon puddings most of which included more sugar than fruit. I didn't want to go quite that route, but that did tell me that cooking the fruit was a standard preparation. The last time I tried to cook down a batch of black sapote I ended up ruining a pot; this has a similar texture so I wanted to add a little insurance by using honey instead of sugar. Plus the persimmons I had were mild enough that they needed a little flavor boost.
This is what I came up with:
Ingredients:
1 1/4 cup persimmon goop
1/2 cup very ripe (or frozen and defrosted) banana
2/3 cup honey
1 thick slice ginger
1 pinch salt
1 cup cream
a couple squeezes of lemon juice
a few dashes cinammon
a teaspoon or two vanilla
a few drops lavender
1. Put the persimmon, banana, honey, ginger and salt in a medium sauce pan. Cook over medium heat about 15 minutes, stirring regularly, until it's cooked down into a syrupy mixture.
2. Cool a bit. Mix in the cream and season with the other ingredients to taste. (These recipes are hard to write when I don't measure anything.)
3. Chill, churn and ripen.
One issue with fruit ice creams is that you have to balance flavor against texture. Every ounce of cream you add thins out the fruit. Here the texture's not bad, but the fact that there's more fruit than cream is pretty obvious. It's still smooth, it just isn't creamy. There's a subtle distinction there but I think you can tell what I mean from the picture, no? Leaving the compote chunky was a good idea; the variation in flavor, texture and color that gives was pretty nice.
The flavor isn't bold, but it's clearly present and there's a lingering fruit/lavender aftertaste that's quite pleasant. It tastes surprisingly like apple pie (a la mode). That's probably due to the cinnamon and ginger flavors over cooked fruit. I sort of regret adding so much that the persimmon doesn't come through clearly as itself--its flavor is well-blended with the honey and lavender--but it did need the help. Folks who've tried it have liked it, but nobody's fighting for seconds. That's probably because of the lack of creaminess and the flavors of a fruit they've never had before. I think I'll make a version of this with black sapote (and some different other flavor components) once we start getting that in the CSA shares.
Sunday, November 28, 2010
CSA week one - Monlar oo thoke
I know I said I wanted to do something boring with the daikon, but I did a bit of searching for recipes anyway and I found three pretty interesting options so I hope we see more daikon in the shares. I decided to go with this salad first because it's Burmese and I don't think I've ever had Burmese food before. I found this particular recipe in the Burmese collection at recipes.wikia.com but digging a bit deeper reveals that it's from the cookbook The Food of Asia. The only credits on the book say "text by Kong Foong Ling" and I don't know if "text" includes the recipes or just the commentary. I'm going to assume this is traditional.
The recipe calls for a large daikon, but I think the one I got in my share was more of a medium so I cut the other ingredients down by a third.
Ingredients:
2 Tablespoons rice vinegar
2/3 Tablespoon sugar
2/3 teaspoon salt
1 medium daikon, thinly sliced
1 medium shallot, thinly sliced [the original recipe calls for a small onion, but I think shallot is much nicer for raw applications.]
peanut oil for frying
6 cloves garlic, thinly sliced
1 1/2 Tablespoons peanuts
2/3 Tablespoon sesame seeds
2/3 teaspoon fish sauce
1 1/2 Tablespoons cilantro, chopped
1. Mix the vinegar, sugar and salt in a medium bowl until dissolved. Add daikon, toss to coat and chill for 15 minutes.
2. Soak shallot in cold water for 5 minutes. Drain. [I don't know what this step accomplishes that a rinse wouldn't, but it wasn't any bother so I went along with it.]
3. Meanwhile, heat oil over medium heat in a small pan until shimmery. Add garlic and fry until golden brown. [This doesn't take long so have your draining set up ready, keep a close eye and remove the garlic quickly once it hits the right stage. I was distracted, burnt my garlic and had to resort to the pre-packaged sort.]
4. Drain the oil from the pan and add the peanuts. Toast until they brown and start to smell toasty. Throw in the sesame seeds briefly. Shortly after the seeds start popping remove them and the peanuts to a food processor and grind until fairly fine. [Again keep a close eye or you'll end up making peanut/sesame butter that'll be pretty tasty but won't be of any use for this recipe.]
5. Remove the daikon from the brine and drain well. In a large bowl, mix the daikon and onion. Add garlic, peanuts and sesame seeds, then the fish sauce and cilantro. Toss well and serve with a Burmese curry.
To accomplish that last step, I made a simple Burmese chicken curry I found at asianonlinerecipes.com.
Ingredients:
1 large onion, roughly chopped
3 cloves garlic, squished
about an equal amount of ginger, chopped [the original recipe called for 5 centimeters of ginger. I don't really know how to interpret a linear measurement for something as irregularly shaped as ginger so I fell back on my default of using the same amount as I used of garlic.]
1 Tablespoon peanut oil
1/4 teaspoon belacan (Burmese shrimp paste) [There are a lot of types of shrimp paste and I only keep Chinese and Filipino on hand. Since belacan is fermented, Chinese is closer so I used that.]
2 chicken thighs, skinned, boned and cut into 1-2-inch pieces [Now that I look at it, this recipe doesn't call for cutting up the chicken thighs. Probably better not to, but I would remove the skin, I think.]
1/2 teaspoon salt
1 cup coconut milk
1/2 teaspoon chili powder
1/2 teaspoon tumeric
1. Add onion, garlic and ginger to a food processor (with a little water if necessary) and process until smooth.
2. Heat oil over medium high heat in a medium saucepan until shimmery. Add onion mixture and shrimp paste. Cook 5 minutes until starting to brown.
3. Add chicken, turn heat down to medium and cook a few minutes until the chicken loses its pinkness and the onion starts seriously browning.
4. Add salt, coconut milk and spices. Bring to a boil, reduce heat to low, cover and simmer 30 minutes. Stir and scrape the bottom on the pan occasionally.
5. Remove the cover and cook for 15 minutes or so to reduce the sauce by around half.
Serve over vermicelli noodles.
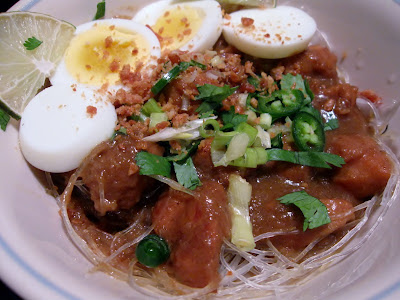
I found the curry's flavor a bit dull so I added traditional Burmese condiments: cilantro, scallion, fresh chili pepper, fried garlic and hard boiled egg.
After its quick pickle, there's little left of the daikon's original mild bite, but it's not entirely lost. It balances against the sweetness of the sugar and the toastiness of the garlic, peanuts and sesame seeds. The salad is a lovely fresh and bright crispness against the heavy richness of the curry.
As this is the first Burmese curry I've made, and as I used the wrong shrimp paste, it's hard for me to judge, but, even heavily condimentated I find it rather flat (to the point where it needs a salad to contrast against, but maybe that's on purpose). The seasoning was rather simple, so maybe I'm missing a bunch of flavors from hard-to-find ingredients that were left out of the recipe. I'll have to do some investigation to learn more about Burmese cuisine. I did like the way the onion/coconut sauce browned as it cooked down. It's an effect I quite like in Indonesian curries I've made and there it's been quite flavorful. Maybe that's down to the galangal and kimiri nuts that usually go into that sort of dish.
Anyway, the salad was nice. It should go well with Thai or Vietnamese dishes too.
Wednesday, November 24, 2010
CSA week one - Blue cheese, bacon and walnut green bean salad
Last minute Thanksgiving side-dish idea! I'm eating it by turkilessly and a day early myself, but you've probably got all the ingredients on hand and it would make a fine substitute for the usual green bean side-dish you had planned.
I modified this from a recipe I found on the Something blog. Kim Carney, who posted it, said that it came an issue of Parade Magazine. I tracked down the article and found it was by Sheila Lukins, author of the Silver Palate cookbook. Maybe I'm the only one who cares about proper attribution, particularly as I did change things around, but I care and it's my blog, so there.
Ingredients:
1 thick slice or 2 thin slices bacon
1/4 cup walnut pieces
3/4 pound green beans, stemmed and snapped into sensible lengths
2 ounces strong blue cheese, crumbled (the original recipe called for twice this. I cut it down to 3 and still found it a bit too much.)
1/2 Tablespoon Dijon mustard
1 Tablespoon red-wine vinegar
1 clove garlic, finely minced
1 Tablespoon parsley, finely minced (If you've got flat-leaf, or for some reason you like the texture of curly, chop less finely.)
1 and a bit Tablespoons extra-virgin olive oil
0. Bring a sizable pot of well-salted water to a boil.
1. Cook the bacon in your preferred manner until crisp. Reserve the fat. Chop the bacon.
2. Toast the walnuts.
3. When the water comes to a boil, add the green beans and cook until just tender, about 4 minutes.
4. Meanwhile, mix the mustard and vinegar in a medium bowl. Add the garlic.
5. Add the bacon fat (I had a teaspoon's worth) and enough olive oil to bring it to 1 1/2 Tablespoons total. Whisk until well-emulsified and slightly thickened.
6. Remove the green beans from the water into a colander. Run under cold water briefly and pat or spin dry.
7. Lightly mix the beans with the walnuts, cheese, parsley and bacon. Add the vinaigrette. Do not mix well or the chunky bits will all migrate to the bottom. Mix judiciously.
Serve with turkey.
This is quite a nice combination of flavors and textures. Texturally, the green beans had a bit of firmness left to them, the cheese was meltingly creamy (which is important. This is a warm salad and wouldn't work nearly as well if you let the beans cool all the way down before adding the cheese.), the bacon and walnuts crisp. The parsley is pretty much lost. You should probably use a couple Tablespoons so it can assert itself a little more.
ON the flavor end, the blue cheese dominates at first in each bite, but any combination of the other elements can rise to the front depending on the particular forkful you got. The vinaigrette lends just a little tang and doesn't overwhelm the other flavors. I liked the walnut and green bean pairing particularly, probably because I toasted the walnuts right to the edge of burning. That flavor pairs with the beans much better than raw walnuts did. Bacon and walnut is a very pleasant paring, too.
Hmm...I think I've just had an ice cream idea.
Saturday, November 20, 2010
CSA week one start-up
I apologize for slacking off on the blog recently. I got busy at work, then I was on the road for a bit and then I got busy again catching up after being away. I had ingredients on hand and interesting recipes picked out to use them, but the free time, energy and inclination to do serious cooking never came together. But that luxury of choice is in the past, the CSA has started. Fingers crossed that, as in past years, the weekly influx of produce will prove more inspiration than burden.
At the start of the CSA last year I said I wanted to perfect some of the recipes I had made in previous seasons instead of constantly trying new ones but I didn't follow through on that. I guess that's inspiration as burden. Huh. This year, I'm even more ambitiously unambitious. I want to not just redo recipes but also do more cooking not worth blogging about--thrown together stir fries and soups primarily. I'm tired of spending all my time thinking about cooking, cooking and then writing about cooking. I do have other interests; these video games aren't going to play themselves. We'll see if I can manage any sort of balance; it should add a little human drama to the blog even as it subtracts posts.
And one last blog-related thing before I get on with talking about the actual share. Marian of the Redland Rambles blog and I have talked a little about starting either a group CSA recipe blog or maybe a discussion group so folks who don't want to commit to regular posting can share their ideas and ask for suggestions. If you'd be interested in participating in either, please post a comment here or in Marian's CSA week one post. I think we'd need a least a half dozen folks involved to make it work.
At long last, let's see what we've got to work with this first week (well, fortnight. Thankfully, we're once again easing into this with no delivery next week).
Starting in the upper left corner, there's dandelion greens. I think I'd like to do another variation on hindbeh bil zayt with them. They work so well with deeply browned onions and garlic that I'm not particularly curious to try other combinations. Some of the parsley and garlic chives, also on the left side, will probably go in that. Otherwise, there's not so much there that I can't just keep them around for garnishing.
Next up is the daikon. I've struggled before finding daikon-centric recipes, but it's the utility starch of Japanese cuisine and often gets thrown into stews and such unremarked upon. That's how I'd like to use it this time around. Or maybe in a slaw; they work well in slaw or so I read.
I looked through my blog archives to see what I've already done for green beans, and it's quite a bit. There's over a dozen recipes there. But I also mention a cold green bean, blue cheese and bacon salad that I never got around to making. That sounds pretty good so I'll have to see if I can dig that recipe up.
There aren't enough cherry tomatoes there to do anything clever with. They'd go well in a salad, but I left the lettuce behind. I remember they grilled up well when my dad used to make shish kabobs. I wonder if that would work in my grill pan?
And finally, there's the bok choy (upper right) and yukina savoy (lower right). I think I'll just stir fry them up with an oyster-sauce-based sauce. That should be just dandy.
What do you guys have planned with your shares?
Tuesday, November 9, 2010
Fabada Asturiana
Fabada is a rustic Spanish bean and sausage stew. Pretty straightforward really, particularly if you invest in one of the ready-made fabada kits that Xixón Café sells at their meat counter. As you can see, they pack in the beans--fabas, a special Spanish variety not on the Publix shelves--a thick slice of Serrano ham, a couple links of chorizo and a link of morcilla de Burgos (a pork blood sausage with a lot of rice in the filling). There's a bit more to a proper fabada than that. They really ought to include the saffron and paprika, I think. Also, those beans about double in volume during an overnight soak so that sausage to bean ratio is a bit skimpy. I scrounged in my freezer and came up with a slice of ham hock and a couple more chorizo links--one Spanish, although a mass market brand, and the other of indeterminate South American ancestry. I really should improve my freezer labeling habits.
Anyway, after soaking the beans, I threw them into my slow cooker along with the Serrano ham, a few cloves of garlic, half an onion and half a green pepper. A lot of recipes didn't include these but you've got to have some vegetables. Those that did include them didn't agree on whether to chop and sauté them or just throw them in whole. I split the difference. I added a cup of stock and enough water to cover, about four more cups.
That simmered for a couple hours until the beans showed signs of tenderness. (An aside here: there was an article in the New York Times recently recounting a Mexican recipe that dispenses with soaking the beans and adds salt at the start and ends with tender beans after just two hours of simmering. It goes against all my experience but the author says it turned out fine. That author isn't Harold McGee so there's no explanation of why it turned out fine when we've all dealt with beans that have stubbornly refused to cook. Maybe I'll do some experiments myself.) Then I pricked the sausages with a fork so they wouldn't explode when cooking and added them to the pot along with good-sized scoops of sweet and smoked paprika and a pinch of saffron.
After another 45 minutes of cooking, the beans were tender and the sausages cooked through. I removed the sausages and ham and sliced them up. Some recipes don't simmer the sausages with the beans; instead they slice and fry them and add them at the last minute. That would add extra flavor to the meat while robbing it from the broth. I'd rather go the other way.
I had hoped more of the liquid would have boiled away at this point--fabada's supposed to be a thick stew, not soup--but it hadn't so I removed as much as I could and boiled it way down on he the stove top. I mashed the beans up a bit, as most recipes call for, returned the concentrated liquid and the meat, seasoned to taste with salt and pepper, topped with a little parsley and served.
Fabada is typically served with cidra and crusty bread, but I haven't got either today. For the cider I'm substituting a bottle of a spicy light ale and for the bread, a second bottle.
I've made my share of bean and sausage pots and this is certainly one of them. The variety of sausages is nice, I'll give it that. And the lack of heat in the spiciness is an interesting angle on the dish. It is quite tasty, but it's beans and sausages, of course it's tasty. Otherwise, fabada is rustic and hearty and perfect for the sort of cool evening Miami doesn't provide so often. I got pretty lucky to cook this just as the cool spell hit.
These beans have a pleasantly light and complex flavor. I wonder if the slow-cooker's low even simmer made a difference, or if it's the type of bean or if it's just that I've for once bought something other than whatever junk the supermarket has. I'll have to give those trendy heirloom beans a try and see if they can match this quality. I may have just ruined myself for the normal version of yet another staple. It gets inconvenient and expensive being a snob.
Subscribe to:
Posts (Atom)