I had a few different ideas of what to do with the zucchini this time around. My first choice was a couscous dish, but I decided to put it off until I can get hold of some merguez sausage (which means probably no time soon). This, instead, is a cross between these zucchini galettes, originally from Bon Appétit magazine, and a more traditional Greek kolokithopita. Or maybe it's just a quiche; I dunno.
Ingredients:
crust:
1 cup flour
1/4 teaspoon salt
6 Tablespoons cold unsalted butter, cut in chunks
2-4 Tablespoons cold water
filling:
1 large zucchini and 1 small summer squash, grated
1 small onion, sliced
2 cloves garlic
3 1/2 ounces well-flavored feta, crumbled
1/3 cup Greek yogurt [I substituted the sour cream I had on hand, but yogurt would be better.]
3 eggs
1 small handful flat leaf parsley, chopped
a little bit of fresh mint leaves, chopped
a little bit of fresh dill, chopped [I was out, but it's a traditional compliment to the other flavors in this dish.]
salt
pepper
pecorino romano or kefalotiri cheese if you can get it
0. Preheat your oven to 425 degrees.
1. For the crust, mix the flour and salt in a food processor. Add the butter and pulse several times until the butter is incorporated and the mixture looks a little coarse. Add the water Tablespoon by Tablespoon, pulsing in between, until the dough just barely comes together. Remove the dough to a work surface, work it into a ball, split in half, flatten each piece into a disc, wrap in plastic and chill in the refrigerator for a half hour.
2. Meanwhile, grate the zucchini and squash (or whatever you've got), mix with 1/4 teaspoon salt, put in a colander and let sit for a half hour. Afterward, squeeze out most of the moisture.
3. Heat olive oil and/or butter over medium-high heat in a medium pan. Add the onion and cook for a few minutes, stirring occasionally, until softened and slightly browned. Add the garlic and cook until fragrant. Add the zucchini and cook five minutes more until the zucchini is softened and slightly browned. Remove from heat.
4. Mix feta, yogurt and eggs in a large bowl. Add the zucchini mixture and the herbs. Add salt and pepper to taste.
5. Remove one of the dough discs from the refrigerator and roll out to about 10-inches in diameter. Place it into a 9-inch pie pan and adjust it so it's lining the pan properly. Pour in the filling and grate the romano cheese over top. I folded the excess dough over the top for a bit of the galette feel. You could top the pie with the other half of the dough instead if you'd like. I ended up saving it for another recipe.
6. Bake the pie at 425 degrees for 15 minutes. Reduce the heat to 375 degrees and bake for 25 minutes more until the filling is set and browned and the crust is golden. Cool at least five minutes before serving.
The pie filling is fluffy and the crust light and crisp so no faulting it on texture, but I'm disappointed in the lack of a strong zucchini flavor. I would have thought the purging and pan frying would have intensified it, but no. The pie's flavor is mostly just savory eggs, feta tang and fresh herbs. Maybe the zucchini flavors blended with the herbal notes? I think it's in there somewhere. Well, I'm not being judged on my use of the ingredient so it doesn't really matter. What's important is that the results are pretty tasty any which way.
A blog about the art and science of cooking with a particular focus on tinkering with recipes to create a more perfect dish. Also a fair bit about eating local, slow food and that sort of thing. Less about the ice cream these days.
Thursday, December 31, 2009
Monday, December 28, 2009
CSA week four - A couple of compicated salads
I don't think it struck me until just now, after the fact, that this week's CSA share (the half-share at least) is better suited to salads than cooking. I thought it was just my slow recovery from various ills that making me not feel like cooking, but with grapefruit, curly parsley, avocado, green pepper and tomato, this is just a raw foods sort of week.
As these are salads, there isn't much to say or illustrate preparation-wise. Chop everything up, mix it together, make the dressing and toss. Not much too it. The aforementioned complication comes from the sheer number of ingredients in each of these dishes. I only made minor tweaks in each so with no further ado, here are the recipes:
Italian Parsley Salad
Adapted from “Roast Chicken and Other Stories” by Simon Hopkinson (Hyperion, 2007)
Ingredients:
1/3 cup soft, fleshy black olives, pitted and coarsely chopped
1 bunch parsley, coarsely chopped
1 large shallot, chopped
1 ounce capers, rinsed of salt or brine
1 large garlic clove, finely chopped
7 large anchovy fillets, chopped
Dressing:
Freshly grated zest of 1 lemon
1/4 cup olive oil
freshly ground black pepper
juice of 1 lemon
salt, to taste [probably not a lot]
thin slivers of Parmesan cheese
crackers or biscuits or toast or bruschetta or suchlike
Mix the salad ingredients. Mix the dressing ingredients. Mix them together. Top with the Parmesan and serve with the crackers.
This has a pleasing combination of flavors that blend together in a pretty classic way and compliment the parsley while still letting it be the center of the salad. Both the texture and the somewhat less strident bitterness of flat-leaf parsley would work better; That's probably why the original recipe called for it. Still, it's still not bad with the curly parsley. The crackers are important in toning down the intensity of flavors, but it's still a bit much to eat on its own. It's better as a side dish to a straightforward piece of roasted meat, I think.
Avocado shrimp Thai salad
This is an unsigned recipe from Recipe4Living which is a community recipe website so there's no way to know where the recipe actually came from. No other versions of it online are immediately obvious so I can't track it down that way. They don't claim association with any old media source of recipes or have any chefs on staff either so far as I can see. I guess it'll have to remain a mystery unless one of their editors notices this post and wants to clear things up in the comments.
Ingredients:
1 hass or lula avocado, peeled, pitted and cubed
1 fluid ounce lime juice
1/2 pound shrimp, peeled and deveined, poached and chopped if they're larger than 'large'
1 large meaty tomato, [whatever sort our CSA tomatoes are is perfect for this sort of thing] coarsely chopped
1 1/2 green onions, sliced lengthwise and separated into four pieces then chopped into 2-inch lengths
1/2 small green bell pepper, diced
1/2 small red bell pepper, diced
1/4 cup bean sprouts [I left these out as the grocery that usually has them didn't this week. They would have been a nice addition even in that small amount.]
1/8 cup mint leaves, coarsely chopped
Dressing:
1/4 cup lime juice [You can get this out of one lime if you rough it up a bit, microwave it for 20 seconds or so and then ream it out with a fork.]
1 teaspoon Dijon mustard
1/2 cup vegetable oil [That's clearly way too much so I used only 1/3 cup which seemed to emulsify well with the amount of water-based ingredients.]
1/2 Tablespoon sesame oil
2 cloves garlic, finely chopped
1 inch knob ginger, grated
1/2 teaspoon brown sugar
zest from 1/2 lime
1 pinch crushed red pepper flakes
salt to taste
Mix the salad ingredients. Mix the dressing ingredients. Mix them together. Serve.
Now this is pretty darn good. There are so many different flavors and textures going on in here that every forkful is a different combination. Each starts with the bite of the dressing, sesame and lime foremost, blending as the crunch, creaminess or chew of the ingredients releases their individual flavors. The tartness gets to be a bit much after a full serving, though. I think that's because there is way too much dressing here. I think halving the amount would probably balance things a little better.
As these are salads, there isn't much to say or illustrate preparation-wise. Chop everything up, mix it together, make the dressing and toss. Not much too it. The aforementioned complication comes from the sheer number of ingredients in each of these dishes. I only made minor tweaks in each so with no further ado, here are the recipes:
Italian Parsley Salad
Adapted from “Roast Chicken and Other Stories” by Simon Hopkinson (Hyperion, 2007)
Ingredients:
1/3 cup soft, fleshy black olives, pitted and coarsely chopped
1 bunch parsley, coarsely chopped
1 large shallot, chopped
1 ounce capers, rinsed of salt or brine
1 large garlic clove, finely chopped
7 large anchovy fillets, chopped
Dressing:
Freshly grated zest of 1 lemon
1/4 cup olive oil
freshly ground black pepper
juice of 1 lemon
salt, to taste [probably not a lot]
thin slivers of Parmesan cheese
crackers or biscuits or toast or bruschetta or suchlike
Mix the salad ingredients. Mix the dressing ingredients. Mix them together. Top with the Parmesan and serve with the crackers.
This has a pleasing combination of flavors that blend together in a pretty classic way and compliment the parsley while still letting it be the center of the salad. Both the texture and the somewhat less strident bitterness of flat-leaf parsley would work better; That's probably why the original recipe called for it. Still, it's still not bad with the curly parsley. The crackers are important in toning down the intensity of flavors, but it's still a bit much to eat on its own. It's better as a side dish to a straightforward piece of roasted meat, I think.
Avocado shrimp Thai salad
This is an unsigned recipe from Recipe4Living which is a community recipe website so there's no way to know where the recipe actually came from. No other versions of it online are immediately obvious so I can't track it down that way. They don't claim association with any old media source of recipes or have any chefs on staff either so far as I can see. I guess it'll have to remain a mystery unless one of their editors notices this post and wants to clear things up in the comments.
Ingredients:
1 hass or lula avocado, peeled, pitted and cubed
1 fluid ounce lime juice
1/2 pound shrimp, peeled and deveined, poached and chopped if they're larger than 'large'
1 large meaty tomato, [whatever sort our CSA tomatoes are is perfect for this sort of thing] coarsely chopped
1 1/2 green onions, sliced lengthwise and separated into four pieces then chopped into 2-inch lengths
1/2 small green bell pepper, diced
1/2 small red bell pepper, diced
1/4 cup bean sprouts [I left these out as the grocery that usually has them didn't this week. They would have been a nice addition even in that small amount.]
1/8 cup mint leaves, coarsely chopped
Dressing:
1/4 cup lime juice [You can get this out of one lime if you rough it up a bit, microwave it for 20 seconds or so and then ream it out with a fork.]
1 teaspoon Dijon mustard
1/2 cup vegetable oil [That's clearly way too much so I used only 1/3 cup which seemed to emulsify well with the amount of water-based ingredients.]
1/2 Tablespoon sesame oil
2 cloves garlic, finely chopped
1 inch knob ginger, grated
1/2 teaspoon brown sugar
zest from 1/2 lime
1 pinch crushed red pepper flakes
salt to taste
Mix the salad ingredients. Mix the dressing ingredients. Mix them together. Serve.
Now this is pretty darn good. There are so many different flavors and textures going on in here that every forkful is a different combination. Each starts with the bite of the dressing, sesame and lime foremost, blending as the crunch, creaminess or chew of the ingredients releases their individual flavors. The tartness gets to be a bit much after a full serving, though. I think that's because there is way too much dressing here. I think halving the amount would probably balance things a little better.
Wednesday, December 23, 2009
CSA week three - Black sapote toffee cake
This is an adaption of a date cake recipe created by Chicago pastry chef Kate Neumann that I found on Food and Wine's website. I've got the idea that black sapote can be successfully substituted any time you find dried fruit that's been simmered and softened as Neumann calls for here.
Ingredients:
CAKE
1 cup black sapote gunk (two black sapotes peeled and seeded)
1 Tablespoon molasses
1 cup all-purpose flour
1 teaspoon baking powder
1/4 teaspoon baking soda
1/4 teaspoon cinnamon
1/4 teaspoon ground ginger
salt
1 stick unsalted butter, softened
1/2 cup plus 2 Tablespoons dark brown sugar
1 large egg
1/2 teaspoon pure vanilla extract
1/2 cup pecans
1 handful finely shredded coconut
2 Tablespoons corn syrup
TOFFEE SAUCE
1/2 stick unsalted butter
1/2 cup dark brown sugar
1/2 cup heavy cream
1/8 teaspoon salt
[The original recipe called for double the amount of sauce, but that's quite excessive. As you'll see, even this amount is generous.]
0. Prepare a 8 to 10-inch cake pan by buttering the sides, placing parchment paper in the bottom and buttering the paper. Preheat oven to 350 degrees.
1. [The original recipe called for 7 ounces of dates simmered in 3/4 cup of water until it boiled down and then blended smooth with the molasses. No need to do any of that with sapote.] Just whisk the sapote gunk with the molasses until it's fairly smooth.
3. Mix flour, baking powder, baking soda, cinnamon, ginger and 1/4 teaspoon salt.
4. Use your mixer to beat butter with 1/2 cup brown sugar until fluffy. Beat in the egg, then the vanilla. Mix in the dry ingredients. Mix in the sapote mixture. Beat until fluffy again. Pour into prepared cake pan and smooth out. Bake for 25-35 minutes depending on the size of your cake pan. [I had a 10-inch pan instead of the 9-inch pan the original recipe called for so I reduced the baking time from 30 to 25 minutes.]
5. Meanwhile, break up the pecans to your preferred size. Spread them and the coconut into a pie plate or baking dish. Add then to the oven for 8-10 minutes until fragrant and golden.
6. Also meanwhile, mix the corn syrup with the remaining 2 Tablespoons brown sugar and another 1/4 teaspoon salt in a small bowl. Heat briefly in the microwave to get the sugar good and dissolved.
7. Remove the cake from the oven, cool slightly and then dump it out onto a cooling rank. Peel off the parchment and return it to the cake pan. Sprinkle the pecans and coconut onto the parchment then drizzle with the corn syrup mixture. Return the cake to the pan, preferably the same side up. [This is much easier said than done. If you've got a method that works for this sort of thing, do please share.] Retrieve the broken pieces of cake from the counter and pack them back into the cake pan as best you can.
Return to oven and cook another 12-17 minutes depending on the size of of your cake pan. When the cake is springy and dry, remove from oven, cool slightly and then invert onto a cooling rack. Peel off the parchment trying to retain as much of the nuts and coconut as you can. Return to cake pan or place on serving platter.
8. For the toffee sauce, place the butter and brown sugar into a small pot. Melt the butter over medium heat, stirring to dissolve the sugar. Bring to a boil. Remove from heat and add cream. Stir until blended and then return to heat.
Return to a boil and simmer 5 minutes. Stir in salt, let cool slightly and then pour over the cake. Let sit overnight to soak in.
Well that was a bit of a project, but the results are pretty impressive:
This was a big hit in the office. It's pretty rich, but not nearly as over-the-top as you'd think from looking at it. Despite everything else, you can taste the black sapote in there with its not-quite-chocolately flavor undergirding the bright toffee and nuts. Combined with the brown sugar, it's hard to identify, but it's an important component giving the cake depth and keeping it from becoming cloying.
The texture is deeply moist, but still caky, not like those brownies people try to pass off as extra-rich because they're only half-baked. The toffee did successfully epoxy the broken cake back together which is a bonus.
While I'm not going to say the toppings are a bad thing, the cake is pretty good on its own. You can probably save some of that trouble and just dust it with powdered sugar and you'd still be pretty happy with the results.
Sunday, December 20, 2009
CSA week three wrap-up, week four start-up
I'm afraid I haven't got much to say today. I was ill most of last week and, while I'm on the mend, the antibiotics are giving me tummy trouble and cold viruses have moved in as the bacteria have retreated. I haven't much appetite and little inclination to cook or think about what I might do with this week's share.
I did make some ice cream with last week's avocado that didn't turn out so great. I think I have everything written up for that. I'll post it if I've got it all.
Also, I've got a recipe lined up for the black sapote, which are finally ripe, but I'm waiting until I actually feel like eating the cake that will result from it.
As for this week, I'll post something once I'm feeling better. Right now, I don't even want to think about it. Sorry.
I did make some ice cream with last week's avocado that didn't turn out so great. I think I have everything written up for that. I'll post it if I've got it all.
Also, I've got a recipe lined up for the black sapote, which are finally ripe, but I'm waiting until I actually feel like eating the cake that will result from it.
As for this week, I'll post something once I'm feeling better. Right now, I don't even want to think about it. Sorry.
Friday, December 18, 2009
CSA week three - Beef with betel leaf and lemongrass stir fry
My turn to tell how I dealt with this week's CSA mystery ingredient. I found a pretty simple Vietnamese-style stir fry that used the betel leaves as a substantial part of the dish--as a vegetable, not just a flavoring. Unfortunately, that meant that after I scaled everything else down to fit the five leaves I had, I only had enough for one modest serving. Here's my modified version:
Beef tossed with wild betel leaf and lemongrass
Original version created by Luke Nguyen
Ingredients:
100 g lean beef sirloin, thinly sliced
5 betel leaves, roughly sliced
1/2 lemon grass stalk (white part only), finely diced (peel off dry outer shell)
1 small clove garlic, finely diced
most of 1 hot chili, finely diced
1 Tablespoon vegetable oil
1 teaspoons fish sauce
1 teaspoon soy sauce
2/3 teaspoon sugar
a little cilantro, chopped for garnish
the rest of the chili, finely sliced for garnish
0. Mix fish sauce, soy sauce and sugar in a small bowl.
1. Heat a medium pan to over high heat to smoking hot, add oil and lemon grass, cook briefly until fragrant. Add garlic and chili. Stir fry until they become fragrant too, then add beef.
Stir fry two minutes, until beef is cooked through and starting to brown. Add seasoning mixture and betel leaf. Stir fry 1 minute more, until betel leaf is wilted.
2. Remove to a plate, garnish and serve with rice.
I know some others had difficulty with the flavor of the betel leaves, but I liked them. Maybe it's the difference between having them raw or cooked. The cooked betel leaf flavor is quite distinctive and hard to describe. It's a bit spicy, a bit smoky, a bit medical. It's one of those odd distinctive flavors like curry leaves and kaffir lime leaves that have no easy paralell for comparison in Western cuisine. I can see it being a bit rough on it's own, but I wouldn't want to eat straight curry leaves or kaffir lime leaves either. They're meant to be mixed with other flavors. Here, moderated by the sugar and complimented by the lemongrass, the closest comparison I can find is root beer--the real stuff, not the artifically flavored version you can commonly get. I quite liked how it paired with the beef; it would probably work well with pork, too, I think.
The dish as a whole needs a little tweaking, though. Two minutes on high heat is too much for thinly sliced sirloin and the soy sauce ended up a caramelizing when I dumped it into the hot pan. If I had been making a full-sized recipe in a wok, that would have worked better. But, overall, it was pretty tasty and it did show the betel leaves to good advantage.
Wednesday, December 16, 2009
CSA week two - Chocolate and roasted avocado ice cream
The combination of chocolate and avocado is unusual, but not entirely unheard of. I understand that chocolate-avocado milkshakes are common in Viet Nam and Indonesia. I can see how the creaminess of the avocado could work; as for the flavor, well, I've got a Monroe so it hasn't got much. Using it as is would have been the easy way out, but I decided to try to intensify the flavor and then see what I could do with it.
I chopped up the avocado, sprinkled it with brown sugar for caramelization--I considered adding a bit of butter as I would if I were caramelizing bananas, but it's got plenty of fat of its own--and baked it at 400 degrees for 30 minutes, stirring a couple times. If you compare the before and after pictures, you can see that it's shrunk considerably. The flavor isn't, I think, a lot more intense, but it has transformed. There are a lot of warm, toasty notes now.
Still, the cup of caramelized avocado wasn't really enough to flavor a full batch of ice cream so I looked around for some additions that would pair well without overwhelming it. And also I wanted to use up some scraps left in the refrigerator. Here's what I came up with:
Ingredients:
1 cup caramelized avocado mush
1/4 cup pineapple
1/4 cup coconut milk
1 1/4 cup milk
1 cup cream
3 Tablespoons dutch process cocoa
1/3 cup light brown sugar
I blended all that together and put it in the back of the refrigerator to chill. The texture seems about right at this point so that's good, but I'm still concerned the flavor isn't bold enough to survive freezing. I may add some spices after I taste the fully chilled mixture.
...
Actually, the flavor intensified, but it did turn somewhat bitter. I added another quarter cup of sugar to compensate.
So, to churning. It froze very quickly. Look how it glommed onto the dasher. I've never seen quite the like before and I don't think that bodes well for the texture of the final result. I was hoping the fat in the avocado would help keep things creamy, but I don't see that happening. The fat's not there in the mouthfeel either. It feels like sherbet despite all the cream that went into it. Here's hoping that ripening will help.
...
And here's the final product. The fact that I didn't bother to deal with the freezer burn is probably a biasing factor, but I think despite that, you can see that that it's not terribly attractive. The texture could be creamier--it's definitely more sherbet than ice cream rich--but it melts smooth if you let it warm up out of the freezer for a while before serving. I'm going to blame the roasting here as there are plenty of avocado ice cream recipes that don't appear to turn out like this.
The flavor starts with cocoa, clearly not intense or creamy enough to really feel like chocolate, with a little tropical fruitiness rounding it out and fades into bitter roasted notes not dissimilar to those you get with very dark chocolate. There's definitely a note of avocado there at the end, too, but difficult to identify if you don't know what you're looking for. It might just be an off note if you're expecting straight chocolate (upon which this is definitely no improvement). It just seems like cheap nasty chocolate ice cream. I'm going to take this back home before it ruins my reputation around the office.
Tuesday, December 15, 2009
CSA week three - Morshan
This recipe is all over the web, cut and pasted on recipe sites and blogs (usually minus attribution and copyright information. This seems to be the origin.), but I can't find any indication that anyone's actually made it.
That's not right; somebody needs to step up, cook it and find out if it's any good and it may as well be me. I want to make this post easy to find for anyone who finds all the other copies so I'm not going to modify or rewrite it at all, just cut and paste like everyone else.
Chickpeas and Swiss Chard in the Style Tunisian Sahel (Morshan)
Recipe from: Mediterranean Cooking, Revised Edition, Copyright ©1994 by Paula Wolfert
Makes 4 servings
3/4 pound Swiss chard leaves, stemmed, rinsed and torn into large pieces [My CSA bunch yielded a half pound of leaves so I added in the thinner stems.]
2 large cloves garlic, peeled
1/2 teaspoon coarse salt
1 teaspoon ground coriander
1 small dried red chile
2 tablespoons olive oil
1/2 cup minced onion
2 teaspoons tomato paste
1 cup cooked chickpeas with 3/4 cup cooking liquid [There's about 3/4 cup liquid in a can of chickpeas so that worked out fine.]
1 lemon, cut in wedges, optional
1. In pot steam, parboil or microwave chard leaves until tender, about 5 minutes. [Our chard started out pretty tender so I cut this down to 2 minutes]
2. Set leaves in colander to drain.
3. Squeeze out excess moisture and shred coarsely.
4. Crush garlic in mortar with salt, coriander and chile until thick, crumbly paste forms.
5. Heat olive oil in 10-inch skillet and saute onion until pale-golden.
6. Add garlic paste and tomato paste and stir into oil until sizzling.
7. Add chard, cooked chickpeas and cooking liquid and cook, stirring occasionally, 10 minutes.
8. Remove from heat and let stand until ready to serve. (Contents of skillet should be very moist but not soupy. For looser texture, stir in more chick pea cooking liquid.)
9. Serve warm, at room temperature or cold with lemon wedges.
It's not bad, but not really inspired either. Maybe its because I haven't had a bowl of greens that wasn't callaloo in a while, but the chard seems really blah. The subtle spice and lemon are nice, but there's nothing much else going on here. I expect bigger flavors from Tunisian cooking. Judging from the other recipes on Ms. Wolfert's site, I think this has been wimped out for the Western palate and probably chard has been substituted in for another, more flavorful, green. It's a shame I couldn't find any other recipes for the dish for comparison.
Sunday, December 13, 2009
CSA week three - Thai basil eggplant
There are lots of recipes on the web for Thai dishes using basil and eggplant. Mostly they're just: fry eggplant, add soy sauce and basil, serve over rice. That not only isn't going to satisfy me, I wouldn't get a blog post out of it. So I started with the most complicated recipe I could find (which, as a bonus, uses the bell pepper) and messed with it.
Ingredients:
1 medium-sized European eggplant, sliced into 1"-square cross-section strips
1 1/2 suntan bell peppers (or one red and one green), sliced into short broad strips
1 medium onion, chopped into pieces roughly the same size as the pepper pieces
hot peppers to taste, finely chopped
all the garlic left in the house, finely chopped (up to 3 Tablespoons, but I only managed 1)
1 generous handful Thai basic, roughly chopped
3 Tablespoons Thai fish sauce
1 Tablespoon soy sauce
1 Tablespoon brown sugar
1 chicken thigh, deboned, deskinned and cut into bite-sized pieces (meat is optional, but I'm compensating for less eggplant than the 3 Chinese eggplants the original recipe called for. If you want to stay vegetarian bar the fish sauce, tofu would be fine or just reduce the amount of onions and peppers.)
1/2-3/4 cup warm water
2 teaspoons corn starch
2 Tablespoons warm water
Instructions:
1. Mix fish sauce, soy sauce and brown sugar. Add the chicken and put it in the refrigerator to marinate. Mix the cornstarch and 2 Tablespoons water.
2. Heat a wok over high heat until it's smoking hot. Add a Tablespoon of cooking oil, the eggplant and a pinch of salt. Fry, stirring frequently for 5 minutes, until the eggplant is softened and, in spots, browned. Remove eggplant to a large bowl.
3. Heat another 1 Tablespoon of oil. Add onions and bell peppers and cook for 5 minutes, until both are softened and a little browned and the onions turn translucent. Remove to the bowl with the eggplant.
3. Heat a third Tablespoon of oil. Add the garlic, hot pepper and fry briefly. Add the chicken (drained of the marinade) and cook until the chicken loses its pinkness. Add the vegetables and mix thoroughly. Add the marinade, and a judicious amount of the warm water. Wait until the water starts boiling and add the basil then cook for at least one minute. When everything looks about right to you, add the cornstarch and take off the heat. Stir until the sauce turns glossy and thickens.
Serve over rice, noodles or a salad.
Hmm...not bad, but not fabulous. The texture of the vegetables is just right--soft but with a little firmness left to the bite. But the sauce isn't quite as flavorful as I'd like. A bit more fish sauce, a squeeze of lime and a whole lot of sriracha wakes it up, but the balance is off. Stock instead of water would help, but I think I just don't have enough flavorings for this much vegetation. Maybe my ratios were off.How big are medium-sized Chinese eggplants anyway?
Saturday, December 12, 2009
Week two wrap-up, week three start-up
Not much to wrap up. The black sapotes are still green and the avocado only ripened enough to use today. That leaves a stir fry with half the bok choy (using Guilin chili sauce which was a nice match) and a couple salads using up most of the lettuce. My two-part secret to satisfying dinner salads: a) bacon, b) skip lunch.
So, what have we got this week? There's eggplant and Thai basil which should go together nicely. It's the wrong sort of eggplant for a Thai dish, but I think that's mainly a textural issue, not a flavor one, so close enough.
There's betel leaves. I've found a Vietnamese recipe that uses them with the remaining lemongrass I've got kicking around that I'll probably go with.
The chard I'm thinking will be lovely either with lentils (which I've done before) or chickpeas (which I haven't). Maybe white beans. I've found Chilean and Tunisian recipes that look good.
The cucumber I'll use to make some tzatziki to go with the keftede I made.
The pepper, like last week, will find its way into some recipe. And the tomatoes I'll probably just snack on.
I left the green beans behind since I still have plenty in the freezer. That just leaves the curry leaves I picked out of the extras bin. I'll probably do something Indian with them since I've got those two other southeast Asian recipes lined up. Exactly what I'll figure out later. Since they're extras, I feel a little less obliged to come up with something interesting for them.
That sounds like a plan. But first I've got to deal with the avocado.
Friday, December 11, 2009
CSA week two - potsticker redux
When I set out looking for recipes, I wanted to find a pork and garlic chive recipe distinct from all the other sorts of Chinese dumplings. Not only didn't I find one, I can't even find a name for them distinct from the rest. Pork and chive seems to be the basic default from which those variations stem.
Given that discovery, there wasn't anything stopping me from winging it. Not that there ever really is, but if there is a traditional recipe for what I'm making, I feel obliged to at least try it. Since there is only a continuum of options, I just looked at what I had around and tossed some ingredients together.
Ingredients:
1/4 cup pork
1/4 cup beef
1 bunch garlic chives, finely chopped (~1/2 cup)
1 inch ginger finely grated (with a microplane is ideal)
6 small dried shiitake mushrooms, rehydrated
2-3 ounces firm tofu
1 Tablespoon rice wine
1 Tablespoon soy sauce
1 drizzle sesame oil
salt and white pepper to taste
no garlic
no scallion
no cabbage (so the chives are really the star of the show)
1. Grind beef and pork, until it doesn't quite form a paste.
2. Grind together mushrooms and tofu. The broken down tofu had an unexpectly sticky texture which let me do without the egg I was going to add as a binder.
3. Add everything else and mix well together. Chill for a whle to make it easier to work with.
I had a little trouble filling my wrappers. They've been in and out of the freezer a few times now and the edges are getting dried out and difficult to make stick together. I ended up bundling some of the dumplings up in burrito-style wraps just to get them to hold together. I had more trouble just with my lack of facility with the dumpling filling-process. I underfilled the dumplings and didn't get all the air out, so these aren't very elegant.
But, pretty or otherwise, the cooked up just fine. Surprisingly, despite the wrapping problem, the batch I made were all sealed air tight so they blew up like balloons during cooking and then collapsed back down.
The filling's a little dry, so maybe the egg would have been a good idea after all. Or maybe a little more of the rice wine and soy sauce as a boost in those flavors wouldn't hurt. Then again, I'm not using a dipping sauce which solve both those problems.
The beef isn't bad, but the combination of beef and chives brings thoughts of beef stew topped with chive dumplings or steak and baked potato--neither of which are helping me enjoy these dumplings. But that's my brain's fault, not the dumplings'. I tried something different and something different is what I got. There are some plusses here even if beef may not have been the best choice. The tofu binder is pretty interesting and the chive flavor is coming through nicely.
Wednesday, December 9, 2009
CSA week two - Zucchini and bulgar keftedes
This is the recipe I mentioned on Saturday, but I misremembered my geography. These are Greek meetballs, not Spanish. More specifically, this are a variation on a recipe by chef Jim Botsacos of Molynos in New York based on Macedonian and Thracian versions. Although, to tell the truth, because I couldn't get kefalotyri cheese or ouzo (I chose the grocery to shop at poorly) and because I cut down on the mint (I've had a bad experience with overly-minty meatballs before) [link], these aren't all that Greek at all.
The recipe I'm vulgarizing I found at the Atlantic's food channel.
It goes something like this:
2 Tablespoons olive oil
1 pound zucchini and/or squash, grated
1 cup onions, finely chopped
1 chopped hot pepper, or red pepper flakes to taste
1 cup bulgur wheat
2/3 cup milk
1 pound ground sirloin
2 eggs
3 cloves garlic, minced
1/4 cup fresh mint, finely chopped
1/3 cup fresh flat-leaf parsley, finely chopped
2 Tablespoons dry white wine
1 Pecorino Romano cheese, finely grated
2 teaspoons kosher salt or to taste
flour for dredging
oil for deep frying
1. In a large cast iron pan, heat the olive oil over medium heat. Add zucchini and sauté for 10 minutes, until they become meltingly soft. You don't want browning, but you do want the zucchini to lose a good bit of moisture. That means you should use a 10-inch pan so the zucchini is piled up and steams somewhat instead of a real proper sauté.
Add the onions and peppers and cook, stirring frequently, 2 minutes longer until onions become translucent. Remove from heat and stir in the bulgar wheat. When the pan seems cool enough that the milk isn't going to sizzle away, stir in that too. Let stand for 15 minutes until the bulgar softens.
2. Meanwhile, in a large bowl, mix the ground sirloin, eggs, garlic, mint, parsley and wine. When the zucchini mixture is ready, mix it in too. Mix in the cheese and salt. Cover and refrigerate for at least 1 hour. [The recipe says up to 8 hours. I don't know what happens after that.]
3. Cook a small amount of the mixture in a pan or microwave to check for seasoning. Adjust if necessary.
4. Heat frying oil in whatever you like to deep fry in (I use my flat-bottomed wok a.k.a. migas pan). Measure a heaping Tablespoon of the mixture (I found a coffee scoop worked well), flatten into a thick patty and dredge in flour. Shake off excess flour and fry in batches for 10 minutes, flipping halfway through if your oil is shallow. You're aiming for a deep browning, but not a thick crust. Transfer to paper towels to drain.
Makes around 50.
Serve hot or room temperature, preferably with a yogurt sauce or a Greek salad. Or just pop them into your mouth while you're cooking as soon as they're cool enough to handle.
These are pretty darn tasty. It's got that sort of meat loaf nature of meat, vegetable and starch that have all absorbed each others flavors. It's weird that you can't even pick out the mint or the beef, which actually tastes a bit more like lamb. Other than a little chewiness from some of the bulgar, the textures have melded together too. This would be a great way to sneak zucchini into someone's diet.
Monday, December 7, 2009
CSA week two - Italian dandelion greens and penne rigate
That looks pretty tasty, doesn't it? Well, in reality it's barely edible. As the Tropical Locavore (who really ought to change the name on her profile picture if she wants to remain psuedonymous) complained earlier today, these greens are intensely bitter.
I used the traditional cooking method of blanching then sautéing, but it really didn't help much. Maybe a longer boil would draw out more of the bitterness? I found the water afterward to be flavored quite nicely, actually, and used it to cook the pasta.
The recipe in the newsletter that uses the greens raw is definitely contraindicated. Save that for when we get some chard.
I'm not saying to throw the dandelion greens out; just use them judiciously, balancing the bitterness with other strong flavors. I used a handful along with some of the bok choy in a yakisoba last night where a touch of bitterness was a pleasant element. I can't see them staying fresh long enough to use up a whole batch this way, but at least you'll get some good use out of them.
Sunday, December 6, 2009
Paradigm: Redux Art Basel Dinner
This weekend, as part of Art Basel, there were a series of dinners with chefs offering seven-course menus inspired by the work and philosophy of an artist they're paired with. The events were put together by, Violeta and Jason, whose last names I didn't I didn't catch when they introduced themselves. If either of you are reading this, please feel free to explain more about yourselves and the project in the comments.
I attended the Friday evening dinner. The chefs were Kurtis Jantz and Chad Galiano from the restaurant Neomi's. There, they do a weekly “restaurant within a restaurant” that they call Paradigm where they explore new techniques and ideas. Here's a write-up of one of those evenings by Frodnesor who was also there for Friday's Paradigm: Redux. The new technique most prominent this evening was sous vide which was used on most of the courses. Nothing seemed squished so they must have just used the temperature controlled water bath aspect and not the vacuum pack bit. They described their style, at least for the night, as Peruvian cuisine influenced by Southern cooking. This meal, I think, was more the other way around.
The evening's artist was Stephen Gamson who works with what he calls "modern hieroglyphics". Symbols important to us today that will be puzzling in a thousand years--ampersands, stick figures sitting around a table, etc--familiar icons open to personal readings all presented in big clear relief against a monochrome background. Now, if you had asked me to pair food with his art, I'd have gone with a Happy Meal. Plainly presented icons deliberately without meaning or context says starch, salt, sugar and fat to me. He mass produces close variations, just changing the colors, which also speaks to fast food. But the chefs said the clean geometic style was something they had in common and, judging from the food they presented, yeah, I can see it.
The dinner was held in Penthouse 2 of 4 Midtown in Miami Beach which has this gorgeous view of downtown (except in focus). I probably should have gotten a shot of the room itself. There were lots of people with cameras there; I'm sure you can find some if you look. They'll probably also have taken pictures of the chefs and the artist. I'm not comfortable taking pictures while someone is talking to me so I only shot the food. If you've got pics to share, please post links in the comments.
The first course was Stick Figure Anticuchos--grilled baby octopus marinated in green Tabasco and lemon with an aji panca tarta and deep fried chicken liver with a Boscoli olive sauce and Cajun cancha corn. The baby octopus flavorful with a hint of citrus. The liver had a lot of flavorful too with, unfortunately, just a hint of burnt. The breading had an unusual powdery texture that a fellow sitting near me attributed to a chemical I heard as "tri-salt" that's intended to keep the breading from getting soggy, but a search on that term and variations doesn't turn anything up so I don't think I've got it right. Seems a sensible choice for catering; Penthouse 2 had quite a small space for the chefs to work in so I understand why they would use such a thing. I wasn't thrilled with the results, but I wouldn't have liked soggy breading either. That said, the central flavors were unchallengingly pleasant, prominently displayed, straightforward and familiar, presented in bold contrast, which I thought was a really good match to the art without going trashy as my impulse was.
The second course was a surf-n-turf: an oxtail meat pie--the meat cooked sous-vide (and the tougher bits pressure cooked)--topped with pepper jelly and a green bean-lobster salad dressed in home-made red wine vinegar and oil and topped with a microwaved corn cake. The pie's crust was light and flaky, the meat tender, the jelly sweet and tart without a whole lot of heat. A very nice little morsel. The lobster salad had some nice textures, but was under-seasoned to my tastes. The corn cake was fuffily light, sweet and brightly flavored. That bit was really interesting in both technique and result.
Third course was Frod's Shrimp Dickles--the pickled shrimp (an escabeche technically) based on a recipe from Frodnesor's mother, although he said it was quite different by the time it hit our plate. The shrimp were paired with a honey-mustard Brussel sprout slaw and home-made white cheddar/Parmesan cheese-its. I liked the sweet light pickle that let the shrimp flavor through without drowning it in vinegar. The slaw was crisp without being too difficult to deal with and creamy without being over-dressed--a difficult balancing act well pulled off. Slaw's tricky. The cheese-its were a bit heavy, but had a lot of real cheese flavor. I thought the flavors played well against each other, but the combination of textures wasn't as coherent.
Fourth course was "Meat". The chefs described the dish as a play on the Publix meat department and it's dissociating effects from where meat comes from. It's an Angus prime sealed in a cryovac with a few flavorings and kept at 45 degrees C for an hour then chilled, chopped and mixed with a little parsley and onion. In the center is an egg yolk from an egg cooked to 64 degrees C which gives it a putty-like texture. We were given condiments to go with: caper salt made by drying and grinding capers to a powder and 'whas dis here' sauce, a homemade Worcestershire sauce that came with a silly story about how Worcestershire sauce came by its name despite being really invented in New Orleans. The meat had a quite pleasant tender texture and had the classic tartare flavors (although with the slight difference of quite rare beef instead of raw). I thought it had, perhaps, a little too much egg yolk for the amount of meat, or maybe I should have mixed it all up to more evenly distribute it. The cool, but not, cold temperature it was presented at brought out the best in the flavorst. A pleasant dish with in interesting presentation that made some sense with the art.
Fifth course was the Golden Egg - scrambled eggs cooked very slowly in a sous vide bag to 71 degrees which the chefs, through, experimentation found to be the precise temperature for perfect results when the egg has something mixed in (70 degrees for plain eggs). In this case, truffles. Too my mind, too much truffles although some would claim there's no such thing. The texture is a little odd--creamy but dry. Not something you can get in a pan very easily if at all. I found the novelty a little unsettling, really.
Sixth course was pork belly cooked sous-vide to 57 degrees in a ham-style glaze made of Inca cola and pineapple juice. It was paired with whipped spiced banana, cilantro cocoa kettle corn, yogurt spheres and white chocolate powder. That's pretty complicated, so I think the art went out the window for this course. This was the meatiest pork belly I've ever encountered; maybe it was compressed by vacuum packing? The meat was tender and the fat melty as one would like. The glaze didn't glaze so well, but it made a nice enough sauce. I thought the banana foam made a tasty combination and I liked the flavor of the popcorn with the pork (although not the texture so much). The yogurt spheres and white chocolate not so much.
And finally, dessert. This was prepared by guest pastry-chef Jenny Rissone who worked under one of the main chefs six years ago. It's monstera deliciosa, a fruit you may recall I had a heck of time dealing with, in a napoleon with meringue wafers and paired with dulce de leche gelato encased in sugar globe. The frosting of the globe is from the freezer; those with gelato that wasn't frozen solid had beautiful shiny green Christmas-ornament globes. I quite liked the combination of the soft monstera kernels with the cream and the crisp meringue. The fruit was just a touch under-ripe--other people at the table thought it was carbonation, but it was the monstera feebly trying to kill us--but had lots of its bubble-gum-esque flavor. The gelato was creditable enough, but I thought the candy shell made it too sweet. Frankly, I would have been happy with just the napoleon.
Whoo, that took nearly as long to write up as it did to eat. Overall, I liked the dinner even if nothing jumped out and wowed me. But neither did the art so maybe that was intentional. If you went, what did you think?
Saturday, December 5, 2009
CSA week one wrap-up, week two start-up
That first share, even a full, is always easy to use in a leisurely way over a full two weeks. That is, if you can keep everything from rotting. I ended up throwing away the turnip tops which were a bit past prime to start with and didn't keep well and just a bit of lettuce. My inflated bag experiment did a great job of keeping the mizuna and callaloo fresh until I got around to using them. Moisture accumulated on the sides of the bag, but since they were well away from the greens nobody got hurt.
I did make the dilly beans as I said I would, but I screwed up substituting kosher salt for pickling salt so they're not very good. I think I can tell through the saltiness that I don't care for the combination of dill and cider vinegar anyway. I also made a stir fry of green beans in a peanut-chili sauce. Pretty good if you don't mind the greasy-goopy texture of the sauce. It used a bunch of leftovers so there's no reproducible recipe to share. Other than a couple salads, I think that's all that's gone unreported. So, on to this week...
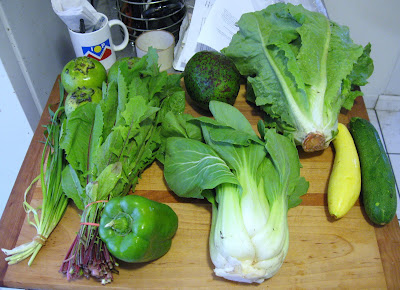
Starting from the left, there's garlic chives. I'm thinking dim sum-style pork and chive dumplings. I do like them a lot with crudo (Italian sashimi basically), too.
Above them are black sapote. My initial plan is to substitute them into a Cajun fig cake recipe, but it'll be a while before they're ripe so there's plenty of time for some other impulse to hit me.
Next over are Italian dandelion greens. They're lovely sautéed with a little garlic over pasta. I missed out on using my turnip tops that way so I'll probably won't do anything more fancy here.
The green pepper will get used without any plan most likely.
The avocado, once it's ripe, I'd like to roast and see what I can do with it. Roasting was an interesting experiment before, but I want to find a practical use for flavor and texture that results from the technique.
The bok choy is tricky to use interestingly, extraordinarily easy to use boringly. Nothing wrong with a basic stir fry or steam, I suppose, other than the lack of blog fodder. I'll have to do some research to see if there's some alternative.
The lettuce I'm thinking may go into a soup. Maybe with shrimp stock this time around.
And finally the zucchini and squash. I've got a variation on albondigas, traditional aparently, that uses them. That should be interesting.
Friday, December 4, 2009
CSA week one - Bap xao
Here is a Vietnamese corn salad that uses some similar flavors as the Thai corn soup I made earlier this week, but turns out very differently. It didn't turn out great because of the tough not-very-sweet corn we got, but it wasn't out and out bad and it showed a lot of promise. I found it at Vietworldkitchen.com.
Ingredients:
3/2 Tablespoons cooking oil
1 Tablespoons unsalted butter
1/4 cup chopped scallion, both white and green parts
3/2 Tablespoons dried shrimp (Chinese, SE Asian and Mexican varieties are all quite similar so feel free to substitute with whatever you've got.)
1 hot pepper of your preference, chopped
2 cups fresh corn cut from the cob (my two cobs each produced a little under a cup so I topped it off with frozen corn.)
3.4 Tablespoon Vietnamese fish sauce (milder than the Thai variety)
dash salt
1. Rinse the dried shrimp, dry them off and either finely chop them or, preferably, run them through your spice grinder to create a powder.
2. Heat the oil and butter in a wok or large pan over high heat. Add scallion, dried shrimp and pepper. Stir fry briefly until scallion is wilted and the mixture is aromatic.
3. Stir in the corn. Add the fish sauce and salt. Cook, stirring frequently, for 3-4 minutes, until the corn is cooked. (This week's tough corn took longer and never really got tender.) Remove from heat and adjust seasoning adding salt or sugar as necessary to create a savory-sweet flavor.
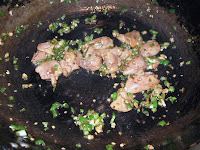
To make a full meal out of this, I served it over rice and topped with a skewer of shrimp. I wanted flavors on the shrimp to match the corn, but not too closely, so I used an oil based marinade flavored with garlic, ginger, scallion, sesame oil, red pepper, salt and fish sauce and then cooked them in a very hot cast iron pan still in their shells to protect them from the heat. I probably should have scraped off the scallions first. Still, they came out just fine.
As for the corn, the fishy salty savoriness is a pleasant counterpoint to the corn's buttery sweetness. It's a complex balance for such a simple dish, but I suppose that's typical of Vietnamese cooking. The corn retains a good bite (being kind of tough and all), but they squish nicely so they are cooked through. The best bit is the fond--mixed shrimp shreds and corn milk browned into a crisp powder--that I scraped off the pan and sprinkled into the salad. I like the added textural element, but I regret that that there's still a lot stuck in the pan. Next time, maybe, I'd add a deglazing step (Maybe with white wine; I could see that working with the flavors of the dish.) so all that flavor ends up on the corn. I wouldn't mind the salad just a little moister anyway.
Subscribe to:
Posts (Atom)