Showing posts with label tinkering with recipes. Show all posts

Saturday, April 9, 2011

CSA week 17 wrap-up, week 18 start-up

Another week of low posting, but I did do some cooking worth mentioning.

As I thought I might, I made a kale and turnip gratin. Unfortunately, there was rather more of both than I counted on, and rather less cream and swiss cheese about than I thought. The results weren't fabulous so I decided to try a fix. Digging around, I found some dried mozzarella, a bit of cheddar a fair amount of pecarino romano and, to substitute for the lack of cream, some cream cheese. I disassembled the gratin, mixed all that in and put it back in the oven for a half hour. An improvement, but still more gooey than creamy so less than entirely satisfactory. The next day I attempted to melt the cheese down and dissolve it into a cream sauce by adding a cup of chicken broth and simmering on the stovetop. Instead, the mozzerella seized up into curds the texture of ground beef. Not bad, really. The turnips had gone soft at this point so I mixed in some noodles for texture and a couple beaten eggs to thicken up the sauce and I ended up with an odd but fairly palatable concoction. Too much of a haphazard mess to be worth a post, though.

In contrast, the pork chops in fennel and caper sauce I made was not worth a post because it's already written up quite adequately on Food.com. It's a Giada de Laurentis recipe that I didn't modify in any notable way. Pretty darn good, though. I do recommend it if you've still got your fennel around.

I bailed on the dill curry I've been talking about, though. I figure that if I've got the ingredients in the house for two weeks and I still haven't made the recipe, then that's a recipe I don't really want to make. And I'm not going to cook something I'm not interested in just for a blog post. Not to please you lot anyway.

On to this week then...


That's callaloo on the right, traded in the extras box for the kale that was in the share. I don't need any more kale. I think I'd like to make mchicha with it again as it turned out quite well the first time.

The green beans I'm going to pickle as the last batch I made turned out great.

For the leeks, I want to do something with a cream sauce. I remember liking a chicken and leeks dish my mom used to make and I haven't done anything using cream with the CSA leeks I've gotten yet.

That squash is the first we've seen in quite some time, isn't it? I know saved some squash recipes for CSA season that I haven't used. I'll have to look one up. I might go with fritters. I could go for fritters.

Potatoes and parsley I'll save until I need them which just leaves the dandelion. Oh, I'll probably have them over pasta in something simple. We haven't had any turnip greens for me to do that with in a while and dandelion should work just as well after a quick blanch.

One final note: I'm going to be out of town next weekend so my half-share is up for grabs. Nobody at work ever wants it when I offer. Do any of you? I use the Coconut Grove pick-up if that makes a difference.

Wednesday, March 23, 2011

Polenta-stuffed collard rolls

This is my Italianiated version of a grits-stuffed collards recipe from Southern Living's 1001 Ways to Cook Southern cookbook.

Step one is to soften the collard greens. I blanched them for one minute, but the original steamed them. That's probably a better idea as there's more steaming later and you don't end up with an extra potful of water to deal with.

Step two is to make a fairly stiff batch of polenta. I included olive oil, garlic and prosciutto (actually Serano ham, but shred it, frizzle it and add it to polenta and I think you'd have a hard time telling the difference) and finished it off with copious Parmesan and a bit of dried mozzarella.

While that cooled to a workable temperature and a pliable texture, I cut out the tough stems from the collard leaves--six leaves for around 1 1/2 cups of polenta. These were big leaves so I could have used another half cup of polenta, really.

To do the wrap, I overlapped the stem-end lobes of the leaf and placed a 3-Tablespoon dollop of polenta a few inches from the bottom. From there it was just a basic burrito fold--once over, fold in the sides, then a tight roll up.

The rolls went into a steamer for as long as it takes for the collards become as tender as you can expect them to get. It'll vary depending on your leaves; Mine took about 10 minutes.

I served them halved with an herbed tomato sauce dip.


There are a couple small problems with this dish. First, because you have to cut so far up the leaf to excise the tough stem, the rolls want to split open at the seam. That's fine once you're plating and want to cut them in half anyway, but it makes them difficult to manipulate out of the steamer. Second, the flavor of the collards just doesn't mesh with the Parmesan or tomato sauce as well as I had hoped they would. I should have kept it Southern and used Cheddar or Monterrey Jack or some-such and served with hot sauce like the original recipe said to do. Well, it was worth a try.

Monday, March 7, 2011

So I added the beet to the chili after all


Since I was going in a Cincinnati direction with the chili spices--cinnamon, cocoa, coffee--and those are flavors that beets can work with (have you ever had beet chocolate cake? It's pretty good.), I decided what the heck and tossed it in. It's not bad. Really, it's too mild to make much of an impact against all those other strong flavors, but it adds a little sweetness and a little tartness missing from the mix otherwise. Also, the beets do make a contribution texturally. I used beef shanks so I have shreds of meat instead of chunks; the beet bits are the only component with any bite to them.

Upon consideration, I've decided that I should have pickled the beets first. Then I'd really have something.

Thursday, January 27, 2011

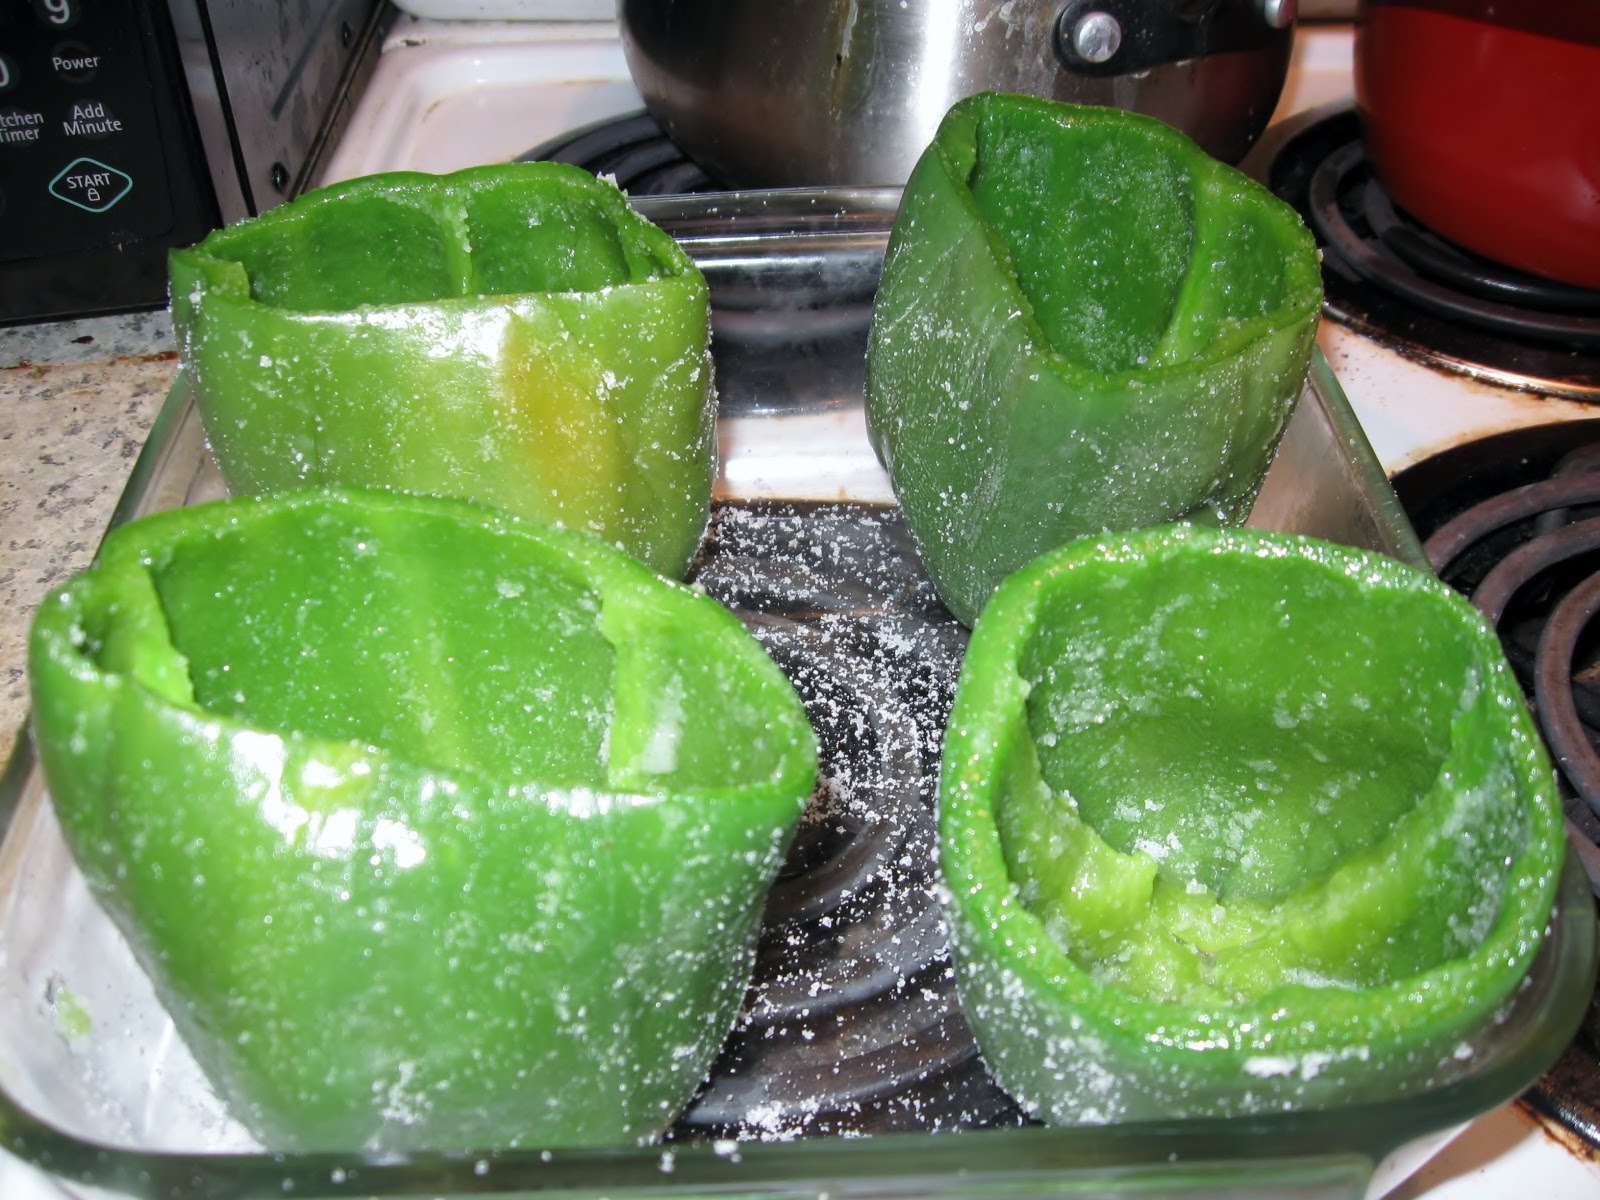
CSA week six - optimized stuffed peppers

It's been a few years since I've stuffed a pepper. I think the mediocre results dissuaded me from the effort. Beyond the two peppers in week five's share, what inspired me to pick the idea back up again was an article on chow.com that claimed to have the secret to better peppers: a whole lot of salt. That sounded sensible to me so I thought I'd give it a try.

Ingredients:
1/2 cup uncooked rice, cooked [careful if you have a rice cooker. The cup measure that comes with mine is six ounces so I had to use 2/3 the resulting cooked rice]
4 bell peppers, tops removed, cored and de-ribbed, and a bit sliced off the bottom if they won't stand up straight
2 Tablespoons fat of one sort or another
1 medium onion, diced
plenty of garlic, minced
1 pound meat, grind to a coarse hamburger texture [You do grind your own, right? You definitely should]
Worcestershire, soy or Maggi sauce or some other umami-rich seasoning
tomato in one form or another
2 eggs
cheese, grated
salt and pepper

0. Preheat oven to 350 degrees.

1. While the rice is cooking, boil a pot of water large enough to submerge at least one pepper. Add salt as if you were cooking pasta and simmer peppers until they start to soften, around 3 minutes. Drain and cool. [I used the water I rinsed my rice in. Waste not, want not.]

2. Heat a medium pan over medium heat. Add your fat of choice and heat. When your fat is ready add the onion and cook until softened and slightly browned. [Add any other vegetables you want to include around now and reduce the amount of meat accordingly.] Add garlic, cook briefly until fragrant. Add meat [I used beef] and cook until barely no-longer-pink. Season heavily with salt and pepper but add only enough Worcestershire (or whatever) to bring out the meatiness, not so much that you can identify it. Remove to a large bowl.

3. Mix rice into the meat mixture.

[At this point I split the filling into two bowls so I could go in two different culinary directions.]

4. Add your tomato of choice and season to match. [To one bowl I added half a can of roasted diced tomato, basil and oregano. To the other, about the same amount of salsa, chili powder, cumin and chipotle flakes.]

5. Add the eggs and mix well. [The original recipe called for just one egg, but I was disappointed in the final texture so I think you should use more.]

6. Salt the peppers well, inside and out, and stand them up in a baking dish. Stuff them with your filling, packing it in well. [I either had smallish peppers (I did) or I went overboard with the tomato (probably also true), as I had a fair bit of extra filling. No reason you couldn't save it and stuff something else later.]

7. Top peppers with grated cheese. I used mozzarella for the Italian-seasoned peppers and pepper Jack for the Mexican.

8. Bake for 30-40 minutes until cheese is bubbly and browned and the peppers have wrinkled up a bit.

And here's the result:


It definitely looks better than my previous stuffed pepper attempts, although I'm a bit disappointed that the filling doesn't stick together. An extra egg or two, as I advise above, would help with that. As would using bread crumbs instead of rice and/or mixing some cheese into the filling. The flavor combinations turned out quite well, if a little overboard on the salt.

The real question is, is the pepper itself improved. It's been nearly three years since I last had a stuffed pepper so I have no idea, to be honest. However, reading over those old posts, I don't sound entirely happy with the results and this time around, I think I am. The pepper is firm and flavorful but doesn't overwhelm the flavors of the fillings. I can definitely recommend it. I do wish I had done one without salting to compare and contrast, though.

Monday, January 10, 2011

CSA week six - Return to the quiche-quest

Longtime readers (Hi Mom!) might remember that back in 2008, I experimented in an attempt to create a more perfect quiche crust. Your standards crusts tend to be soggy on the bottom, dried out on top and contain a heck of a lot of butter to no notable benefit. Also, it's kind of a pain to make. I had the idea that a savory crumb crust might make a workable substitute and worked through a few variations. I was fairly happy with a cracker-crumb crust, but since I was making a quiche today to use up a bunch of scallions, I thought I'd try a new tweak on the formula.

This time around I processed a couple handfuls of homemade breadcrumbs with around an equal amount of Kalvi Crispy Thin crackers until they were fairly finely ground. To that I added a big pile of finely grated Parmesan (which I'm rather surprised I haven't tried before), a bit of salt and a couple Tablespoons of melted butter--just enough to give the mixture a little structure so it would stay up on the sides of the pan. Once I got the crumbs laid out nicely I blind baked the crust for 10 minutes at 350 degrees.

It didn't quite fuse into a solid piece, but there's a bit of structure there. Enough that I didn't have to be too gentle when putting in the fillings--three scallions and a tomato cooked-down, a half cup of diced green pepper browned, a little Serano ham frizzled and three more scallions cut larger and just wilted--plus a third cup of crumbled capricho de cabra, a soft flavorful but not too tangy goat cheese. Over that went four eggs beaten with 1/2 cup milk and 3/4 cup cream. The fillings stuck to the bottom so I had to gently mix things up a bit to distribute the vegetables.

I baked for 35 minutes at 375 degrees until a knife inserted in the middle came out clean, rested it for a bit and cut out a piece.

The quiche itself is nothing remarkable, but take a look at the bottom. Now that's a proper crust; I've got no idea how the crumbs transformed into that. It's a separate layer enough density and integrity to it that it broke along its own weakpoints instead of where I tried to cut it. It's flavorful from both the crackers and the cheese and even crisp up on the sides and, as you can see, a gorgeous golden brown. Very nice indeed.

Thursday, November 4, 2010

Mamey sapote ice cream

I've made mamey ice cream a couple times before, but I tried something a little different this time around.

In earlier ice cream recipes, I've seen a big difference in batches made with raw and cooked fruit. Mango had a particularly profound transformation in flavor making an entirely different ice cream. Cooked recipes with mamey are rarer than with mango, but not entirely unheard of. I've never tried one so I was curious to give it a try.

Here's the sapote I used. According to the guy at the market stand, it's one of the last of the summer mamey crop and a different variety than get in the winter. More fibrous for one thing. No huge difference in flavor though, if I'm remembering right over the months. I didn't get many details from him so if you know something about this, do please share in the comments.

I started by scooping out a couple cups worth of pulp, mashing it up with a half cup of sugar and put it over a low heat to cook. I, thoughtlessly, expected it to break down like mangoes do on the stove-top; I should have known it would have a texture more like sweet potato. It took a lot of attention to keep it cooking without burning, but over ten minutes or so it turned into a paste and developed a bit of a caramelized smell.

I didn't want to risk burning it went out of the pot and into the blender with:
1 cup heavy cream
1/2 cup milk
1 Tablespoon cream cheese (which seems to help scoopability)
the juice of 1 lime
2 teaspoons vanilla, and
a few dashes cinnamon

But it was too thick to blend properly so it definitely needed thinning down. I added another half cup cream, a quarter cup of a tropical juice blend and a couple Tablespoons of agave nectar which does a good job of bringing out fruity flavors along with bolstering the sweetness.Finally, I wanted to add some alcohol to keep it from freezing solid. I'm out of vodka and rum which would have been my first choices, but found that the flavor of dry sake and mamey go really well together. (There's a pretty good cocktail in that combination for those interested in experimenting in that area.) I just added 2 Tablespoons to complete the recipe and gave it a serious blending.

After all that, the mix was still pretty thick, but I was pretty sure I'd added enough alcohol and fructose to keep it from thickening up too much further and my churn's got a relatively powerful motor so I was in good shape as long as I kept an eye on it.

Here it is right out of the churn:


and here it is after ripening in the freezer:

It did freeze up a bit more solid than I would have liked, but it is nearly 50 percent fruit so that's bound to happen.

Despite all the tweaking, the mamey flavor is clear, but in a mellow ice-cream-flavoring way instead of a fruit smoothie in-your-face way. There's an vapory hint of sake in the aftertaste which cuts the starchy throat-coating effect blended mamey can have so that's nice. The texture came out dense, but easily scoopable straight from the freezer (at least from the work freezer which is a bit warmer than my home freezer) and nicely smooth if not exactly creamy (despite all that cream in there). There's no hint of the fibers from the original fruit and just a little of the typical mamey grit.

So did cooking down the mamey make any difference? A bit in the texture I think, but it was a real disappointment that it didn't seem to change the flavor at all. There's probably some interesting bio-chemical reason for that. Non-volatility of the flavor compounds or some such. But the upshot is that this ice cream is pleasant enough, but nothing to get exercised about and a disappointment only so far as the new flavor territory I delved into is indistinguishable from the old.

Friday, May 21, 2010

Black sapote clafoutis

I'm not really out of my cooking funk quite yet, but two out of three of my black sapotes finally ripened and I did have an interesting recipe prepared for them so it didn't take too much to prod me into action.

So you probably want to know what a clafoutis is. From an American perspective, it's a French version of a buckle. You might also want to know what a buckle is. It's a dish in the crumble family. Depending on how you prepare the floury stuff that goes with the fruit, you can make a crumble, a crisp, a buckle or a grunt. For a buckle, you put your fruit on the bottom of a baking dish and pour over cake batter. For a clafoutis, the batter is closer to a crĂŞpe: looser and eggier mainly.

Traditionally, clafoutises are made with cherries, but you do see them with other fruits, mainly tart berries. And if I had a reasonable amount of fruit to work with I'd whisk some lemon juice into the pulp and go with that. But I don't so I went with my black sapote back up plan which is to mix it 50/50 with a nut butter. Almond by preference, but peanut by what I've actually got on hand. In this case I mixed something like:
1/3 cup black sapote pulp
1/3 cup natural peanut butter
1 Tablespoon honey
1 Tablespoon sugar.
That gave me enough for about a third of a standard batch of clafoutis so I scaled down.

That means the batter was:
a bit less than 1/3 cup flour
1/6 cup sugar
1 teaspoon cornstarch
1 small pinch salt
1 egg
1 1/3 Tablespoons unsalted butter, melted
1/4 cup milk [I used cream since I had some some]

As with crĂŞpe batter, I mixed the dry ingredients, whisked in the egg, then the butter then the cream.

Then I poured the batter over dollops of the sapote mixture in a small baking dish and baked at 350 degrees for a half hour until browned and puffy.

I let cool to, if not room temperature, then at least not hot and served with a little powdered sugar or, as pictured, with cinnamon whipped cream.

The baking has brought out the chocolatier aspects of the black sapote, which is certainly not a bad thing in this context, although it makes the flavor a bit less Floridianly exotic. I had hoped the honey would have helped to boost the fruity flavors, but I guess not. The crumbly brownie-esque texture of the fruit mixture contrasts with the lighter moist sponge-cakey texture of the cake bit. Its milder flavor cuts the intensity of the fruit and is mildly sweet and a little eggy on its own. This is very different than how this dish would work with cherries, but it's pretty tasty in its own, heartier way. I'd like to try it with the sapotes unadulterated by peanut butter to see how it goes.

Friday, April 23, 2010

Five-spice vanilla ice cream

I made two batches of ice cream for a going-away party at work yesterday. My freezer is still packed full so I had to bring my churn in, make them there and serve them soft. It's kind of a pain to haul the equipment around, but it also let me simplify the recipes because I don't have to worry about the texture once they ripen up in the freezer. In this case, that just meant I didn't bother with the corn starch. To be honest, I'm not sure how much effect the corn starch has on the final texture, but I do know that leaving it out takes all of the cooking out of the recipes. If there's a step to skip, that's the one.

The original plan was to keep it simple--just make vanilla and strawberry--but inspiration struck and what was I supposed to do other than follow my muse?

For the strawberry, the results were fine, but not as interesting as I hoped. That recipe was:
1 14 ounce can coconut milk
1 pint strawberries
2/3 cup sugar
1 pinch salt
1 1/2 ounces cream cheese
Hershey's strawberry syrup to taste.


I would have prefered to use real strawberry syrup, but I haven't got any left. The hope there was to boost the complexity of the strawberry flavors by including both cooked and raw (or in this case artificial and real) versions. I was also hoping the coconut milk would add some extra interest. Nope, it just tasted like strawberry ice cream. Nothing wrong with that I suppose; people liked it.

The mutated vanilla ice cream, though, was pretty fabulous. That's the root beer float flavor in the title. That recipe was:
1 14 ounce can sweetened condensed milk
1 cup cream
1 1/2 ounces cream cheese
1 Tablespoon vanilla paste
1 pinch salt
1 big pinch five spice powder

Five spice powder, if you don't have it memorized or a bottle nearby to check, is made of cinnamon, fennel, cloves, star anise and white pepper. I just did a search and found a handful of recipes that pair it with vanilla for sweet applications including some ice creams, but I think I'm the only one to also use condensed milk which really made this recipe really work well. Other than the pepper, the spices in five spice all have sweet uses. Marrying them with the vanilla the caramel notes from the condensed milk and the cream comes up with something pretty close to a root beer float--accessibly tasty but hard to pin down and with an interesting burn in the aftertaste. A lot of the odder flavors I make are interesting novelties, but this one's a keeper. You've got all those ingredients in the house; try it.

Wednesday, March 10, 2010

CSA week 14 - A mizuna pesto variation

As Caroline wrote on her blog earlier today, pesto's an easy way to use up an overload of CSA greens and it works just fine with mizuna. I've been having trouble finding a good use for the mizuna so I decided to punt with a pesto, but I didn't want to make it too easy on myself. As long as I was switching out the basil, I might as well throw in a few more switch-ups and see where I ended up.

I had a vague idea of making a Southwestern-style pesto so to the mizuna I added a handful of cilantro. And to the garlic I added a modestly hot pepper. The olive oil I kept the same. For the parmesan, I substituted an aged queso blanco and for the pine nuts I substituted corn nuts.

And, in a last minute decision, for the pasta, I substituted pulled pork.


The results left something to be desired, but, surprisingly, it wasn't my substitutions that caused the problem. It was the bitterness of the mizuna. Once I added a couple pinches of sugar and a drizzle of vinegar to balance against the bitterness, it was much improved. Now it tastes like a proper pesto with a bright fresh grassiness and slight tanginess. Without the bitterness prominent, a lot of the distinctive character beyond a generic green comes from the cheese and the corn nuts which give subtle hints of funk and toastiness respectively. And a lot of salt from both. All of this plays surprisingly well against the savoriness of the pork. This was just a lark, but I've stumbled upon something really quite tasty. I wonder why there isn't a tradition of pesto-based barbecue sauces. Maybe the smokiness of proper barbecue (as opposed to my crockpot pulled pork) throws the balance off? Or does such a thing exist; have any of you heard of it?

Tuesday, March 2, 2010

CSA week 13 - spinach ricotta croquettes

As promised, here's the final result from tinkering with yesterday's recipe, rolled in panko breadcrumbs and deep fried.
So that's:
1 pound spinach, cleaned and washed
8 ounces ricotta
1/2 cup finely grated Parmesan
2 eggs
1/2 cup breadcrumbs
1 teaspoon nutmeg
1/2 cup flour
salt and pepper

Blanch the spinach, squeeze out the excess moisture and chop it fine. Mix with everything else (including the breadcrumbs I forgot to mention yesterday). Chill well. Form into 1-2 Tablespoon balls, roll in panko breadcrumbs, flatten slightly and deep fry 2-4 minutes until bronze brown. (Usually I say golden brown, but I liked these a little darker.)

Not bad at all. Crunchy outside, creamy and a little melty, but with a little firmness to the bite too inside. Good spinach flavor and the raw flour flavor's all gone. Not as fancy, but just as good as the gnudi.

Unlike the gnudi, this definitely doesn't need to be doused with butter. Instead, I found a spicy vinegary dipping sauce to complement it well. And beer too. These are darn fine bar snacks.

Sunday, January 31, 2010

CSA week seven - Black spaote banana meringue cookies

I had no reason to think this was going to work. My searching didn't turn up any recipes that combined whipped egg whites and fruit pulp which is usually a pretty good indication that it's not a good idea. But I had everything I needed lying around so I thought I'd give it a try just to see what would happen.

Ingredients:
pulp from several small black sapotes
1 banana, frozen and defrosted
1-3 Tablespoons sugar depending on how sweet your fruit is
1 pinch salt
1 teaspoon vanilla
5 Tablespoons whole wheat pastry flour
some agave nectar
2/3 cup egg whites

0. Preheat oven to 300 degrees.

1. Blend the fruit. Add the sugar and vanilla and blend some more. Stir in the flour.

2. Beat the egg whites to stiff peaks. Stir 1/3 of the egg whites into the fruit mixture to lighten. Fold in the second third. Fold in the third third. Check for sweetness. Fold in agave nectar until the flavors pop.

3. Using a coffee or small ice cream scoop, dispense dollops of batter onto cookie sheets prepared using your most extreme non-stick procedure. Bake for 40 minutes, turning halfway through. Take them out, try one, discover it's raw in the center and put them back in for 15 minutes at 350 degrees.

For my second batch I found 25 minutes at 350 degrees worked well, but the hour of sitting around deflated the cookies which may have had some effect so use your best judgement.


I call these cookies, but only because I can't think of a better word for them. They've got the soft squishy/chewy texture of angel's food cake. Actually many are partially pre-squished due to troubles I had getting them off the parchment paper I baked them on.

Fresh out of the oven they were a little crisp around the edges, but that fades. There's still a little crystal-crunch from the sugar which I actually like, but you may want to avoid by using confectioner's sugar.

Despite having substantially more sapote than banana, the flavor is predominantly caramelized banana. The sapote rounds it out, but it could be mistaken for a hint of chocolate. Pretty tasty. Maybe it could use a little acid to brighten it up--a lemon sugar glaze maybe?

Wednesday, January 27, 2010

CSA week seven - Canistel meatballs

Back in this post, where I made a meatloaf using overcooked carrots and turnips, I wondered how a meatloaf using canistel might work. The texture of the wad of mushed-up overcooked root vegetables was pretty similar to the texture of roasted canistel so I suspected that that aspect would work, but what about the flavor? In the comments, Russell expressed skepticism, but also mentioned trying pumpkin meatloaf.

It was a good comparison. Roasting canistel brings out its nutty pumpkiny flavor elements, leaving a mild sweetness and, at least this time, a slight bitter aftertaste, probably from the fruit being a little under-ripe--but just a little--they were squishy-ripe, not gooshy ripe.

There are actually a fair number of pumpkin meatloaf recipes out there so I was fairly confident the canistel would work. But no point in wasting a lot of food unnecessarily; best to start the experiment with a small batch of meatballs and go from there.

I roasted two canistels, sprayed with olive oil and lightly salted, at 350 degrees for a half hour, but I decided to only use one for this recipe.

I ran that canistel through the food processor, skin and all, to reduce it to a paste. To it I added:
1/3 pound ground pork
1/3 pound ground beef
1/2 small onion
1/4 green pepper
1/2 stalk celery, all three very finely chopped
1 handful breadcrumbs, and
1 sizable dose of Milwaukee Ave. Steak Seasoning from Spice House

I mixed that all together and rolled out balls about 1 1/2-inches across which I shallow fried for 6 minutes with a flip half way through. I had my usual trouble getting the temperature right, but a thick crust helped the meatballs hold together so even the slightly overcooked ones had their virtues.


They turned out really pretty well. Texturally, the canistel holds the meatballs together, but not quite as well as I would have liked. I should have cut a few minutes off the roasting to leave them a little moister. Or added an egg or maybe replaced the spices with chipotle peppers.

Flavorwise, the mild sweetness of the canistel balances with the smokey pepperiness of the spice mix similarly to how barbecue sauces do. The pumpkiny flavor of the canistel pairs well with the meat and the smoke. It worked; I ate up the whole batch without hesitation. So, if you don't know what to do with your canistels or haven't liked the sweet preparations you've tried, roast them and substitute them into pumpkin recipes. It'll probably work.

Sunday, November 1, 2009

Chinese-spiced chicken stew

This recipe is an interesting example of a dish mutating as various cooks adapt it to different purposes. It started as the classic French braised version of chicken with forty garlic cloves. Mark Bittman switched out the seasoning for Chinese flavors and, for some reason, called it a stew even though it's still just chicken in sauce. I toned down the garlic to let the other seasonings come through and made it into a proper stew.

Ingredients:
1 Tablespoon high smoke-point oil
2 chicken thighs, bones in and skins on
1 Tablespoon minced Chinese ham, bacon or sausage (I used something labeled bacon, but it's so lean I think it's actually ham)
5 cloves garlic, peeled (halved from amount of garlic in the original recipe, so if you want to scale it back up to a whole chicken use 20 cloves)
2 Tablespoons dry rice wine or sherry
1 Tablespoon sugar
1 star anise
1/2 stick cinnamon
2 1/4-inch slices ginger (or a roughly equivalent chunk if your ginger is all dried out from too long in the refrigerator like mine was)
1/4 teaspoon Szechuan peppercorns, lightly crushed
1 1/2 Tablespoons soy sauce
vegetables you've got on hand including, preferably, greens and scallions. (I keep to minimalistic vegetables off-season so I only used scallions and peppers today.)
2 handfuls fresh egg noodles

1. Heat the oil on medium high heat in a deep well-seasoned cast iron or nonstick pan or pot just large enough to accommodate the chicken. (I didn't use nonstick and, as you can, see, the chicken skin stuck.) Add the chicken, skin-side down. Cook for several minutes to brown, adjusting heat to avoid burning. Turn and cook for another minute or two (depending on where your heat level turned out) to brown lightly. Remove chicken to a plate and pour off any more fat than you started out with. (And save it. I save both chicken and pork fat for adding a little extra flavor when I'm frying up random vegetables.)

2. Return pan to fire and adjust heat to medium. Add your cured pork product and garlic. Cook, stirring occasionally, until garlic is browned. Add rice wine, scrape bottom of pan with a wooden spoon to deglaze, then add sugar and spices. Once the sugar is dissolved, add soy sauce and a quarter cup of water (maybe a little more if the rice wine mostly boiled off when you added it).

3. Return chicken to pan, skin-side down, turn heat down to low, cover and gently simmer for 15 minutes. Turn chicken and add any tough vegetables you're using (e.g. bamboo shoots, carrots, rehydrated mushrooms, daikon, kale or other tough greens), squish the garlic to release a bit more flavor, re-cover and simmer another 10 minutes.

4. When chicken is done, remove to a plate and keep warm. Add noodles and lighter vegetables (e.g. scallions, peppers, eggplant, mizuna or other mid-weight greens) to pan. Look at the amount of liquid in the pan and taste it for flavor. Decide if you want to keep the cover off to reduce it, keep the cover on to keep it, or add some water or stock to thin it out. Simmer for three to five minutes until vegetables are tender and noodles are cooked.

5. Remove the cinnamon stick, star anise and ginger from the pot and check the thickness of the sauce. If your noodles were coated with flour like mine were or if you left the cover off the pan earlier, then it will be thickened slightly. If not, you might want to remove everything else from the pot and mix in a little cornstarch. Up to you. Also up to you is if you want to keep your chicken pieces whole or carve them up into bite-sized pieces. I went with the latter.

Serve by filling the bottom of a bowl with the noodles, layering in the vegetables, topping with the chicken, pouring the sauce over and garnishing with scallion and/or cilantro. Or mix everything together.


This is really quite lovely with flavors that are complex and understated. The sauce is sweet, but not cloying. Aromatic, but not spicy. Bright, but not salty. I'm normally not a huge fan of anise, but I like how the star anise pairs with the Szechuan pepper to compliment the chicken. I also like how the flavors in the sauce reconfigure into a notably different, earthier arrangement when they're absorbed into the noodles. The variety of textures, with the chewy noodles, tender chicken and still slightly crisp scallion, is nice too. But this is really just a test run for a more vegetable-intensive version of this dish I'll make after the CSA shares start arriving. Given the similarity to a standard red-simmering master sauce (like the one I never used again last year), it should make a good throw-in-whatever-you've-got dish. I'll report back then with how it goes.