Saturday, May 30, 2009

Summer a la carte CSA number one

Actually this is the third time the Bee Heaven Farm ~ Redland Organics CSA has offered a la carte produce this summer, but it's the first time they've shipped up to Coral Gables and I'm still unwilling to drive all the way down to the farm for a pick-up. I really must either start coming to terms with Miami driving or move out of here.

But enough about me, now that I finally can get CSA produce, what did I get?


In the upper right corner is a pile of mangoes in various states of ripeness. There's enough there for me to make another attempt at mango ice cream. I want to try to concentrate the flavor this time around, maybe by roasting or just by cooking down mango pulp into a syrup.

Next to them is twice as many white sapotes as I was expecting. They're fairly small so that's probably a good thing. From my research, I was expecting cherimoyas, but these appear to be casimiroas. Both are called white sapotes and custard apples but they seem to be two closely related but distinct fruits. And custardapple.com.au is all about atemeoyas. They all look different on the outside, but the descriptions of the insides' textures and flavors all match pretty well so the distinction may be entirely botanical and not culinary. I'll probably try one of the recipes from custardapple.com.au and find out for myself.

Next over are four smoked eggs which I guess you eat straight or on top of a salad use to make particularly interesting egg salad for sandwiches. I've made pickled smoked eggs before and I've tried the Chinese-style tea-smoked eggs, but these aren't those so I'll have to try one to see what it's like and give some thought to the disposition of the rest.

Below the eggs is a much-easier-to-deal-with bag of arugula. A bit of salad, a bit of sandwich topping, a bit of pasta topping and that should do it.

To the right are curry leaves and plenty of them. Most recipes only call for one sprig so I've got a lot of south Indian and Malaysian cooking ahead of me to use this packet up. I've never made a dish with mangoes and curry leaves in it despite both being common in south India. I'm going to look for one of those.

And that leaves a bunch of garlic chives. They'll probably end up over pasta or in a quiche or somesuch.

That's a fair bit and I've got to admit I haven't much felt like cooking recently. I'm glad I don't have to try to use all this up in a week.

Thursday, May 28, 2009

Graham cracker gooey bars

This is a recipe from the L.A. Times Culinary SOS column who got it from Julie Campoy of the bistro Julienne in San Marino, California, who got it from her mother Susan Campoy who got it from the Nantucket Open-House Cookbook by Sarah Leah Chase. No doubt there was some adaption along the line. At the last step in my kitchen they went from graham cracker chewy bars to gooey bars. I'm not quite sure if I undercooked them or if it was the humidity during this stormy weekend that caused the change. They went over quite well with the texture they had so I'm not going to call it a mistake, just a change that I'll need to experiment if I want to replicate.

Crust
3 cups graham cracker crumbs
[I like to crush crackers in a large bowl using the pestle from my mortar and pestle. That won't work well for most folks, but I've got a strange set with a big mushroom-shaped pestle that almost entirely fills the mortar. I doesn't actually work at all well which I probably should have guessed. When a design doesn't appear until 19,999 years into the 20,000 year history of a tool, there's probably a good reason. On the other hand, put the big pestle in a larger bowl and it works a treat for big batches of things that need to be crushed.]
3/4 cup (1 1/2 sticks) butter, at room temperature
1/4 cup sugar
2 tablespoons flour

1. Heat the oven to 350 degrees. In a large bowl with an electric mixer, or in the bowl of a stand mixer, beat the graham cracker crumbs, butter, sugar and flour until moist and well-blended. Press the mixture firmly and evenly over the bottom of a 13-inch by 9-inch baking pan. Bake until the crust is golden brown, 10 to 15 minutes.

Topping and assembly
2 1/2 cups brown sugar
[I may have gone a little heavy on the sugar. I ran out of brown sugar with a cup left to go so I ran some white sugar and molasses through the food processor to make a substitute. I know that when I make powdered sugar that way the volume reduces a fair bit so I put in a cup and a quarter which, as I said, may have been a little much.]
4 extra-large eggs
[Ah, my eggs were just large. That's what caused the change in texture. I should have added one more.]
2/3 cup graham cracker crumbs
1 tablespoon vanilla extract
3/4 teaspoon salt
1/2 teaspoon baking powder
1 cup pecans, chopped
[I crushed them instead by sealing them into a plastic bag, laying it out flat and whacking them with my crab hammer.]
1 prepared crust

Powdered sugar, if desired [I didn't desire. They're plenty sweet without.]

1. While the crust is baking, in a large bowl, whisk together the brown sugar and eggs to blend. Whisk in the graham cracker crumbs, vanilla, salt and baking powder until well-blended. Stir in the pecans.

2. Spread the mixture over the baked crust and return to the 350-degree oven until the filling is dark-golden on top and jiggles slightly when tapped, 20 to 25 minutes. Transfer the pan to a cooling rack and cool completely.

3. Sprinkle a light coating of sifted powdered sugar over the pan if desired, and cut into 24 bars. The bars can be made 1 day in advance. Wrap in plastic and keep at room temperature.


The first part of the experience is the sweet scent of graham and candied pecan wafting up from the pan even after it's completely cooled. And you can see the cut edges slowly oozing out. I don't think that's quite the texture it's supposed to have. I must have undercooked it a little; I couldn't test it for jiggliness when the top had puffed up so I just went by color and smell.


The pieces squish under the teeth, spreading into the mouth. The flavor of the brown sugar dominates, but it's colored by the pecan at first fading into the graham in the aftertaste and it's almost overwhelmingly rich from the butter and eggs. Even as the center spreads in the mouth, your teeth are crunching through both the bottom and top layers. The bottom's texture is a sugary crystalline crunch, not a cracker crunch. You get more of that from that top which crisped up nicely although it shattered when I cut out the squares. The soft inside is chunky with the larger pieces of pecan and gritty with the smaller shards. After the square has melted away, there's still a bit of nut to chew on and strong lingering flavors that demand strong black coffee, maybe an espresso, to cut through. Or maybe a glass of milk; that would work too. You could do a scoop of vanilla ice cream or some warm chunky stewed fruit, which would be nice, but these really don't need any more sweet no matter what other aspects are good contrasts.

Anyway, you can tell from my vaguely poetic attempts to describe them or even just from the picture that these are fabulous if you're up for a seriously intense dessert. Pretty easy to make, too. There are some pictures out there of the chewy version, but they don't look half as good. I'm tempted to blame the photography, though. Maybe I should make the recipe without my unintentional changes to see how it is that way.

Tuesday, May 26, 2009

Cuban escabeche

Last time I made escabeche, back in September, '08 I mentioned that I wanted to make a Cuban version I had found and then I got distracted by the CSA. But now I've got free reign in choosing my recipes again so I've finally made it. I didn't make the recipe I had picked out back then. Instead, it seemed worth looking around to see what looks appealing to me now. That other recipe has some intriguing differences from what I settled on, so if I come back to the idea I may well give it a shot, but I found the inclusion of lime juice in the recipe I found at Chef4all.com interesting enough to give it the edge.

For those who haven't been reading since last Fall or have lives of your own so don't remember what I was posting about back then, I got interested in variations of cooked pickled fish after trying the Japanese version Nanban Zuke at Shiro's in Seattle.

I made a version of that myself and learned during my research that it evolved from Spanish and Portuguese escabeche dishes. So I made a few versions of that too using shrimp, mahi, and smelt with different results each time.

And now on to the Cuban version. Since I'm only serving myself, I used a single filet of tilapia instead of the two pounds the recipe is designed for. I quartered the rest of the ingredients and since the filet was a bit less than a half pound, I tossed in a few shrimp to make up the difference. Most of you are probably making more than one serving so here's the full unreduced recipe:

Ingredients:
2 cups sunflower oil [I used a light olive oil]
1/2 cup white vinegar
1 teaspoon green peppercorns [I used the pickled sort recommended by, I think, Russell]
http://russelleverett.blogspot.com/
2 bay leaves
1 cup sliced black olives [I considered kalamata since I've got some left over, but they didn't seem right. Instead I used the less briny niçoise.]
1 thinly sliced carrot [I had one tiny CSA carrot languishing in the back of my produce drawer so I used that.]
1 Tbsp. capers
1 tsp. oregano
2 tsp. salt
1 red onion, sliced
2 limes, juiced
1 tsp. sugar
1 cup flour
2 pounds of white fleshed fish fillets
freshly chopped parsley or dill.

1. Add everything but the fish, flour, herbs and half the oil to a medium saucepan and bring to a boil. Reduce temperature to low, cover and simmer 10 minutes.

2. Chop the fish into serving pieces, sprinkle with salt and pepper and dredge in flour.

3. Heat the rest of the oil in a medium pan until shimmery. Cook the fish until golden brown and crisp on the outside and just barely cooked through. How long will depend on the thickness of each piece so use your judgment.

4. Line a lidded container with some of the solid bits from the marinade you prepared in step one. Lay out the fish (and the shrimp if you fried up some of that as I did). Add the rest of the solids on top and pour over the liquid. Seal the container and let sit in the refrigerator for up to seven days.

I only left it for one day and gave it a flip after 12 hours since the fish pieces weren't completely submerged. Unlike last time, the oil didn't separate out and solidify. There's nothing I recognize as an emulsifier in there so I'm not sure why that is.

When the day was up I pulled it out of the refrigerator and laid it out all pretty topped with chopped parsley.


This recipe is lighter on the vinegar than the last escabeche I made and I think that works well. The dressing is light and multidimensional--not overwhelmed with tartness. You can still taste the fish through it even though it's just a mild whitefish. The olives, capers, green peppers, even the carrots all contribute elements of flavor. I really like how they're all working together. The lime, on the other hand, is hard to find in there.

The fish have firmed up due to chemical cooking from the acid to a solid, somewhat chewy texture. It's something like canned tuna, but not dried out which helps a lot. The shrimp, on the other hand, got a little mushy. They didn't absorb the flavors as well either. Next time, poach out of the shell instead of a quick fry in the shell.

Shrimp aside, this is really quite lovely and, I've got to admit, rather better than I've come to expect from Cuban cuisine. If this is a legitimate Cuban preparation, I've written them off too soon. I guess I need to go out for a fancy Cuban dinner instead of just eating Cuban junk food from holes in various walls to see what I've been missing. Any recommendations?

Saturday, May 23, 2009

Whole wheat sesame millet sandwich bread

This is a recipe adapted from the Fanny Farmer Baking Book by someone who did a guest post on the TheKitchn blog. I've adapted it further by using Peter Reinhart's soaker and sponge technique.

Makes two smallish loaves

For the soaker:
2 cups whole wheat flour
1/3 cup millet
3 Tablespoons roasted sesame seeds (if what you've got hasn't been pre-roasted a brief toasting on the stove-top will suffice)
1 Tablespoon kosher salt
1 cup hot water
1/3 cup honey
1 Tablespoon vital gluten

Mixed, covered and let sit out overnight.

For the sponge:
2 cups white bread flour
1 cup hot water
1/4 teaspoon yeast
1 Tablespoon vital gluten

Mixed, lightly kneaded, covered and let sit in the refrigerator overnight.

When I was splitting up the ingredients from the original one-day recipe I wasn't sure where to put the honey. I ended up choosing the soaker but I didn't have a good reason for that and the soaker was rather wetter than the other Reinhart recipes I made. Seemed to work out OK, though.

In the morning I brought the sponge out and let it warm up. Once it was close to room temperature I tore it into small pieces and mixed it into the soaker. The soaker was so wet it didn't hold together at all so that began easily. But the sponge was surprisingly resilient. I probably shouldn't have put the gluten into it. That meant that getting the two halves to mix homogeneously was a bit of a trial. At the same time, the whole was so wet that I worked in over another half cup of white flour to get a proper workable dough out of it. I wish I could have gotten a picture of it, but my hands were covered with bread-muck. The mixer couldn't handle it at all so I had squeeze and stir and knead handfuls to get it to come together. I also added around another teaspoon and a half of yeast. The original recipe calls for a Tablespoon, but I had less in the house than I thought. That just meant a longer rise time; no big deal.

Once I finally got the dough together, I kneaded it as best I could (It was still pretty wet and sticky), and put it in an oiled bowl to rise for a couple hours. When it was about doubled I poured it out onto a floured board, punched it down a bit and cut it in half. I rolled both halves into loaf shapes, wrapped one up in plastic wrap and then foil to go in the freezer, and put the other in a loaf pan for the second rise.

A couple more hours later it had doubled again. I attempted to slice the top and baked it in a 400 degree oven for 45 minutes until it reached 210 degrees inside. I poured some melted butter over top after 25 minutes too.


There wasn't any rise in the oven. In fact, it looks like it might have fallen a little. So the bread is pretty dense. But it wears it well. It has a spongy texture with lots of tiny bubbles and a strong gluten structure. It holds up to spreading unsoftened butter and has a very nice hearty chew to it with little crunchy bits from the seeds and whole grains. You can smell the whole wheat just a bit, but the flavor doesn't hit you over the head; it tastes more like a country white loaf: sweet, buttery and nutty. It's got a lot of flavor, but not so much or so unusual that you couldn't use it for sandwiches. Pretty darn good, especially considering it's half whole grains.

On a related note, I was thinking of maybe submitting a guest post for The Kitchn too. Is there anything I've posted about that you think I should use? The black sapote bars were the biggest sensation, but not many folks have heard of sapotes and they're out of season anyway. Maybe something about radishes? It's the start of CSA season for a lot of folks who could use ideas on using them. Or maybe I could write up something about how I went from no-knead bread to machine mixing to doing everything by hand with slowly increasing confidence in my abilities. What do you think?

Friday, May 22, 2009

Chickpea pasta casserole

No preparation pictures tonight since I just threw together ingredients I had in the house for a quick dinner and didn't expect to post about it. Also this is pretty close to a recipe I wrote about back in November '07. But it was such a good result with so little time and effort involved, I figured I ought to share it. And it's different enough from that earlier post that it's worth calling a variation, anyway.

Ingredient amounts are going to be even rougher than usual here.

1 large handful ditalini or other small pasta (broken spaghetti shows up in a similar Mexican dish)
olive oil
1/4 pound Spanish chorizo, thickly sliced and then each slice halved
1/4 cup yellow onion, diced
(an equal amount of green and/or red pepper would be a nice addition, but mine had gone fuzzy in the refrigerator)
1 handful broccoli rabe stalks with heads and flowers (I still have plenty of this left so I'm throwing it into everything until it all goes yellow.), chopped
1 large handful medium shrimp (I left them in their shells, but that meant I couldn't devein them so probably better to shell and clean them and add them later in the process
1 medium tomato, roughly chopped
1 14 ounce can of chickpeas
1/2 teaspoon smoked paprika
1/2 teaspoon sweet paprika
1 large pinch fresh thyme (or frozen in my case)
1/4 cup dry white wine
1 handful parsley, finely chopped
1 large squeeze lemon juice

0. Bring a pot of water to a boil.

1. In medium saucepan, heat chorizo and olive oil over medium heat until chorizo has rendered a good bit of fat, but hasn't shriveled into little crunchy bits. Remove chorizo.

2. Add ditalini and plenty of salt to boiling water. Boil five minutes.

3. Add onion (and pepper) to pan with a pinch of salt. Sauté, stirring frequently, until softened. Add broccoli rabe and cook until wilted.

4. Add tomato to pan, stir briefly, add shrimp (if in shells), chickpeas with liquid, pasta, wine, paprikas, thyme and salt to taste. Stir well and simmer for around five minutes until shrimp and pasta are just cooked.

5. Finish with parsley and lemon juice. Let sit for a minute for parsley to cook slightly before serving.


Looking at it now, I'm not sure if casserole is quite the right term. Casseroles generally have a binder, don't they? But this isn't pasta and sauce either. It is half pasta, but the rest isn't particularly saucy. Whatever it is, it's pretty tasty. The little liquid there mixes the flavors of many of the components into a nice melange and, since there's plenty of starch, it sticks well to the components and brings the flavors together. The tomato has almost entirely collapsed, but the broccoli rabe and the ditalini are still firm. The suasage and shrimp have a little chew and the chickpeas are creamy, but not falling apart. So, a nice variety of textures. Overall, not bad at all for an improvisation.

Wednesday, May 20, 2009

Larb salad

Larb (or laab or laap or, quite possibly, laarpb) is a salad from northeastern Thailand. There are a good many variations out there, all kind of complicated. The key, from what I've read, is balance between all of the different elements, but since we're talking Thai food here, this is the pyramid of circus elephants sort of balance, not the delicate flower arrangement of Japanese dishes. Did that metaphor work? Maybe Japanese food is a pyramid of crickets?

It's generally served rolled up in lettuce leaves, with papaya salad, with green beans, cabbage or spinach and/or with sticky rice.

Anyway,
Ingredients:
5-8 ounces of lean pork, chicken, duck, whatever, with some offal thrown in if you've got it. I just used pork.
1 Tablespoon rice
2 Tablespoons chicken stock
1 clove of garlic, minced
1 pinch sugar
1 pinch salt
1 or 2 limes
~2 Tablespoons fish sauce, the serious good quality Thai stuff. It should smell awful straight.
~1/2 teaspoon chili powder, freshly ground if you can manage it
1/4 to 3 shallots depending on how big your shallots are, sliced thin
1 large handful of mixed mint, cilantro and scallions, chopped
1 Kaffir lime leaf, slivered

1. Put the meat in the freezer for an hour or so to firm up and then chop it by hand for a few minutes until it looks like it's been ground. Apparently this makes a difference. It only took a few minutes so why not?

2. Toast the rice in a dry pan until it turn brown and aromatic. Grind it in a spice grinder or mortar.

3. Squeeze the juice of 1/3 of a lime over the pork. Mix well and marinate.

4. Add stock, garlic, sugar and salt to a small pan. Heat over high heat until boiling. Add pork and cook, stirring, for a couple minutes until cooked through and kind of fluffy in texture. The pork will stick and then unstick as it releases juices. Because it's being cooked in the liquids it shouldn't dry out too much.

5. Turn out pork and accumulated liquid into a large bowl. Add fish sauce, a couple Tablespoons of lime juice and chili powder. Taste and adjust seasonings until you're getting sweet, salty, spicy, sour and pungent all at once.

6. Add the shallots, herbs, lime leaf and most of the toasted rice powder. Toss well. The rice powder should absorb a good bit of the liquid.

Serve with whichever of the accompaniments listed above that you'd like. I defrosted some CSA green beans and made up a batch of sticky rice, myself. Garnish with the remainder of the rice powder and maybe some leftover herbage.


There are a whole lot of flavors going on here. The sour spicy funkiness of the dressing is up front, but it's on a foundation of meatiness and has a variety of herbal notes brightening it up with the aromatic mint clearly present. I'm finding the mint a lot more harmonious here with the fish sauce and lime than in the Iranian context I used it in a while back. You can taste the toasted rice in there adding its own unique not-quite-nuttiness too.

There's a good variety of textures too with the chewy meat, crisp vegetables and tender rice.

This is a dish that rewards concentration. I was paying close attention while I was writing the description, but then I sat down to dinner while reading a book and, while the larb was still tasty and unusual, I missed the subtleties of interplay between all those different elements and now that I'm finished I regret that decision. Stupid five-minutes-ago-me, doing two things at once!

Monday, May 18, 2009

Hey, look what I bought!

I've mentioned a few times the difficulties I had dealing with my broken down manual pasta roller. It's screwed up one too many dishes and I finally tossed it. And I've replaced it with this shiny new Kitchen Aid attachment motorized pasta roller!

Using it is a completely different experience than the frustration of that old machine. The pasta goes in one end and comes out the other end flatter. And that's it; no drama involved. The only problem I encountered was, because I didn't need any flour to keep the dough from sticking to the rollers, I forgot that I needed it to keep the dough from sticking to itself. The net of noodles in the picture is one solid object.

I tore it into reasonably-sized pieces, made do and learned a lesson for next time. For the record, I sautéed up some broccoli raab (not brocollini as I mistakened identified it in the risotto post) and shrimp in butter and olive oil with plenty of garlic, red pepper flakes, fresh oregano and parsley for the pasta sauce. Finished with a squeeze of lemon it wasn't bad despite the uneven cooking of the wads of noodle.

Like all Kitchen Aid attachments, the price is ludicrous, but if you're serious about making pasta and maybe if you've got one of those 20% off Bed Bath and Beyond coupons, it's worth the investment.

Sunday, May 17, 2009

Dim Sum Sunday - gravlax

This week's Dim Sum Sunday theme is Mama Mia. Or possibly last week's. The folks at Karmic Kitchen announced this theme with their own entry a week ago, when it was appropriate and then announced a new theme on Thursday. I don't know if they're giving us lots of warning or none at all. Well, no matter. Mama Mia can be interpreted as either cooking one of your mother's recipes or something Swedish and I already had both on my to do list.

Right now: Swedish. Gravlax is a traditional Swedish cured salmon dish and surprisingly simple to make.

All you need is a salmon fillet, salt, sugar and dill (although there are plenty of optional extras).

I checked the salmon for bones and laid it skin-side-down over a few springs of dill on a sheet of plastic wrap. A lot of recipes add extra flavors at this point but I kept it simple for my first time out: for my 7 ounce fillet, 1 Tablespoon of sugar, 1 Tablespoon of sea salt and 1 teaspoon of ground black pepper mixed and spread over the flesh side of the fillet. That's topped with an big pile of dill (CSA dill I've had in the freezer for some time); a half cup's probably plenty, but you can't use too much. I was going to leave it at this, but just in case the common addition of flavored liqueur is bringing out alcohol-soluble flavors, I poured a couple teaspoons vodka over top. That all got wrapped up in two layers of plastic wrap, laid in a platter with a high rim, weighted down with cast iron and a can and left in the refrigerator for three days, flipped every 12 hours.

Cooking for Engineers, a website I often look to for reality checks, says the weight and flipping are dispensable, but I can't imagine getting the same firm texture without the even squeeze pushing out the water the salt pulls from the fish. You can see how it was squished flat. On the other hand, that water is pretty tasty so I wouldn't mind if some of it stayed in. I'll have to give it a try the other way to compare and contrast.


Here; after I carefully rinsed and brushed off the dill, sugar, salt and pepper; is the result, sliced thin and served with the traditional mustard sauce and crackers.

The mustard sauce is:
1 ounce Dijon mustard
1/2 teaspoon dry mustard
1 1/2 teaspoon sugar
1 Tablespoon white wine vinegar
3 Tablespoons olive oil
1 1/2 Tablespoons dill
Some recipes say to add the olive oil bit by bit while whisking furiously, but mustard's an emulsifier. I just dumped everything (bar the dill) into a bowl and stirred for a minute until it came together. No big deal.

The crackers are Kavli whole grain crispbread from Denmark. Thin slices of pumpernickel or whole wheat bread are traditional, but my kitchen's been too hot for baking and this did fine.

My, and probably your, point of comparison is lox. This isn't quite the same but it's close enough for government work. They both have the same lovely salty-sweet salmon flavor and a similar firm but melt-away soft texture. The gravlax has no smokiness, of course, and some subtle dilliness to it. Loximilitude aside, this is really good in and of itself. But, it's simple. And I know I did that on purpose, but even with the mustard dill sauce (which isn't half bad in a honey-mustard dressing sort of way) it needs something--I dunno, capers, lemon, cucumber, something. But then you don't sit down and eat a pile of lox, either. That's best with all the additional flavors of an everything bagel, cream cheese, tomato and onion. Let's call it even; they're both good leads, but they need their back-up singers to really shine.

... I've done a little more reading and found that the sugar to salt ratio is open to personal taste and 1:1, which resulted in the lox-like flavor, is unusually low. Most recipes call for twice to four times as much sugar as salt which would make for a rather different result. That variability, plus the various other changes that fall within the tradition make for lots of room for playing with flavors here. And going beyond that opens up lots more. Add a little ground lapsang souchong for smokiness to get closer to lox. Substitute soy sauce and cilantro to make a southeast Asian version. Or use whitefish and go a completely different direction with it. (These are not my original ideas, I should point out. I haven't seen actual recipes, but the suggestions are out there on the Web already.)

Bonus! Cooking Corner's gravlax page recommends, once you've sliced all the meat off of the salmon skin, deep fry it to make chips. Easy peasy, but they pop so you definitely need a spatter-guard and they make the oil unreusably fishy so use as little as possible. On the other hand, they're pre-seasoned for your convenience. They suggest serving the chips on top of cold boiled red potatoes, but I liked them on top of a graxlax-laden cracker for a bit more crunch.

Friday, May 15, 2009

Bacon and egg risotto

This is a recipe from the Ojai Valley Inn courtesy of the Los Angeles Times' Culinary SOS column. Risotto is pretty flexible so just moving the flavors from Italian to American isn't all that interesting, but instead of dumping a bunch of cheese in at the end, the recipe called for a raw egg yolk to be mixed into each serving at the table and that seemed worth a try.

I wanted to add some vegetation to the dish so I left out the minor amount of chives and substituted in a good bit of finely chopped broccolini. No doubt that ruined the balance of flavors Jaime West, the original chef, was looking for, but I think it still turned out fine.

Ingredients:
3 cups reduced-sodium chicken broth
1/2 onion, chopped
1/2 tablespoon butter
3/4 cups arborio rice
1/2 teaspoon minced garlic
3 strips bacon, preferably apple-wood-smoked, cut into 1/4-inch dice
1/8 cup grated Parmigiano-Reggiano
1/8 cup chopped chives [or a full cup of broccolini]
Sea salt
Freshly ground black pepper
2 egg yolks

1. In a medium saucepan, bring the broth to a simmer. Reduce the heat to low to keep the broth warm.

2. Meanwhile, in a 4-quart heavy pot over medium heat, cook the onion in the butter until softened, stirring often, about 5 minutes. Stir in the rice, garlic and bacon and cook, stirring frequently, until the bacon begins to brown, about 3 minutes.

3. Stir in one-half cup warm broth and continue to cook the rice at a simmer until the broth is absorbed, stirring frequently. Continue to add the broth, one-half cup at a time, stirring constantly until each addition is absorbed before adding the next, until the rice is creamy-looking but still slightly chewy, 18 to 20 minutes (you should have leftover broth). [I added the broccolini at around 10 minutes and ended up using the full three cups of broth and 25 minutes of cooking time.

4. Stir in the cheese and chives, and season with salt and pepper to taste.

5. Immediately divide the risotto between 2 warmed plates, and make an indentation in each mound of risotto for a yolk. Place a yolk in the center of each mound and serve immediately.


The egg flavor comes through clearly in the sauce so there's no mistaking this for a traditional risotto. It's rich and smokey with a little bit of bitterness from the broccolini. I think the flavors would be rather straightforward and boring without it though. I was more attentive to my stirring than usual and I think it paid off in rice that was firm but not chalky and a thick creamy sauce. I cut my bacon larger than the recipe called for so I had a little problem with chewing limp rubbery bacon pieces, but crisp really isn't an option in a risotto. Kind of misses the point of bacon, though; There are plenty of other ways of adding smoky flavor. I wonder if there's some way to make it work with a smoked ham hock instead.

Anyway, I did like it; Not as much as a traditional risotto with prosciutto and cheese instead of bacon and eggs, but I did like it well enough.

Thursday, May 14, 2009

Banana ice cream with stuff in it

said stuff being a peanut butter/honey swirl and graham cracker brittle. A bit long to put all that in the title.

This is a new version of an ice cream I made back in February '08. And part of that recipe I took from Alton Brown:
Banana Ice Cream
3 medium ripe bananas, peeled (a little over 1 pound)
1/2 Tablespoon lemon juice
3/8 cup light corn syrup
1/2 teaspoon vanilla extract
1 1/2 cups heavy cream

Freeze and defrost the bananas. Mix everything in a blender, chill, churn, ripen and serve.

My innovation was adding habeñero peppers and an attempt at a peanut butter/honey swirl that ended up more as chewy chunks (albeit tasty ones). That turned out fine, but could have done with some improvement and since I was responding to a request for banana ice cream this week, it seemed a good time to look back and see what could be done with it.

First thing was adding some more texture. I was very happy with how the almond brittle worked in the lapsang ice cream I made a while back so I thought that approach would work well. There was already going to be nuts (well, legumes) from the peanut butter so I wanted to make a cookie brittle instead. Nilla Wafers were my first choice, but I had graham crackers in the house for another recipe I'm going to make sooner or later and they'll do fine. When you look up recipes for graham cracker brittle on-line, though, you find some weird cookies that soak the crackers in whole sticks of melted butter before pouring caramel over top. Not what I was looking for. Instead I just crushed up a half cup of crackers, cooked three ounces of sugar to hard crack stage, mixed them together, spread it out flat and, once it hardened, whacked it with my crab hammer into bitty pieces. There: brittle.

For the swirl, I saw honey roasted as an option in the grind-your-own-butter peanut bins at Whole Foods. Half the price of the plain peanuts for some reason so I tried that. It came out crunchy style which wasn't my intention, but was actually a plus as it eventually added some more textural interest to the ice cream. I mixed roughly equal amounts of the peanut butter and a wildflower honey and then, to make sure it would stay liquid, a good dose of vodka. It got gooey in a refrigerator test so in went more vodka and then too much vodka so I had to add more peanut butter and honey to get some flavor back into the mix. And some hot sauce too; what the heck. I wasn't entirely happy with the final result, but the texture seemed to hold up well as it chilled and the alcohol burn tends to fade at freezer temperatures so I figured I'd be OK.

So, once everything was good and cold, I churned up the ice cream mix and as I was scooping it out mixed in handfuls of the brittle and dollops of the swirl. After a night in the freezer, here it is:


I like the clarity of flavor the agave syrup gives the banana ice cream. It's not banana/honey (although that's a fine flavor combination); it doesn't have that industrial tinge corn syrup gives or the deep undertones of molasses; it's just banana. This really cements agave nectar's place in my pantry for the times that I need fructose, but don't want any of those other flavors. Thanks to that fructose, along with the bananas, the texture is nicely smooth and creamy. The bananas make it a bit goopy as it melts but given how much fat their substituting for, that's a minor quibble.

The peanut butter/honey swirl I screwed up a little as I tried to ensure it stayed liquid in the freezer. The vodka thinned out the flavors unevenly so the result tastes of peanut butter first, vodka second and then a little honey. The hot sauce was really completely unnecessary as there was already some burn from the vodka (although not a lot).

The graham cracker brittle is also a little off. The sugar cooked a little too dark and contributes a a touch more flavor to the combination than I wanted. The graham cracker is still easy to recognize but it's pairing with the caramelized sugar and not with the banana, peanut butter and honey that it was supposed to. And if you're not going to get those combinations you kind of lose the point of using graham crackers in the first place.

My last gripe is that I over-swirled the ice cream so you don't get the distinct layers I was hoping for. That said, the mixture is still sufficiently uneven that you get a different balance between banana and peanut butter in each spoonful which is a nice effect. And those flavors are pretty nice. Coming at this without knowing what I had in mind, this is a dandy ice cream and an improvement on last year's model I think.

Tuesday, May 12, 2009

Chicken and squash chicharrones

Yes, I know those words don't make any sense together; bear with me a little while and I'll explain.

What I was actually making for dinner were just chicken chicharrones which aren't actually chicharrones either (although I have made the chicken equivalent of pork rinds just incidentally while rendering down chicken fat for schmaltz. They're called gribenes in Yiddish and they're not half bad.) These are deep-fried chicken nuggets common all through South America and the Philippines too (at least according to the commentary on the recipes I found. I really ought to go on a culinary tour of someplace someday and see these things for myself). They kind of look like pork rinds, at least the good sort you can get some places here in Miami, not the puffed up industrial ones in the supermarket.

Unsurprisingly, there's a good bit of variation in the recipes; I went with something on the Filipino end of things.

You can cut up a whole chicken, bones and all, but I just used two chicken thighs and saved the bones for stock. The marinade is made of equal parts soy sauce, rum and lime juice--one ounce each for that much chicken--a little sugar and, optionally, garlic, a couple dashes of hot sauce and/or cilantro. Marinate for an hour on the counter or overnight in the refrigerator (so long as you bring it back up to room temperature before cooking).

For the breading, mix 1/2 cup finely ground flour--corn flour (which is something distinct from corn starch I just learned) in South America typically or rice flour for the Filipino version. Into that half cup mix a half teaspoon of salt and a half teaspoon of whatever flavorings you want that didn't use in the marinade. I used garlic in the marinade so I added cayenne pepper and finely chopped cilantro to the flour.

Fish the chicken out of the marinade, shake and/or pat it dry, dredge it in the flour and fry it in the hot oil until golden brown. Some recipes call for shallow frying, some deep frying. There's also a pretty big range in cooking times--from six to twelve minutes. It all depends on how small you cut your pieces of chicken. I did mine no more than a couple inches across so I couldn't get them out of the oil fast enough. I slightly burnt most of them, but the last batch with the heat on low and only cooked for three minutes total came out OK.


As for the squash, I had both the marinade and the plenty of leftover flour mix and I wanted some vegetation with my dinner. I had chopped and frozen the squash a few weeks ago and I decided, given my problems controlling my oil temperature, it would be best to cook it without defrosting. I took a handful of squash pieces from the freezer, gave them a couple minutes in the marinade and then into the bag of flour for tossing without drying them off since I wanted a bit more of a batter than I was getting for the chicken. They got three minutes in the oil too and they came out looking pretty nice.


Both the chicken and the squash taste pretty good too, particularly finished with a squeeze of lime. The central ingredient and the breading are fairly equal partners with the seasonings present but not overbearing. There's a nice crunch when they're hot, but the flavors better when they've cooled off a bit. Cooking the squash from frozen was a good idea; it would have been mush if I had defrosted it first. As is, it's still got a little bite to it and a nice burst of flavor captured inside the breading. These aren't giant flavors that wow you with bite, but they're good bar food and I think that's all chicharrones of any sort are meant to be.

That said, there's a similar recipe for Bancock street fried chicken that looks like it might step things up a bit, but I need to get ahold of some coriander root to do it right. Have any of you seen that for sale?

Sunday, May 10, 2009

Whole wheat sugared puffs

This is my version of a recipe that's been making the rounds of the cooking blogs since it appeared in the New York Times in March. the NY Times has an occasional column--Recipe Redux--where some chef-of-the-moment remakes a recipe that appeared in the paper a few decades previously. This time David Lebovitz redid Maida Heatter's 1966 popover recipe by adding a little sugar to the dough and a whole lot of sugar to the outside. In the accompanying article, he's quoted as saying: “It’s like a cinnamon doughnut. Who needs the fried and all the inside? You want the crunch.” Crunchy donuts? The article's author, Amanda Hesser describes them as "part soufflé, part doughnut, part cinnamon toast." which is more on the mark to my mind.

I changed the recipe a little by using for the generic "1 cup flour", half a cup of bread flour and half a cup of whole wheat pastry flour. I had some success when I used this combination for crêpes a while back so I figured it was worth trying here too. I also used some vanilla sugar in the coating along with the cinnamon.

Ingredients:
For the puffs:

Softened unsalted butter, for greasing the pan
2 tablespoons butter, melted
3 large eggs, at room temperature
1 cup whole milk
1 teaspoon salt
1 1/2 teaspoons sugar
1 cup flour

For the sugar coating:

2/3 cup sugar
1 teaspoon ground cinnamon
4 tablespoons butter, melted.

1. Preheat the oven to 400 degrees. Liberally grease a nonstick popover pan, or a muffin pan with 1/2-cup indentations, with softened butter.

2. For the puffs, put the 2 tablespoons melted butter, eggs, milk, salt and sugar in a blender and whiz for a few seconds.

3. Add the flour and whiz for 5 to 8 seconds, just until smooth.
[I've never made popovers before so I didn't know that the dough was going to be so very thin. I double-checked that I had done everything correctly, but I was still skeptical that I had done it right.]

4. Divide the batter among 9 greased molds, filling each 1/2 to 2/3 full.
[My skepticism increased when I found I could fill all 12 molds 2/3 full.]

5. Bake for 35 minutes, until the puffs are deep brown.
[The word "deep" there makes a big difference, and judging from the pictures and descriptions on many of the blogs, a lot of people are missing it. I did too.]

6. Remove from the oven, wait a few minutes until cool enough to handle, then remove the puffs from the pans. You may need a small knife to help pry them out.

7. Mix the sugar and cinnamon in a medium bowl. Thoroughly brush each puff all over with melted butter, then dredge in sugar and cinnamon mixture to coat completely. Let cool on a baking rack. Makes 9 puffs.
[I found brushing the puffs while they sat in a wide-mouthed bowl kept the mess to a minimum. Plus, by the end of the process, the dripped butter was coating the bottoms while I was brushing the tops. There wasn't quite enough sugar for a proper dredge so it was more of a roll and pour over-top process. I ended up with about a third of the sugar and butter left over even having to coat a full dozen puffs so you can cut back on the amounts here without a problem.]

I got halfway through the brushing and dredging procedure before I decided to actually try one of the puffs. I found it to be rather undercooked--soggy and eggy in the middle. I had done the full 35 minutes so I took another look at the recipe to see if I missed something. I had: the word "deep". I had taken out the puffs when they were golden brown as your impulse would have been to do to. Look at them; Those look done.

If they were just a little more done, I could have passed them off as soufflé-like in the middle, but as it was they had to be fixed. So I reheated the oven to 400 degrees, put the puffs back in the muffin pan and then back in the oven to continue baking. I checked every five minutes and at 15, they looked ready. Sorry, I neglected to take a picture before I returned to coating them, but here's one after:
You can kind of see the deeper brown.


The texture is crisp on the outside and inside, light and airy with a thin layer of chewy in between. I like the way the sugar melted a bit into a glaze on the pre-coated ones, but not enough to recommend doing what I did deliberately. The flavor is the rich eggy sweet/savory mix of cinnamon french toast. Not bad at all, if you like your deserts and/or breakfast pastry on the reserved side (as far as sweetness goes. Nothing reserved about the levels of fat in here). And certainly easy enough, too.

I'm curious about savory popovers now. Maybe I ought to make beef Wellington.

Friday, May 8, 2009

Pork clay pot

Pork medium saucepan, more accurately. This is an adaption of a classic Vietnamese dish by Mark Bittman from his Bitten blog (and in the NY Times Chef column 5 years previously). I've looked around for more traditional recipes and it doesn't look like he changed it much other than the cooking vessel. I did find that you can use pork belly instead of pork shoulder but you'd have to cook it an extra hour. I can't find pork belly locally so not really an option there. One other point is that it's important to use the milder Vietnamese fish sauce instead of the saltier Thai version. I used the wussified supermarket fish sauce I picked up once when I couldn't make it out to the Asian grocery. Nice to know it has a legitimate use.

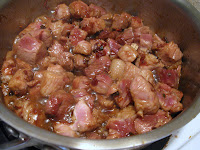
All that said, I was interested less in the authenticity than in the unusual technique of cooking the spices and then the meat in a caramel. It's an interesting alternative to the standard oil and water mediums and I was curious how it would work technically. Now that I've tried it I'm not sure I've got any great insights. It did seem to stick to the meat so it browned better than you'd expect in an overcrowded pan, but that may be an illusion since it's brown to start with. There not have been much Maillard reaction going on for proper browning. More experimentation will be required.

Recipe: Pork Clay Pot

Adapted from Charles Phan by Mark Bittman

Time: 45 minutes

Ingredients:
2 tablespoons neutral oil, like corn or canola
1/4 cup sugar
1 tablespoon minced garlic
1/4 cup chopped shallots
1 tablespoon minced ginger
1 small chili, minced
1 1/2 pounds fatty pork, cut from shoulder, or about 2 pounds fatty pork chops, cut into 1- to 1 1/2-inch cubes
2 tablespoons fish sauce, or to taste
1 teaspoon ground black pepper, or to taste
4 hard-cooked eggs, peeled
Salt if necessary
Shredded scallion for garnish [cilantro too]
[Sriracha hot sauce which is Thai or a Vietnamese vinegar-based hot sauce if you have it]

Cooked white rice.

1. Put oil in a saucepan or clay pot large enough to comfortably accommodate pork; turn heat to medium. Add sugar and cook, stirring occasionally, until it dissolves and colors a bit, 3 or 4 minutes. Add garlic, shallots, ginger and chili and cook, stirring occasionally, until shallots soften, about 5 minutes.

2. Add pork and raise heat to medium-high. Let it brown a little, stirring occasionally, for about 5 minutes. Add 1/2 cup water, and fish sauce and black pepper. Bring to a boil, then adjust heat so mixture simmers steadily. Nestle eggs in mixture and cover pot. Cook for about 30 minutes, stirring once or twice, until pork is tender, adding a little more water if mixture threatens to dry out.

3. Taste and adjust seasoning, then garnish with scallions and serve with rice.

Yield: 4 servings.


Hey look, the yolk didn't oxidize and get all green and stinky. I wonder why not.

The pork is cooked just the wrong length of time. You know how meat starts tender, toughens while you cook it, and then gets tender again as the connective tissue dissolves? A half hour gets it just to the wrong point on that bell curve. At least I kept the simmer low. Upon further consideration, the meat isn't tough as such, just chewy. I'm putting the rest back on the heat for at least another half hour. [45 minutes did the trick, although it did a number on the eggs.]

The sauce is rich with pork juices, sweet and a little funky from the fish sauce. Fair on its own, but really good when balanced by the tart and sweet from the hot sauce and the fresh herbs. It's only half a dish without the garnishes. Cooking the sauce down to half its volume would probably do it some good too. Now that I've done the research I find that many recipes leave the lid off and cook the sauce way down. I'll do that when I continue simmering the pork. [I only cooked the sauce down a little but the flavors got pretty intense so I didn't want to go any further. Be careful. I think the particular nature of your chili and fish sauce are going to make a big difference here.]

I'm thinking that there's no reason this dish couldn't have vegetables too. Root vegetables to soak up the flavor like the eggs did would be best: carrots, daikon, turnip, that sort of thing. I haven't got any of those in the house right now, but I think I might revisit this recipe in the middle of next CSA season.