Thursday, April 30, 2009

CSA week 20 - Glazed turnips, cabbage and kielbasa

As I mentioned a while back, I wanted to try a variation on the very successful and rather odd glazed turnip recipe I made a while back. I was just going to mess with the seasonings a little, but since I've got half a cabbage and a little sausage that might do well in this inverse braise why not try it all together?

It's the same simple procedure: slice a turnip into wedges, add them to a cold pan, dot with butter and add water to halfway up. Bring to a boil on high, turn heat down to medium, boil away the water stirring infrequently (about 20 minutes, when the pan's dry turn the heat back up and cook five minutes more until the turnips are tender and browned.

This time I added the sausage when the water came to a boil and laid the cabbage over top for it to steam. I tried to keep it elevated after stirring with some success, but just mixed everything up for the final sauté. That caused a small problem as the cabbage stuck to the cast iron pan and burnt a little. I should have used non-stick.

I decided not to do a full vinegrette since that would have been weird with the sausage. Instead I just seasoned with a little mustard seed, a little caraway seed, salt and pepper and drizzled a little cider vinegar over top when it was done. I would have deglazed the pan with it if it wasn't for the burnt bits.


The turnip didn't turn out quite as well as last time. They could have used a little more time in the pan when the cabbage was ready to come out. Also, this turnip was a bit past its prime so its texture was sub-par before I started. Given all that, it turned out fine. The cabbage worked out better--tender, lightly browned (the overbrowned bits stayed in the pan) and flavorful. And the keilbalsa was well cooked and had a bit of browning too.

So, a good one pot meal. I just need to cook the turnips a little longer before adding everything else.

And that does it for the CSA season bar some leftover celery that I've got a plan for and a pile of potatoes that I don't. The first a la carte CSA offering is this weekend but you have to pick it up down at the farm and I really don't like driving in Miami even on Saturdays so I passed this time around. I think I'm happier with how it went this time around than last year. I threw out less lettuce for one thing and I think the dishes I made were, on average, both tastier and more interesting. I have the CSA to thank for my increased blog readership certainly, although given the number of people in the CSA I thought I'd have more than a few dozen regular readers. I guess most folks know what they're doing and don't need my ideas. I wonder if a message board would get more traffic? I also wonder how many folks will stick around as I switch from CSA-driven posting to working through the recipe to-do list I've accumulated. Time will tell.

Tuesday, April 28, 2009

CSA week 19 - Pizzoccheri

Pizzoccheri is both the name of this dish and the buckwheat noodles that make it so unusual and interesting. I've only ever seen buckwheat noodles before as Japanese soba noodles. These come from Valtellina in northern Italy. This casserole seems to be the only thing that gets done with them.

There are quite a few versions of this recipe on the web. I picked one that made a reasonably small amount for my first try, but beyond that convenience and some small variation in the ratios, they're all pretty much the same.

I could have substituted in soba and saved myself a bit of trouble, but I decided to make the pizzoccheri noodles from scratch. I need the practice.
I used:
1 cup buckwheat flour
3/4 cup semolina flour
2 large eggs [some recipes just use water]
a pinch of salt,

mixed them all together in the usual way, kneaded for a good ten minutes to compensate for the lack of gluten in the buckwheat, let it rest and then clogged up my pasta machine with the soft, sticky, friable, unworkable dough. That clearly wasn't going to work so I rolled it out by hand as best I could and then cut out broad, short noodles.

I let them dry a little as I brought a pot of water up to a boil.

Meanwhile, I fried 2 ounces of chopped pancetta in a small pan. This is an unusual addition to a simple peasant dish, but since I'm not actually a peasant I figured I could splurge a little. Once they were crisp, I fished them out and set them aside. Then I added a modest 3 Tablespoons of butter to the pan [I saw recipes that used a whole stick], melted that down, added a smashed clove of garlic and 4 julienned sage leaves and simmered on low for a couple minutes to infuse the flavors. No browning.

By this time, the water had come to a boil so I added the noodles. Because they were so thick, they took a good 15 minutes to cook through. I fished them out and kept them warm. Then I added six ounces of shredded cabbage [some recipes use chard] and a large potato, thinly sliced and boiled them for ten minutes until they were tender. A lot of recipes start with the vegetables, cook a little while and then add the noodles to the pot, but I had no idea how long my noodles were going to take so this way seemed best.

And finally, I shredded 4 ounces of fontina cheese and 2 ounces of Parmesan. Again, many recipes use a lot more.

Once everything was cooked, I got out a big bowl, put some noodles in the bottom, added a layer of vegetables then a layer of cheese and repeated until I had three full layers. The pancetta goes on top and then the sage butter. A few recipes added a couple cups of bread crumbs before the butter and then baked the whole thing like a lasagna, but I kept it simple; the hot ingredients were plenty to melt the fontina to bring the dish together.


And the result is...not all I had hoped, honestly. Thinner noodles would have helped; Right now there's not much textural contrast between the noodles and the potatoes. And both are on the bland side. Pair those with boiled cabbage and mild cheese and you've got a big hearty bowl of kind of boring. It's not really bad, it just clearly could be better. Double the sage, quadruple the garlic, add some hot pepper flakes, sauté the cabbage to condense the flavor (instead of boiling it away. There's a lot of flavor in the boiling water that should be in the dish.), crisp up the potatoes, switch out the fontina for something with a bit more punch and then I think you've got something. Or maybe just more salt in the pasta water and heap up the cheese and butter. I think I was too conservative and missed the point of the dish.

I've been doing a bit more reading and thinking about buckwheat pancakes I've had. People are saying, and I'm thinking, that buckwheat by itself doesn't taste so good. The flavor you're looking for is the combination of buckwheat and butter. I've got a couple servings of leftovers and I'm adding a sizable chunk of butter to both before they go into the freezer. Also, a sprinkling of pine nuts for a bit of texture. I think that should do the trick.

Monday, April 27, 2009

CSA week 20 - Khoresh karafs

Khoresh is a type of Iranian stew and karafs is Persian for celery. Wait, hold on, I've just did a bit more research and I'm going to say that khoresh just means stew. The term is used across the Middle East and there's so much variation in recipes that I can't really pin down what would make one stew a khoresh and another not. That said, if you look up Iranian khoresh, this recipe is what you'll turn up.

The particular version I used is from here as it's a little more complicated than the other versions I found. I probably should have made this a bit sooner as the week in the refrigerator has made the CSA celery a little rubbery, but the flavors are so close to the beet soup I made last week that I wanted to put a little space in between.

Ingredients:
1 teaspoon saffron
1 teaspoon sugar
1/4 cup olive oil
6 garlic cloves, finely chopped
2 large onions, roughly chopped [I'm low on onions so I used one and one shallot]
1 1/2 teaspoon turmeric
1 teaspoon sweet paprika
1 pound stew beef cut in 1-inch pieces
salt and pepper to taste
1 large celery bunch with leaves [Our CSA celery went beyond 'large' to 'huge' so I only used three quarters of it.]
3 cups chopped herbs--a mix of parsley, cilantro and mint [I'm well off mint, at least combined with saffron, so I went half and half with parsley and cilantro.]
Juice of 1 lime [or Iranian dried or preserved limes which I haven't got]
1 Tablespoon tomato paste

1. Using a mortar and pestle, grind saffron and sugar. In a small bowl, combine ground saffron-and-sugar mixture with 1/4 cup hot water; set aside for 10 to 15 minutes.

2. In a large shallow saucepan, heat 2 tablespoons olive oil over medium heat. Add garlic and onions. Cook until golden brown, about 10 minutes. Stir in 1 teaspoon turmeric and paprika. Add beef, salt, and pepper. Cook until meat is browned, about 10 minutes. Add 1 1/2 cups hot water, and stir to combine. Cover, and cook for 20 minutes. [This recipe calls for two very large saucepans, but I've only got one. Instead of adding the water to the pan, I heated it up in my dutch oven on a back burner and added the beef mixture to it.]

3. Cut celery on the diagonal into 1 1/2-inch pieces. In a large skillet, heat remaining 2 tablespoons olive oil over medium heat. Add celery, and cook for 20 minutes, stirring occasionally. Add parsley and mint to cooked celery. Stir in additional salt and pepper, and remaining 1/2 teaspoon turmeric. Cook for 2 minutes.

4. Add celery mixture, lime juice, tomato paste, 1 tablespoon saffron-and-water mixture (saving the remainder for another use [for instance, adding to the rice you're going to serve this with]), and 2 cups hot water to beef; stir to combine. Cover, and cook over low heat for 1 hour [or into the oven at 350 degrees for 2 hours for a more foolproof method]. Serve with Persian rice [or just plain rice if you don't feel up to making fancy rice].


Not a bad preparation for someone not entirely fond of celery as their flavor is rather washed out. The dish is fragrant with herbs and saffron. The celery flavor actually blends in with the parsley and cilantro as another herb. It isn't spicy, but the turmeric and paprika are prominent keeping the stew well localized to Iran and the broth flavorful enough to keep a mouthful of celery palatable. Beyond just that, the flavors do meld well into a tasty and unusual (to me. Your standards of unusual will, of course, vary) whole. Rather better than they melded with beets, at any rate.

If you find yourself stuck with a big head of celery, this is a fine way to use it. But if you're the sort of person who goes out and buys a big head of celery, you might want to find a recipe that plays it up a little more.

Saturday, April 25, 2009

CSA week 20 - Malted honey peanut butter balls two ways

I found this recipe on the thekitchen.com blog and there was some discussion in the comments of this being (or at least being a variation on) a traditional American recipe, but I've never seen it before and Googling doesn't turn it up anywhere else. Their recipe tweaks a recipe in from the 1976 More-with-Less Cookbook. I suppose that's enough time for it to filter out a little and the origin to be forgotten. You can see their version here. For my first version I tweaked the recipe a little more but still kept it simple.

Ingredients:
1/3 cup unsweetened coconut flakes
1/2 cup natural unsweetened creamy peanut butter
1/3 cup honey
1 cup malted milk powder
1/3 cup white chocolate

1. Toast coconut flakes (carefully as they go from raw to burnt very quickly) and break them up into small bits in a clean spice or coffee grinder.

2. Mix coconut bits with honey, peanut butter and malted milk powder until they form a slightly sticky, crumbly lump. I found that the full cup of powder didn't want to incorporate so I had to knead it in like getting all of flour into a wet dough.

3. Let rest a short while to hydrate, then pinch off pieces and roll into balls.

4. Melt white chocolate in microwave or in a double boiler. Dip each ball into the chocolate and set somewhere cool to firm up. If you store them in the refrigerator, let them warm up a bit before serving.

OK, maybe that's not quite as simple as the original mix-then-roll-into-balls, but the toasting and the white chocolate are good additions.

This was good, but messy at Miami room temperature as the balls slumped and expressed oil while the white chocolate melted. Also, I wasn't entirely happy with the grainy final texture. I was clear that while the malted milk was fully incorporated a lot of it was only mixed in and not dissolved.

I wondered what would happen if I melted the honey, peanut butter and white chocolate together and then mixed in the powders. Secondarily, I had just bought a bottle of amber agave nectar. I had only tried the light version before and I was wondering how this slightly more flavorful version would work in this recipe.

That makes the new recipe:
1/3 cup unsweetened coconut flakes
1/2 cup natural unsweetened creamy peanut butter
1/3 cup agave nectar
1 cup malted milk powder
1/3 cup white chocolate
a few drops vanilla

1. Toast coconut flakes and grind them into a paste oozing coconut oil in a clean spice or coffee grinder. (Another change there to smooth out the texture.)

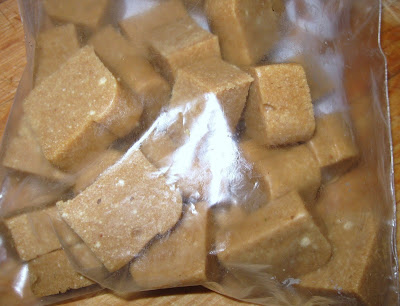
2. In small saucier, melt peanut butter, nectar, vanilla and chocolate and stir until homogeneous. Stir in coconut and malted milk powder and blend. When the powders have been fully incorporated, pour the mixture out into a small container to cool. The texture at this point was the gooey sticky napalm of melted marshmallow so may have been possible to whip in some air to adjust the texture as it cooled, but I just let it settle into a dense brick and sliced it up into rectangular cuboids. (That's the right term; don't blame me. Hyperrectangle or 3-D orthotope are close, but imply hollowness. That leaves out 'box', too.)


I took both into work and had a taste test. The results were close, but by a small margin everyone preferred the second version. The texture ended up somewhere between caramel and fudge, which is a good place for a candy to end up and sure you'll agree. I pressed the point that the crumblier candy and creamy chocolate coating made the first version much more interesting texturally, but good was preferred over interesting (much to my and every other experimental chef's disappointment).

They also liked the purer peanut flavor to the honey/peanut mix. The amber agave really wasn't much different from the light version. They both have the vacant mildly floral sweetness of honeysuckle easily overwhelmed by the stronger flavors at play here. I shouldn't have been surprised; it says "mild" right there on the bottle. The malt and coconut flavors are there too, but they're enriching the peanut, not standing up recognizably on their.


One of my colleagues who's from south India made the interesting observation that the second version's flavors and textures aren't far from some traditional candies from that region. That opens the possibilities of adding cardamom, pistachios, maybe rosewater. Lots of room for further experimentation here, but they're plenty tasty as is too.

Friday, April 24, 2009

CSA week 20 - steamed scallion and sausage buns

This is not quite an authentic recipe, I think. At least the sausage buns I've seen have also had egg custard or were a bun wrapped around a whole sausage. Also, I doubled the scallions. There's never enough in the traditional ones.

I worked off of the recipe from here. I made some minor adjustments for adding the sausage and skipped the fancy styling, though.

Ingredients:

For the dough:
1 1/2 teaspoons yeast
3 cups bread flour
2 oz sugar [down from three in the original recipe]
1/4 cup vegetable oil
1 cup milk

For the filling:
6 Tablespoons chopped scallions, green part only
1 link lop chong, steamed for five minutes or microwaved for one to partially cook and then sliced thin and chopped
1 teaspoon salt
1/2 teaspoon sugar
1 tablespoon sesame oil [double if you're not using the sausage]

0. Turn on oven to lowest setting.

1. Mix flour, sugar and yeast (or activate yeast in milk if you're using that sort). Mix in vegetable oil and milk until a slightly stiff dough forms. Let rest 20 minutes. Knead for five minutes until gluten forms. Put in clean bowl, cover with moist cloth and put in oven for 1 hour.

2. Mix filling ingredients and allow to macerate.

3. After an hour, remove dough from oven and scrape out onto a floured work surface. Roll dough out to form a 14" by 20" rectangle. A little thinner would probably be fine but that's how big my cutting board is so that's as far as I got. Spread filling over dough. [I used 4 Tablespoons of scallion to start but decided it was a bit sparse so I chopped up a bit more. Another half a sausage wouldn't be a bad either.

4. Roll the dough up along the short axis and slice into two inch pieces. Use a sharp knife and and sawing motion with little downward pressure to keep from squishing the dough. Stand the slices up on baking sheets with plenty of room around each and return them to the oven that I never told you to turn off. Let rise 40 minutes.

5. Start a steamer steaming. When buns are well risen, move to steamer and steam 13 minutes. They'll expand again so don't crowd the steamer. I did batches of four but that only worked because my end pieces rather small. If you did step 3 better than I did, you'll have to do batches of three.

And that's it! Serve immediately with a completely optional soy/chili oil dip or cool and freeze. Reheat 60 seconds in the microwave covered with a damp paper towel.


These turned out very well. I'll put them up against the best I've had in various Chinatowns. The dough is just as it should be: fluffy and light, but squishy and chewy to the bite. Mild, but not flavorless. A lot of recipes didn't use milk, but I quite like the character it added. The scallions and sausage are aromatic and brightly savory, cutting through the sweetness of the buns. Darn good stuff, but I've got to stop eating them so I can freeze some for later. So now I've made gyoza, sticky rice and buns. I think roast pork is up next in my Chinese snack agenda.

Wednesday, April 22, 2009

CSA week 20 - deep fried stuffed cucumbers

Did you know that pork and cucumbers are a traditional Chinese combination? I didn't, but I did a search for "fried cucumbers" just to see if recipes for such a thing existed and there they were. At first I was going to do a stir fry, but I gotta do something a little more interesting for the blog, so stuffed and deep fried it is. This is another recipe from Thousand Recipes Chinese Cookbook.

Ingredients:
3 dried black mushrooms (I used cloud ears)
1/2 pound lean pork
2 slices fresh ginger
1 scallion
1 Tablespoon soy sauce
1 Tablespoon sherry or rice wine
1 teaspoon sugar
1/2 teaspoon salt
1 teaspoon oil

3 large cucumbers
3 Tablespoons cornstarch
1/4 cup water
oil for deep frying
1/2 cup water
1 Tablespoon tomato or soy sauce

0. Soak the mushrooms and chill the pork in the freezer until firm.

1. Process the pork, mushrooms, ginger and scallion in a food processor until nearly smooth. A dozen pulses or so.

2. Blend in soy sauce, rice wine, sugar, salt and oil. Set aside in refrigerator.

3. Peel cucumbers in stripes and cut crosswise in 2-inch sections.

4. Start heating oil for deep frying.

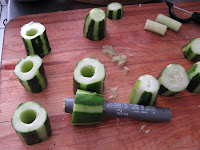
5. Scoop out seeds. [An old fashioned peeler is a good tool for this. I haven't got one, but the tubular protective case for my candy thermometer did the job nicely. Any thoughts on what to do with the leftover cucumber cores?] Stuff cucumbers with filling mixture.

6. Mix cornstarch with 1/4 cup water. Brush mixture over cucumber sections. Resist the temptation to dunk the cucumbers since you'll be using the cornstarch in the sauce and don't want raw pork in it.

7. When oil is just about smoking add cucumber sections a few at a time without crowding the pan. Deep fry a few minutes until pale golden. Drain.

8. Heat 1/2 cup water to a low simmer in a large pan or dutch oven. Carefully add cucumber sections, cover, turn down heat to low and simmer 10 minutes.

9. Remove cucumbers to serving platter. Mix soy or tomato sauce [I didn't want to open a can of tomato sauce for one Tablespoon so I used a teaspoon of tomato paste and a Tablespoon of soy sauce.] with a little of the corn starch mixture [The recipe says to use all of it, but it was far too much for the amount of liquid I had to thicken and I ended up adding another half cup of water to thin it out.] and add to liquid in pan and stir to thicken. Pour over the cucumbers and serve.


Hmm, not the most attractive presentation I've seen. It reminds me of the painting of the Elder Ones in Barlow's Guide to Extraterrestrials. Just me? The striping is more prominent on the page. Maybe it was the unsettling texture of the over-thickened sauce that put me in a Lovecraftian state of mind.

Appearances aside, it's not bad. The cucumber has the texture and, to some extent the flavor, of cooked green pepper. Soft in places but still with a little firmness to the bite. It's not easy to recognize as cucumber as the flavor isn't strong, but if someone told you, you wouldn't scoff. The pairing with the pork is pretty good but the sauce gets in the way. I shouldn't have used the tomato paste. The sauce is thinly flavored due to the extra water I had to add, but the tomato flavor does come through and I don't think it works well with the cucumber. The combined pork and cucumber juices that gathered on the plate as the pieces rested is pretty tasty and a fair bit better than the prepared sauce to my mind.

I'm curious about the pork and cucumber stir fry recipe I passed up for this. If the two were both sliced thin and tossed together instead of sitting is separate chunks, would I get that blending of flavors throughout? Maybe so. Rather lighter on the oil too. This is good, but next time I've got cucumbers to hand I'm making that instead.

Monday, April 20, 2009

CSA week 19 - garlic soba noodles with kale and scallops

So I was searching on-line for a New York Times recipe for kale that substituted soba noodles for a traditional Italian buckwheat pasta and discovered a) the non-healthified version of that dish uses cabbage and potatoes (other CSA veges I've still got) and looks really good and b) there are Japanese recipes that legitimately pair soba noodles with kale. I set the Italian recipe aside and went with Japanese tonight.

There doesn't seem to be a particular name for this dish, but a couple pages of Google results roughly agreed on the recipe. Cook the soba noodles and set them aside. Shred the kale, blanch it for a few minutes and then sauté just like the Brazilian recipe I posted about a while back. Maybe this is a recent Sushi Samba sort of thing. Garlic, shiitakes and scallions are standard additions. Scallops my own since I wanted a bit of protein.

I sautéed the kale over very high heat and it took a couple minutes before it started wilting properly. I added the shiitakes early on, the garlic just as the wilting started and the scallops and scallions right before taking it off the heat and mixing with the noodles.

For the sauce I went the lazy route and used the little packets that came with the soba. I saw a recipe that simmered the shiitakes with some kombu instead of soaking and boil that down and mix with a bit of soy instead which sounds interesting.

Deglaze the pan with a little rice wine, mix in that and the sauce, top with a little sesame and/or chili oil and, if you've got it, shredded nori and you're done.


The texture on the kale's pretty good--just a little firm to the bite, but I wish it had retained a little more flavor. The chunky bits stand up to the sauce but the little bits of kale and scallion have trouble. Their not entirely lost, but it would be nice if they stood out a bit more. I think I'd use big chunks of scallion next time, but there's not much to be done about the kale. Maybe some salt in the blanching water to brighten it up.

Also, in retrospect this would be best chilled instead of slightly above room temperature. And that means this would work as a potluck dish and you could trick unsuspecting innocents into eating kale. Interesting.

Saturday, April 18, 2009

CSA week mainly 18 - Fragrant beetroot and vegetable soup with spiced lamb kubbeh

This is a recipe from the cookbook Sephardic Flavors by Joyce Goldstein. It comes from the Jewish community that used to be in Cochin in south India. Now they're nearly all in Israel or New York City.

While poking through the other cookbooks my sister brought to Passover I found a surprisingly similar (if rather simpler) recipe for a beet soup with meat dumplings from Iraq called Kukkah Adom. A quick search online turns up that at least one family of the Cochin community emigrated from Iraq so this must come from that tradition.

Ingredients:
1 Tablespoon vegetable oil
1/2 onion, finely chopped
6 garlic cloves
1 carrot, diced [or two of the small CSA ones]
1 zucchini, diced [the pieces of zucchini I froze defrosted a little mushy, but otherwise intact]
1/2 celery stick, diced
4-5 cardamom pods [I seem to be out of whole cardamom so I used the powder]
1/2 teaspoon curry powder
4 vacuum-packed beet root, finely diced and juice reserved
[I've never seen a vacuum-packed beet so I have no idea how big they are. I used the full 1 1/2 pounds of CSA beets which, in retrospect, was way too much. I presume the packed beets are pre-cooked, given how they're used in this recipe, so I simmered my raw beets for 20 minutes. The picture in the cookbook had rather large pieces of beet so I went with that. If you go for the fine dice, 10 minutes will probably do. Also, I substituted 1 cup of the boiling water for the packed beet juices.]
4 cups vegetable stock
[or 2 cups beet boiling water and 2 cups chicken stock]
14 oz can chopped tomatoes
3-4 Tablespoons chopped cilantro
2 bay leaves
1 Tablespoon sugar
salt and pepper
1-2 Tablespoons white wine vinegar, to serve

for kubbeh:
2 large pinches of saffron threads
1 Tablespoon hot water
1 Tablespoon vegetable oil
1 large onion, chopped
9 oz lean minced or ground lamb
1 teaspoon vinegar
1/2 bunch fresh mint, chopped

1 cup plain flour (semolina better)
1-3 pinches salt
1/2 - 1 teaspoon turmeric
4-8 Tablespoons cold water

for ginger and cilantro paste:
4 garlic cloves, chopped
1-1 1/2 Tablespoons chopped fresh ginger
1/2 - 4 fresh mild chillies
1/2 large bunch fresh cilantro [stems included since you're going to puree everything]
2 Tablespoons white wine vinegar
salt
extra virgin olive oil

1. To make paste, put garlic, ginger and chillies in food processor and process. Add rest, process to puree. Start with a little olive oil and add more with processing until you get a nice smooth texture. Set aside.


2. To make kubbeh filling, place saffron in hot water and leave to infuse. Heat oil in pan and fry onion until soft. Put onion and and saffron water in food processor. Blend. Add lamb, season and blend. Add vinegar and mint. Chill.


3. To make kubbeh dough, mix flour, salt and turmeric. Add water until it forms a slightly sticky but still workable dough. Let rest 20 minutes Knead for 5 minutes, wrap in plastic and let stand 30 minutes.


4. Divide dough into 10 - 15 pieces. Roll each into ball then roll into thin rounds. Place a spoonful of filling in each, dampen the edges, fold over or bundle up to seal. [I started by bundling up, but as I kept going along, I found myself doing more of an envelope fold and making flat square packets.] Set aside on a floured surface. [I made 12 pieces and found I had a third of the filling leftover. I'm not sure what went wrong there. Maybe my onion was too big? I made a dozen meatballs with the extra.]

5. To make soup, heat oil in pan, add onion and fry for 10 minutes until soft but not brown. Add half the garlic, the carrot, zucchini, celery, cardamom and curry. Cook 2-3 minutes.

6. Add three quarters of the diced beetroot, the stock, tomatoes, cilantro, bay leaves and sugar. Bring to boil, reduce heat and simmer for 20 minutes.

7. Add remaining beetroot, juice and garlic. Season to taste and set aside.

8. To serve, reheat soup and poach dumplings in salted water for 4 minutes. For each bowl, add a dash of vinegar, two or three dumplings [or a dumplings and three meatballs] and a small spoonful of the paste.


OK, this is a strange combination of flavors and they're not immediately gelling into a whole.

The broth is sweet from all that beet water, but not cloying. There's a lot of savory and acid in there too. And heat floating in from the cilantro paste. You can taste the beets and tomatoes in it, both mellowed. The herbs and spices do make it fragrant so the name is accurate enough.

The twenty minutes of cooking wasn't enough to cook the character out of the vegetables. All of them, even the canned tomatoes, keep their individual flavors and textures. Well actually, the beets that cooked for the twenty minutes taste just like the broth now so putting some more in at the end makes sense.

I've tried different combinations of the ingredients and I've decided I like everything but the mint. Maybe if there was just a lot less of it. Mint's supposed to go with lamb and beets, but it's just jumping to the fore and clashing with everything. Or at least with the tomatoes. That definitely doesn't work at all. If you get a piece of kubbeh without much mint, it's not bad at all. It's actually not far off from Ashkenazi kreplach so maybe heavy meat dumplings are a universal of Jewish cooking. The soup itself, when you get used to it, is not a bad chunky vegetable soup with some interestingly unusual flavors, particularly with the cilantro paste added. Not something I'd seek out, to tell the truth, but if you're a vegetable soup fan, worth a try. Maybe it'll be better after a night in the refrigerator for the flavors to meld.

OK, it's tomorrow and I'm trying a bowl without the kubbeh. Just plain, without the cilantro paste, it's extra-sweet vegetable soup. No big deal. With the paste it's a lot more interesting with an odd, but not bad combination of flavors. Oh, I forgot to add the vinegar. ... Now that makes more sense. The tart balances out the sweetness into a more unified whole. It's actually good now.
Hold on again, I'm going to boil up a kubbeh. ... I'm still not sold on the mint, but the acid tones it down a bit so it kind of works. I'm still tempted to open up the kubbeh and extract the mint with tweezers, though.

I strongly considered switching out the mint for something I liked more, but I wanted to make such an unusual recipe as written. But having done that, I have no idea if it tastes anything close to what it's supposed to. And how many people on the planet could answer that? A few thousand? Maybe I should just please myself.

CSA week 20 start-up

No wrap-up for week 19 as I wasn't up to much cooking or eating for most of the week. I'm feeling somewhat better now so my project for the day is the mysterious beet recipe I've mentioned that should use up most of the leftover week 18 ingredients and some week 19 stuff too. Consider that post the wrap-up if you strongly feel you must have one.

Straight on into our final week, then. Quite a big haul to send us off with too.

Starting in the upper left corner, there's a big bunch of scallions. I'm thinking of follow-up my leek bread recipe with Chinese steamed scallion buns; I could easily see deciding to make Chinese roast pork and char siu bao instead, though.

The honey doesn't require a plan, but I do have a simple candy recipe I want to try with it.

I'm glad to see some corn again. I haven't peeked inside to see what shape the ears are in. Last time we got corn (or the previous time? I don't recall), it was clear the bugs had had their way with them first and I didn't have much to work with. Margie, or whoever writes the newsletter's Featured Items section, suggests eating it raw. I don't know about that, but maybe a light steam if I'm not going to use them as an ingredient.

I haven't touched the potatoes from week 18 so these just go on the pile. I don't cook much with potatoes since I freeze portions of all my big meals for lunches and that makes potatoes mushy. But that's just for soups and stews; hash browns freeze fine. Hmm...

No need to worry about the pepper, cilantro or lettuce. The first two will get used somehow and the third will rot and get thrown out eventually.

For the turnip, I want to try varying the glazed turnip recipe I posted about last month. Maybe I'll simmer them in stock instead of water or drop some herbs in. Or maybe I'll just toss them in a spice mix instead of a vinegrette.

Two small caimitos isn't enough even for a test batch of ice cream. Should be enough to substitute into my piña colada sorbet recipe, though. On the other hand, I've got no idea what caimitos taste like so adding them to coconut milk, pineapple and/or banana might be awful. I'll have to taste one and see.

Two big cucumbers, plus one left from last week, means I need to find an actual cucumber recipe for a change. I like cucumber sandwiches, but the bread I just made is a terrible choice for that. And in salads then tend to rapidly go limp and watery. I guess I'm cooking with them, then. I have seen stuffed cucumber recipes. I'm doubtful, but I've seen them.

That leaves the largest head of celery I've ever seen. That would intimidate me even if I liked celery. Which I very much do not. But I've never had fresh, local, organic celery so I'm giving this a chance. To use this much, I think I'll need a soup or stew. ... I've found a couple interesting ones. Celery keeps so that's probably for next weekend.

Friday, April 17, 2009

CSA week 19 - German leek bread

Well, German onion bread with leeks substituted in, anyway.

Ingredients:
Leek filling:
3 cups thinly sliced leeks (or yellow onions) [Luckily enough, that's exactly how much came in the CSA share.]
1 teaspoon sugar
3/4 teaspoon salt
2 Tablespoons oil
1 Tablespoon butter

Sponge:
2 1/2 teaspoons yeast
1 cup whole wheat flour
2 Tablespoons brown sugar
1/4 cup milk
1 cup water
2 Tablespoons butter, softened

Dough:
1 1/2 teaspoons salt
2 cups flour

[You'll notice that I'm measuring this in volume instead of the better practice of measuring by weight. Partially that's because that's how the recipe I'm adapting is written, but given the uncertainty of the moisture level of the cooked leeks there's no real way to be precise. Use the volumes of flour and water as a rough guide.]

1. Mix all of the sponge ingredients and let it sit somewhere warm for an hour or twenty. Well, with the dairy in it, twenty probably isn't a good idea. Let it sit for as long as you're comfortable with.

2. To make the leek filling, melt the butter in the oil over medium heat. When it's stopped sizzling add the leeks, salt and sugar and cook, stirring occasionally, until golden brown and reduced in volume by two thirds. [I cooked mine just a bit too long, but it still turned out fine so don't worry too much about it. My deep brown leeks were crispy, but I don't think that's what the recipe is aiming at.] Remove leeks, draining out most of the oil. Set aside to cool.

3. Mix three quarters of the leek filling with the sponge, flour and salt [holding back a little flour to give you some room to adjust the texture]. Adjust flour and water until you get a soft, but not sticky dough. Let sit for 20 minutes to autolyse then knead until gluten is well formed.

4. Let rise in a bowl covered with a damp cloth until doubled in volume. Stretch and fold and form into the final loaf. [I chose a wide flat shape to make the next step easier. The original recipe cuts it into six pieces and rolls those out into eight-inch lengths to make horseshoe-shaped rolls] Press the remaining leeks into the top of the loaf, cover and let rise until doubled again. [Only 45 minutes with my rather active yeast.]

5. Meanwhile, preheat your oven to 450 degrees (with your cast iron dutch oven in it if you're using that). When the dough's ready, bake for 30 minutes at 450 and 30 at 375 until the internal temperature reaches 210. The usual method of tapping the bottom to listen for a hollow sound doesn't work with this loaf. [My intention was to lower the heat from my usual method to avoid burning the leeks on the top of the loaf, but I neglected to turn down the heat for the first half hour.]


You can see the leeks on the outside blackened. They taste a little burnt, but they aren't too bad. And they come right off when cutting slices so they're kind of a waste anyway. Otherwise, the crust is light, crisp and flaky and the crumb is dense and soft with a bit of chew to keep it from wadding up like Wonderbread. The flavor is rich, hearty and a little sweet. It's not a flavor that calls out for snacking on its own; (A welcome change. Maybe I won't eat half the loaf within the hour for once.) It requires cured meat. Sausage is the obvious choice, but I think lox or smoked herring would work really well, too. Stinky cheeses are also a suitable accompaniment.

I've never made a specialty bread like this before. I wonder if I'll get tired of it before it gets stale.

Thursday, April 16, 2009

CSA week 19 - Braised chicken with green beans, Thai style

I had a cold green bean salad with bacon and blue cheese all ready to go today, but I saw a recipe that looked better so change of plans. Unfortunately, the new plan involved buying a duck which is not so easy around here. All the ones I found were frozen solid (although I'll admit I only looked two places) so I just went with chicken thighs instead.

Here's the original recipe (from Mark Bitman) with notes on my changes:
___

Braising solves several of the challenges of cooking duck: it renders the fat completely and reliably; it browns the skin without spattering; and it makes the meat tender. It also requires very little effort from the cook. You put the duck in a covered pan, turn on the heat, and walk away.

Braised Duck With Green Beans, Thai Style

Yield 4 servings

Time 1 1/2 to 2 hours

Mark Bittman

Summary

If you can find duck legs in the store, go with those. If you can buy only a whole duck, the procedure for cutting it up is almost identical to that for cutting up a chicken. The joints are a bit trickier to find, but they are in the same places.

Ingredients
  • 4 duck legs or 1 duck, cut into quarters [or four chicken thighs. Two if you're halving the recipe like I did]
  • Salt and pepper
  • 1 large onion, sliced
  • 1 tablespoon minced ginger
  • 1 tablespoon minced garlic
  • 1 or 2 small chilies, seeded and minced, or crushed red chili flakes to taste
  • 1 1/2 pounds green beans, trimmed [each share was a handy 3/4 pound so this worked nicely]
  • 1 tablespoon sugar, or to taste
  • 2 tablespoons nam pla or soy sauce
  • 2 tablespoons lime juice, or to taste
  • Coarsely chopped fresh cilantro leaves for garnish, optional
Method
  • 1. Remove excess fat from duck or duck legs. Season with salt and pepper, and put in a skillet that will fit it comfortably; turn heat to medium, and cover. Check once you hear sizzling: duck should be simmering in its own fat and exuding liquid. Adjust heat to create a steady simmer. [No real exuding from the chicken, either liquid or fat. I was hopeful about the liquid, but I knew fat would be a problem. To compensate, I stuffed a couple teaspoons of butter under the skin of each piece]
  • 2. Once bottom browns, turn. Eventually liquid will evaporate and duck will cook in fat only; at this point, lower heat and continue to cook duck, turning once in a while, until it becomes tender, about an hour. [45 minutes seemed to be plenty so I stopped then. It all depends on how low you turned your heat, though.]
  • 3. Transfer duck to a plate. Pour off all but a couple of tablespoons of fat. Turn heat to medium high, and add onion; cook, stirring occasionally, until it softens, about 5 minutes. Add ginger, garlic and chilies and cook, stirring, for 30 seconds. Add beans and sugar and turn heat to high; cook, stirring occasionally, until beans begin to brown, about 5 minutes.
  • 4. Add 2 tablespoons water and nam pla or soy sauce. Put duck on top of bean mixture and bring to a simmer. [Problem in the recipe here as "bring to a simmer" is less accurate than "watch liquids evaporate immediately". The pot just spent five minutes on high. I turned down the heat to medium low and added plenty more water and some more nam pla too as the beans needed a bit more flavor.] Cover and cook until both beans and duck are very tender, 15 to 30 more minutes, adding a little more water if necessary to keep mixture moist. [15 minutes was more than plenty for me.] (You can prepare dish in advance up to this point; cover and set aside until ready to eat, then reheat.) Uncover and stir in lime juice; taste and adjust seasoning, then sprinkle with cilantro and serve.

Source: The New York Times


Not a half bad way to prepare green beans, I think. There's lots of flavor from the spices, fish sauce and all that fond and caramelization on the onions, but you can taste the beans through that too. They ended up rather soft, but the thing about green beans is that the flavor is best at a completely different cooking point than when the texture is. If you've had them prepared Greek-style, you know that.

The chicken is surprisingly moist considering the long dry-cooking time, but it's hard to completely ruin chicken thighs. It's almost got that confit texture to it, although the skin lost its crispness in the last cooking step. Something I only noticed after I finished cooking is that the Thai flavors never touched the chicken. It was only seasoned with salt and pepper. Still good, but a little odd next to the green beans. Maybe a marinade would help. Or maybe duck is a better match.

One last thing, I think "Thai style" is a misnomer. I've never seen a Thai recipe cooked like this. Let's say "Thai flavor" instead.

Wednesday, April 15, 2009

CSA week 19 - Strawberry kalamata ice cream

If you didn't read all the way to the end of my post on the Coral Gables Food and Wine Festival (and I wouldn't blame you a bit if you didn't), you missed the strawberry/tomato/black olive parfait that was being offered by the Miccosukee resort. I liked the flavor combination a lot so stole it for an ice cream recipe.

The parfait didn't have any pieces of olive in it and, at first, I wanted to infuse the flavor they way they did, but, not really knowing how to do that, I thought it would add an extra layer of uncertainty to an already risky recipe.

Instead I just took a simple strawberry ice cream recipe and mixed in some chopped olives. I can go for elegant next time once I know what I'm doing. I chose kalamata because I wanted a black olive that a) I could reliable get and b) was unmistakably fruity in flavor and had a substantial meaty texture. All I did was give them a good rinse to get the brine off, but I just found a video cooking demo for an olive cobbler that simmers them in port and sugar to get a more cherry-like flavor out of them. Interesting idea, but it kind of seems like cheating.

The ice cream recipe comes from the Perfect Scoop, and like I said, it's really simple. Slice up one pound of strawberries (two pints exactly, I found) and macerate them in 3/4 sugar and a Tablespoon of vodka or kirsch for an hour. Then put the berries and the expressed juices into a food processor with two cups of cream and a good squeeze of lemon. (Lebovitz actually uses one cup cream and one cup sour cream which would be dandy if I was just making strawberry ice cream. But sour cream plus black olives equals topping for bad nachos to me which I hoped to avoid evoking here.) Process until not quite smooth, chill and churn. This actually makes more than would fit into my standard-sized churn so I had to do it in two batches. Once that was done, I mixed in a good-sized handful of chopped olives, gave it a night in the freezer and here you go:


As you can see, the texture isn't as creamy as I usually get. This is more of a Philadelphia style ice cream so that's to be expected. You can also see lots of olives. I think I went a little overboard. With the strawberry flavor damped down by the cold, the olive is a little more prominent that I wanted. That said, the flavors do work very nicely. Actually, I seem to be the least happy with it of everyone whose tried to so far as it's getting rave reviews. I should have taken some notes when I had some this afternoon as I'm having trouble describing the flavors evocatively at this remove. I'm going to have to get technical instead. You've had strawberry ice cream--I don't have to describe that. This is a fairly mild rendition that supplies mainly low notes with a deep berry flavor and the rich creaminess. The olives themselves have fruity middle notes with salty highlights here and there. Does that make sense? Maybe I'll try again later.